Service guide
AI Studio guide
Learn how to use basic editing, style presets, and inpainting in AI Studio.
1.AI Studio screen overview
In AI Studio, you can enter prompts to edit images in various styles. With multi-editing and inpainting features, you can easily edit images for your content.
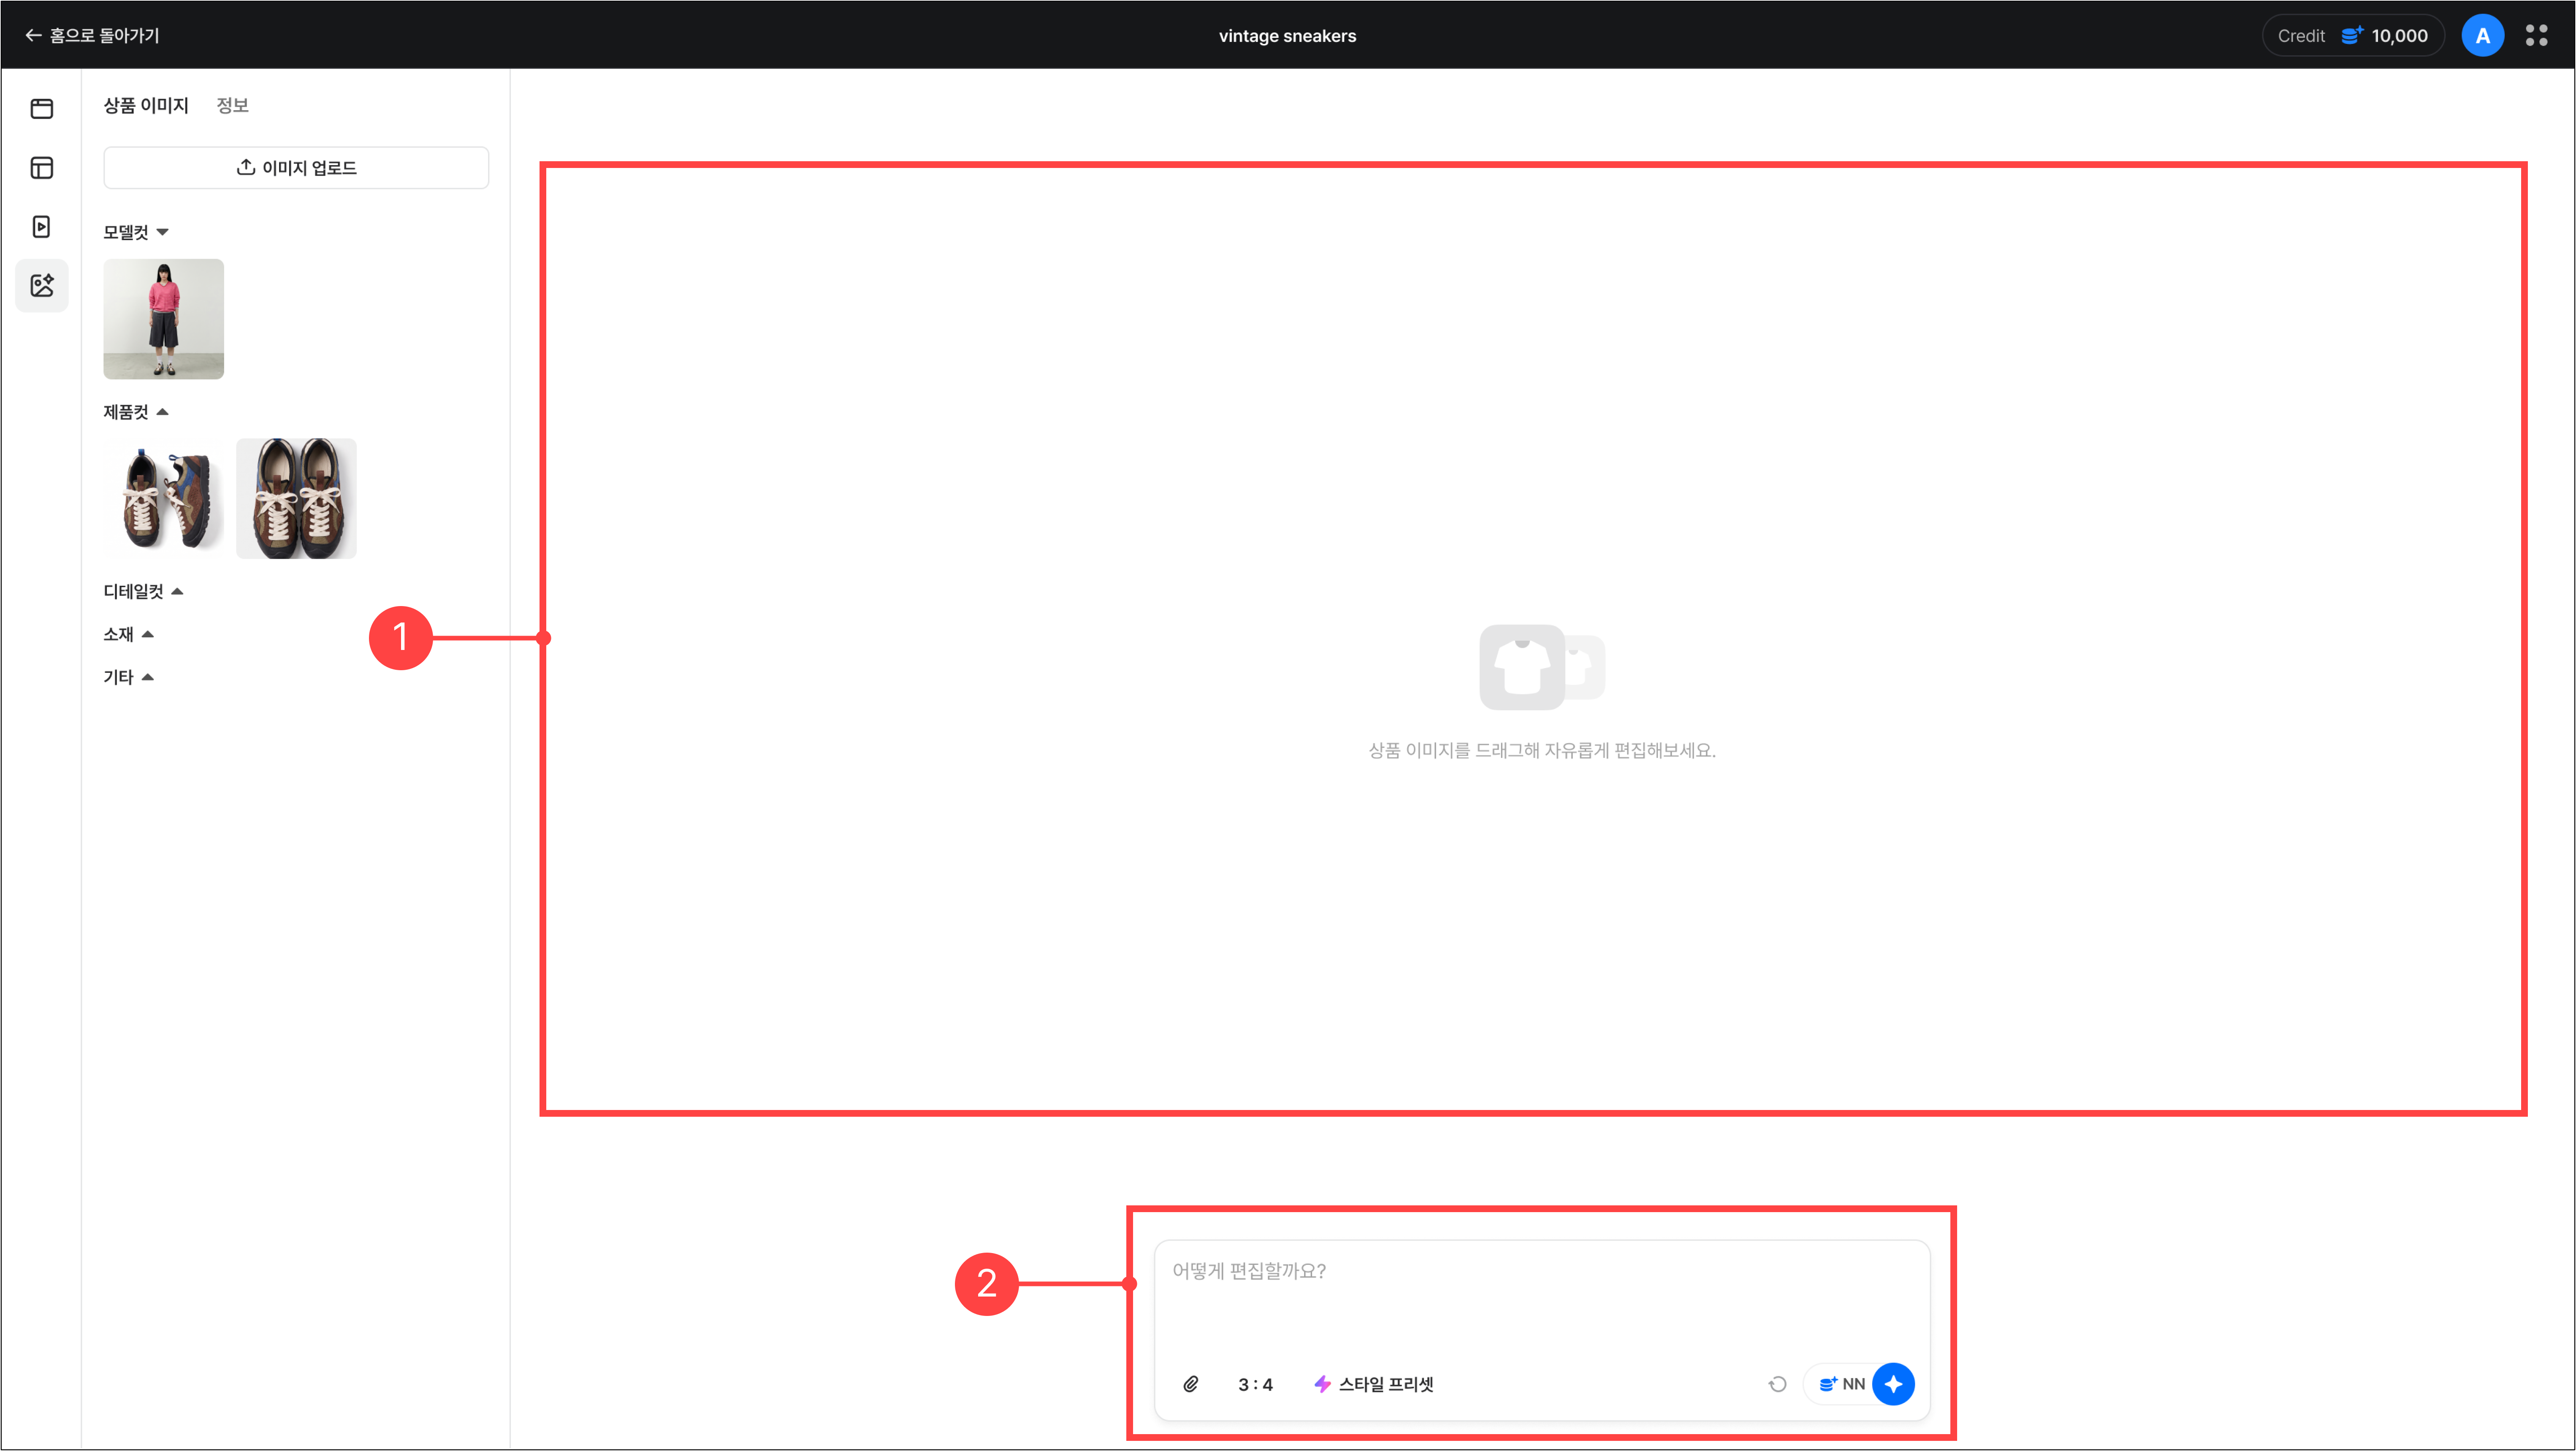
1.The area where AI-edited images and edit details are displayed.
2.The chat area where you set the editing method. You can add images to edit, enter text prompts, and register reference images. You can also select a style preset to apply your desired editing style.
2.Basic editing features
Drag an uploaded image onto the canvas, then enter text in the chat box to edit the image in the direction you want.
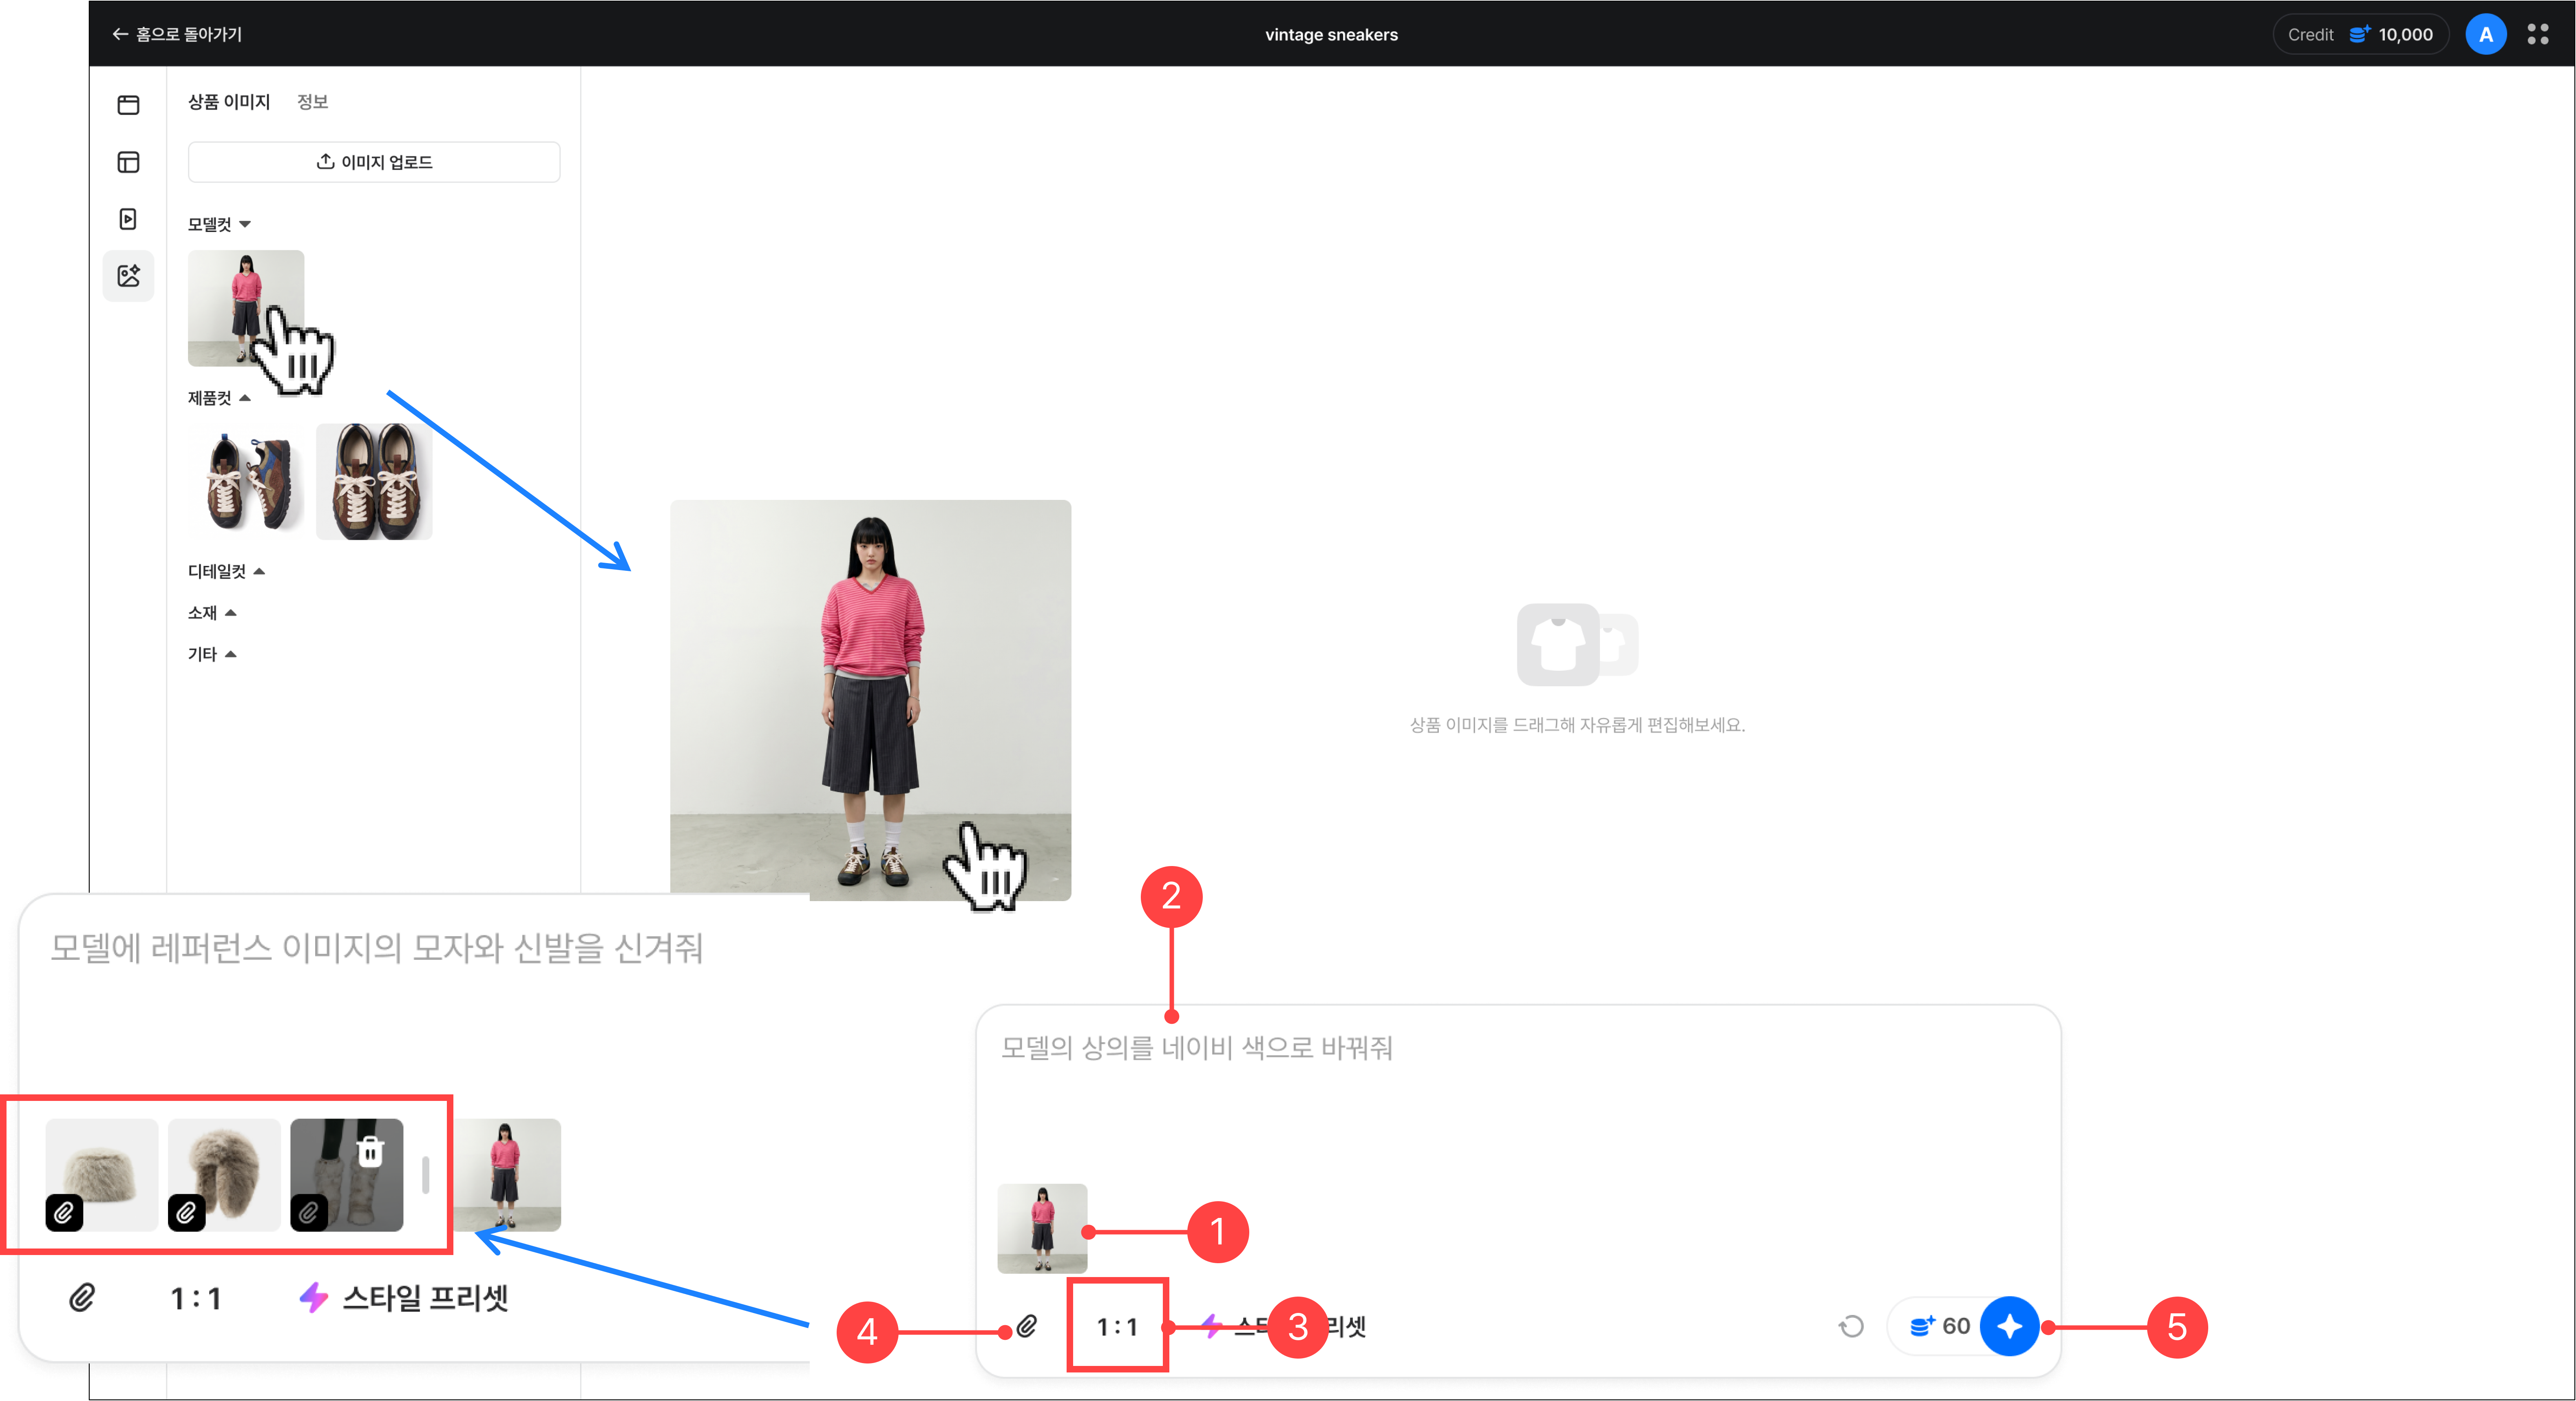
1.Drag an image from the asset panel into the chat box. You'll see the image to edit added to the chat box. You can add and edit multiple images at once.
2.Enter what you want to edit as text in the chat box.
3.You can set the image ratio in the chat box.
4.Attach a reference image to generate an image in your desired style. You can upload a new reference image or load one from the asset panel.
5.After checking the credits to be deducted, click the Create button to start editing the image.
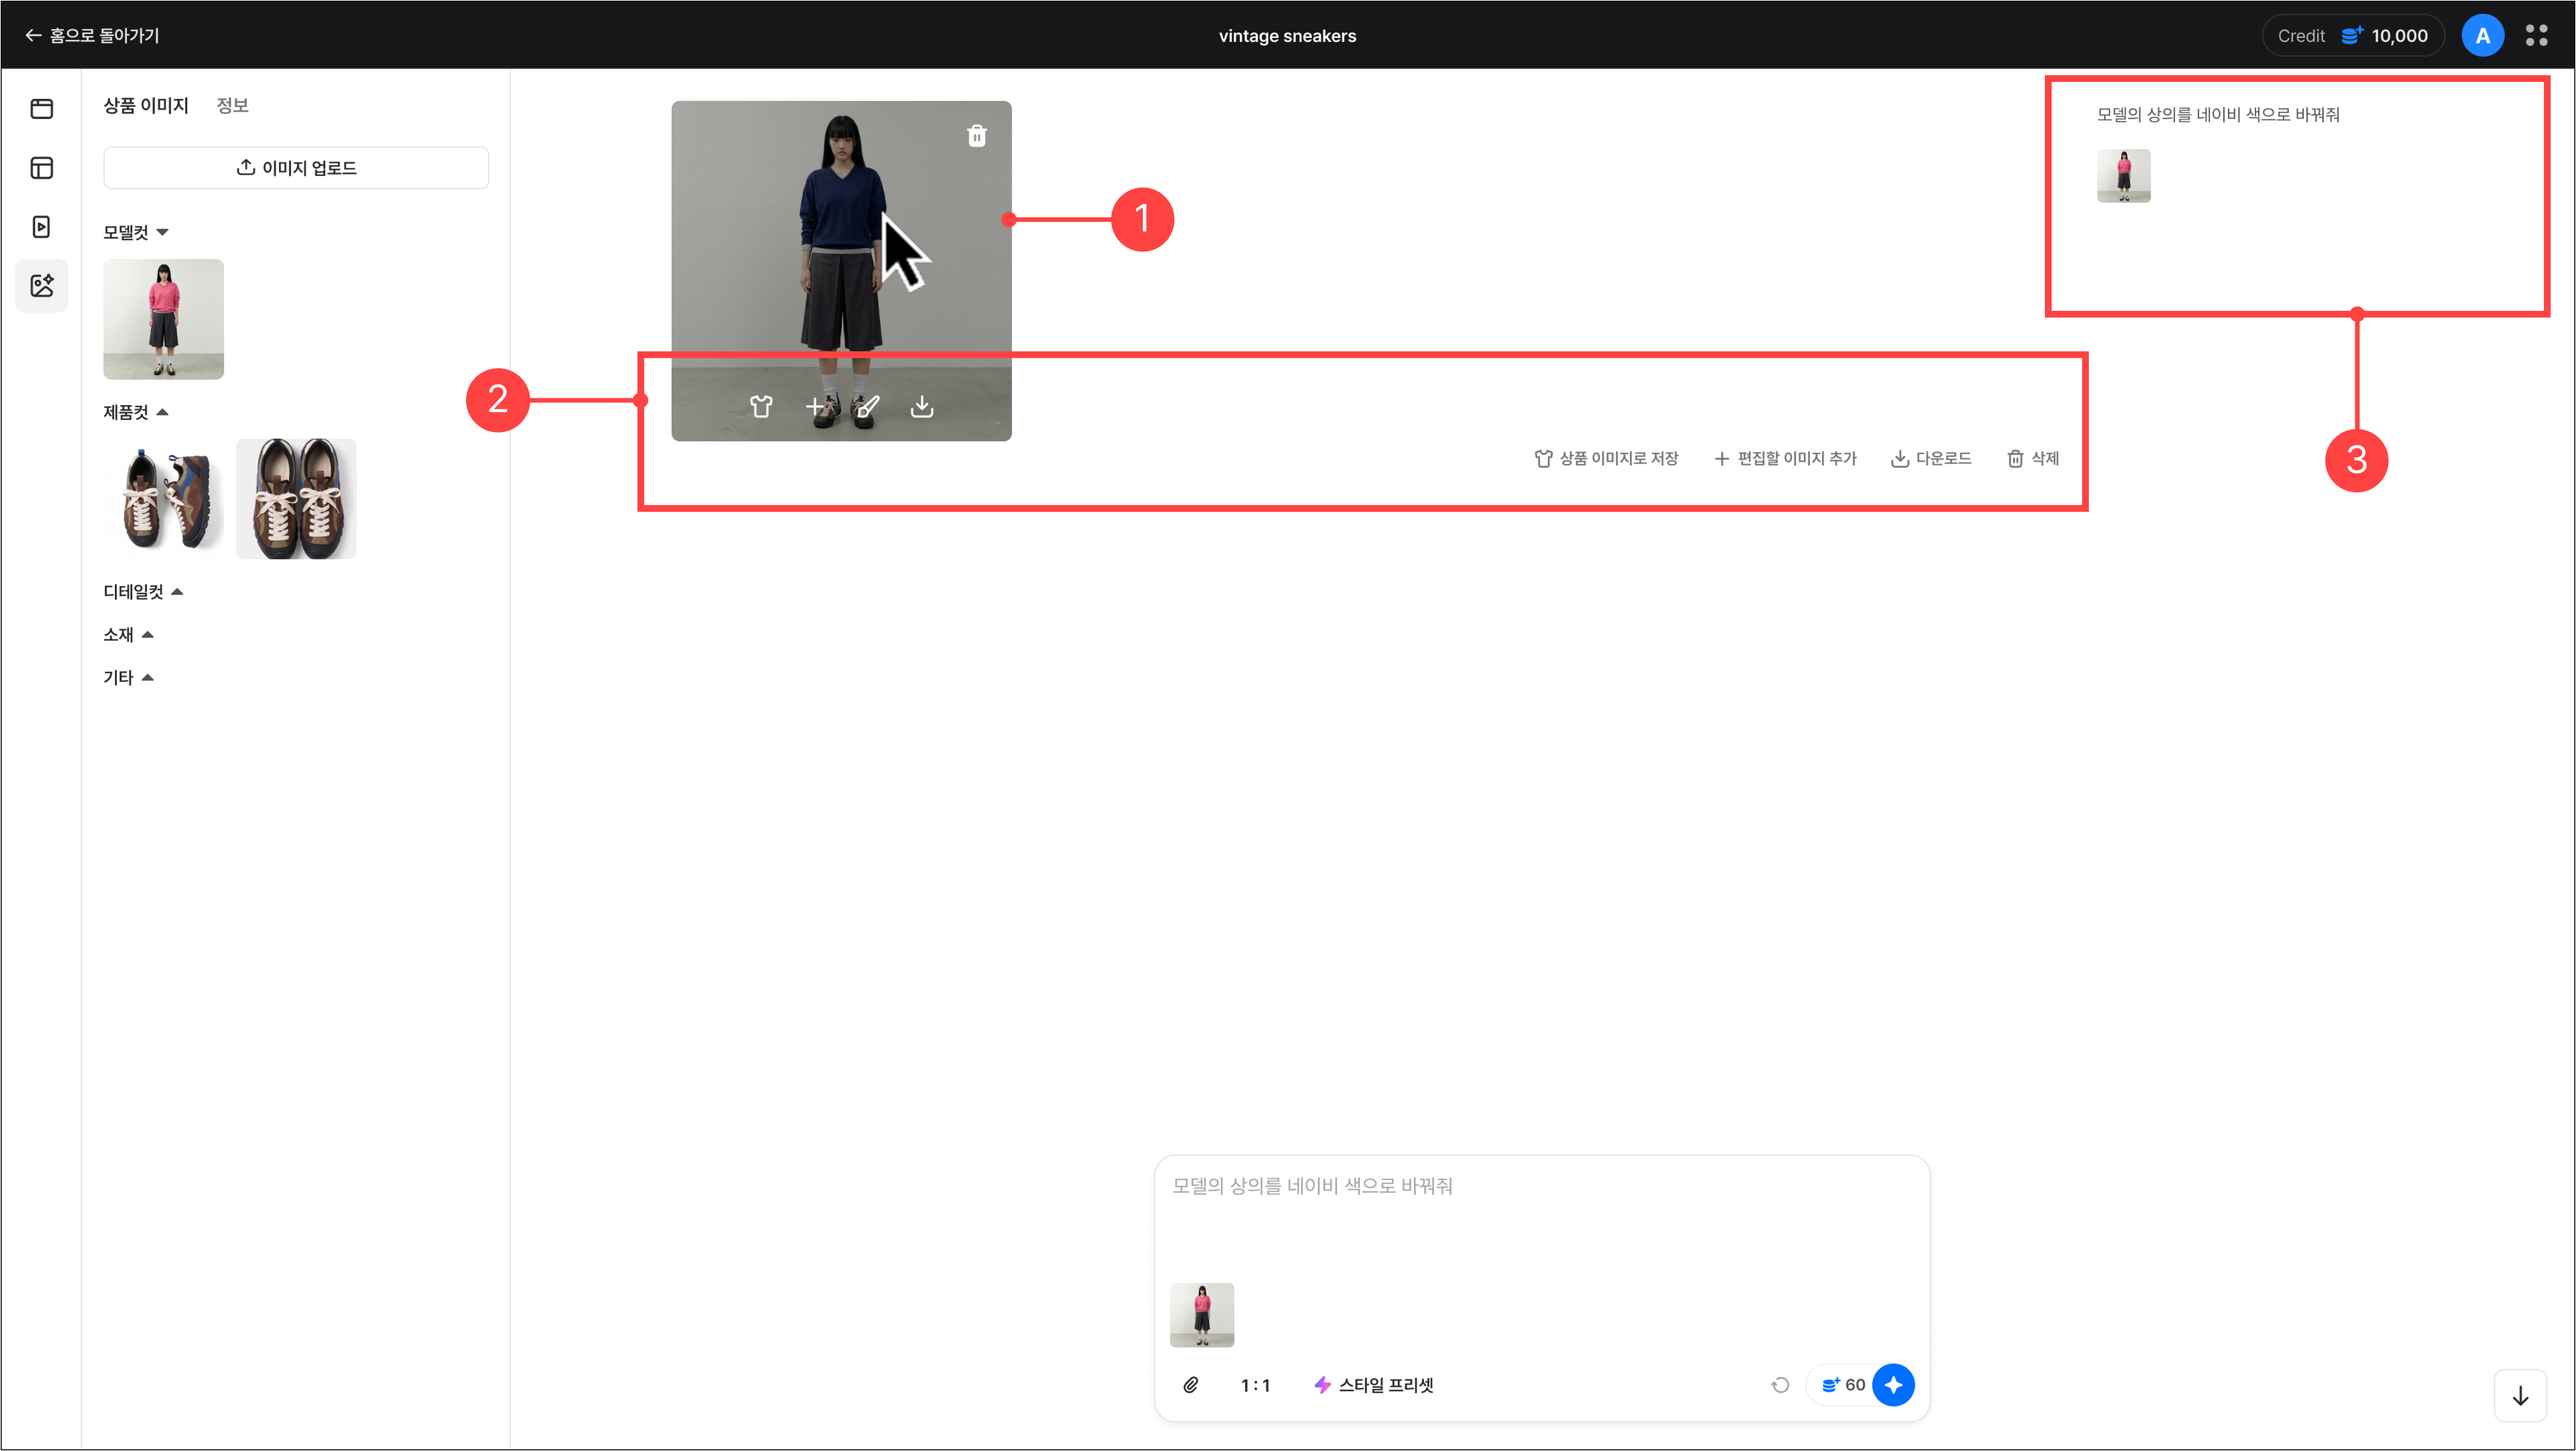
1.When image editing is complete, the result image is shown in the edit area.
2.Hovering over a result image in the edit area enables the image management buttons. You can use the following functions on an individual image or on the entire set of edited result images.
-Save as product image: Saves the edited image to the asset panel.
-Add as image to edit: Adds the generated image to the chat box as an image to edit.
-Download: Downloads the edited result image.
-Delete: Deletes the edited image.
-Inpainting edit: Specify a particular area of the image for additional editing. For details, see 4. Inpainting.
3.To the right of the edited image, you can see the text prompt used and the original image.
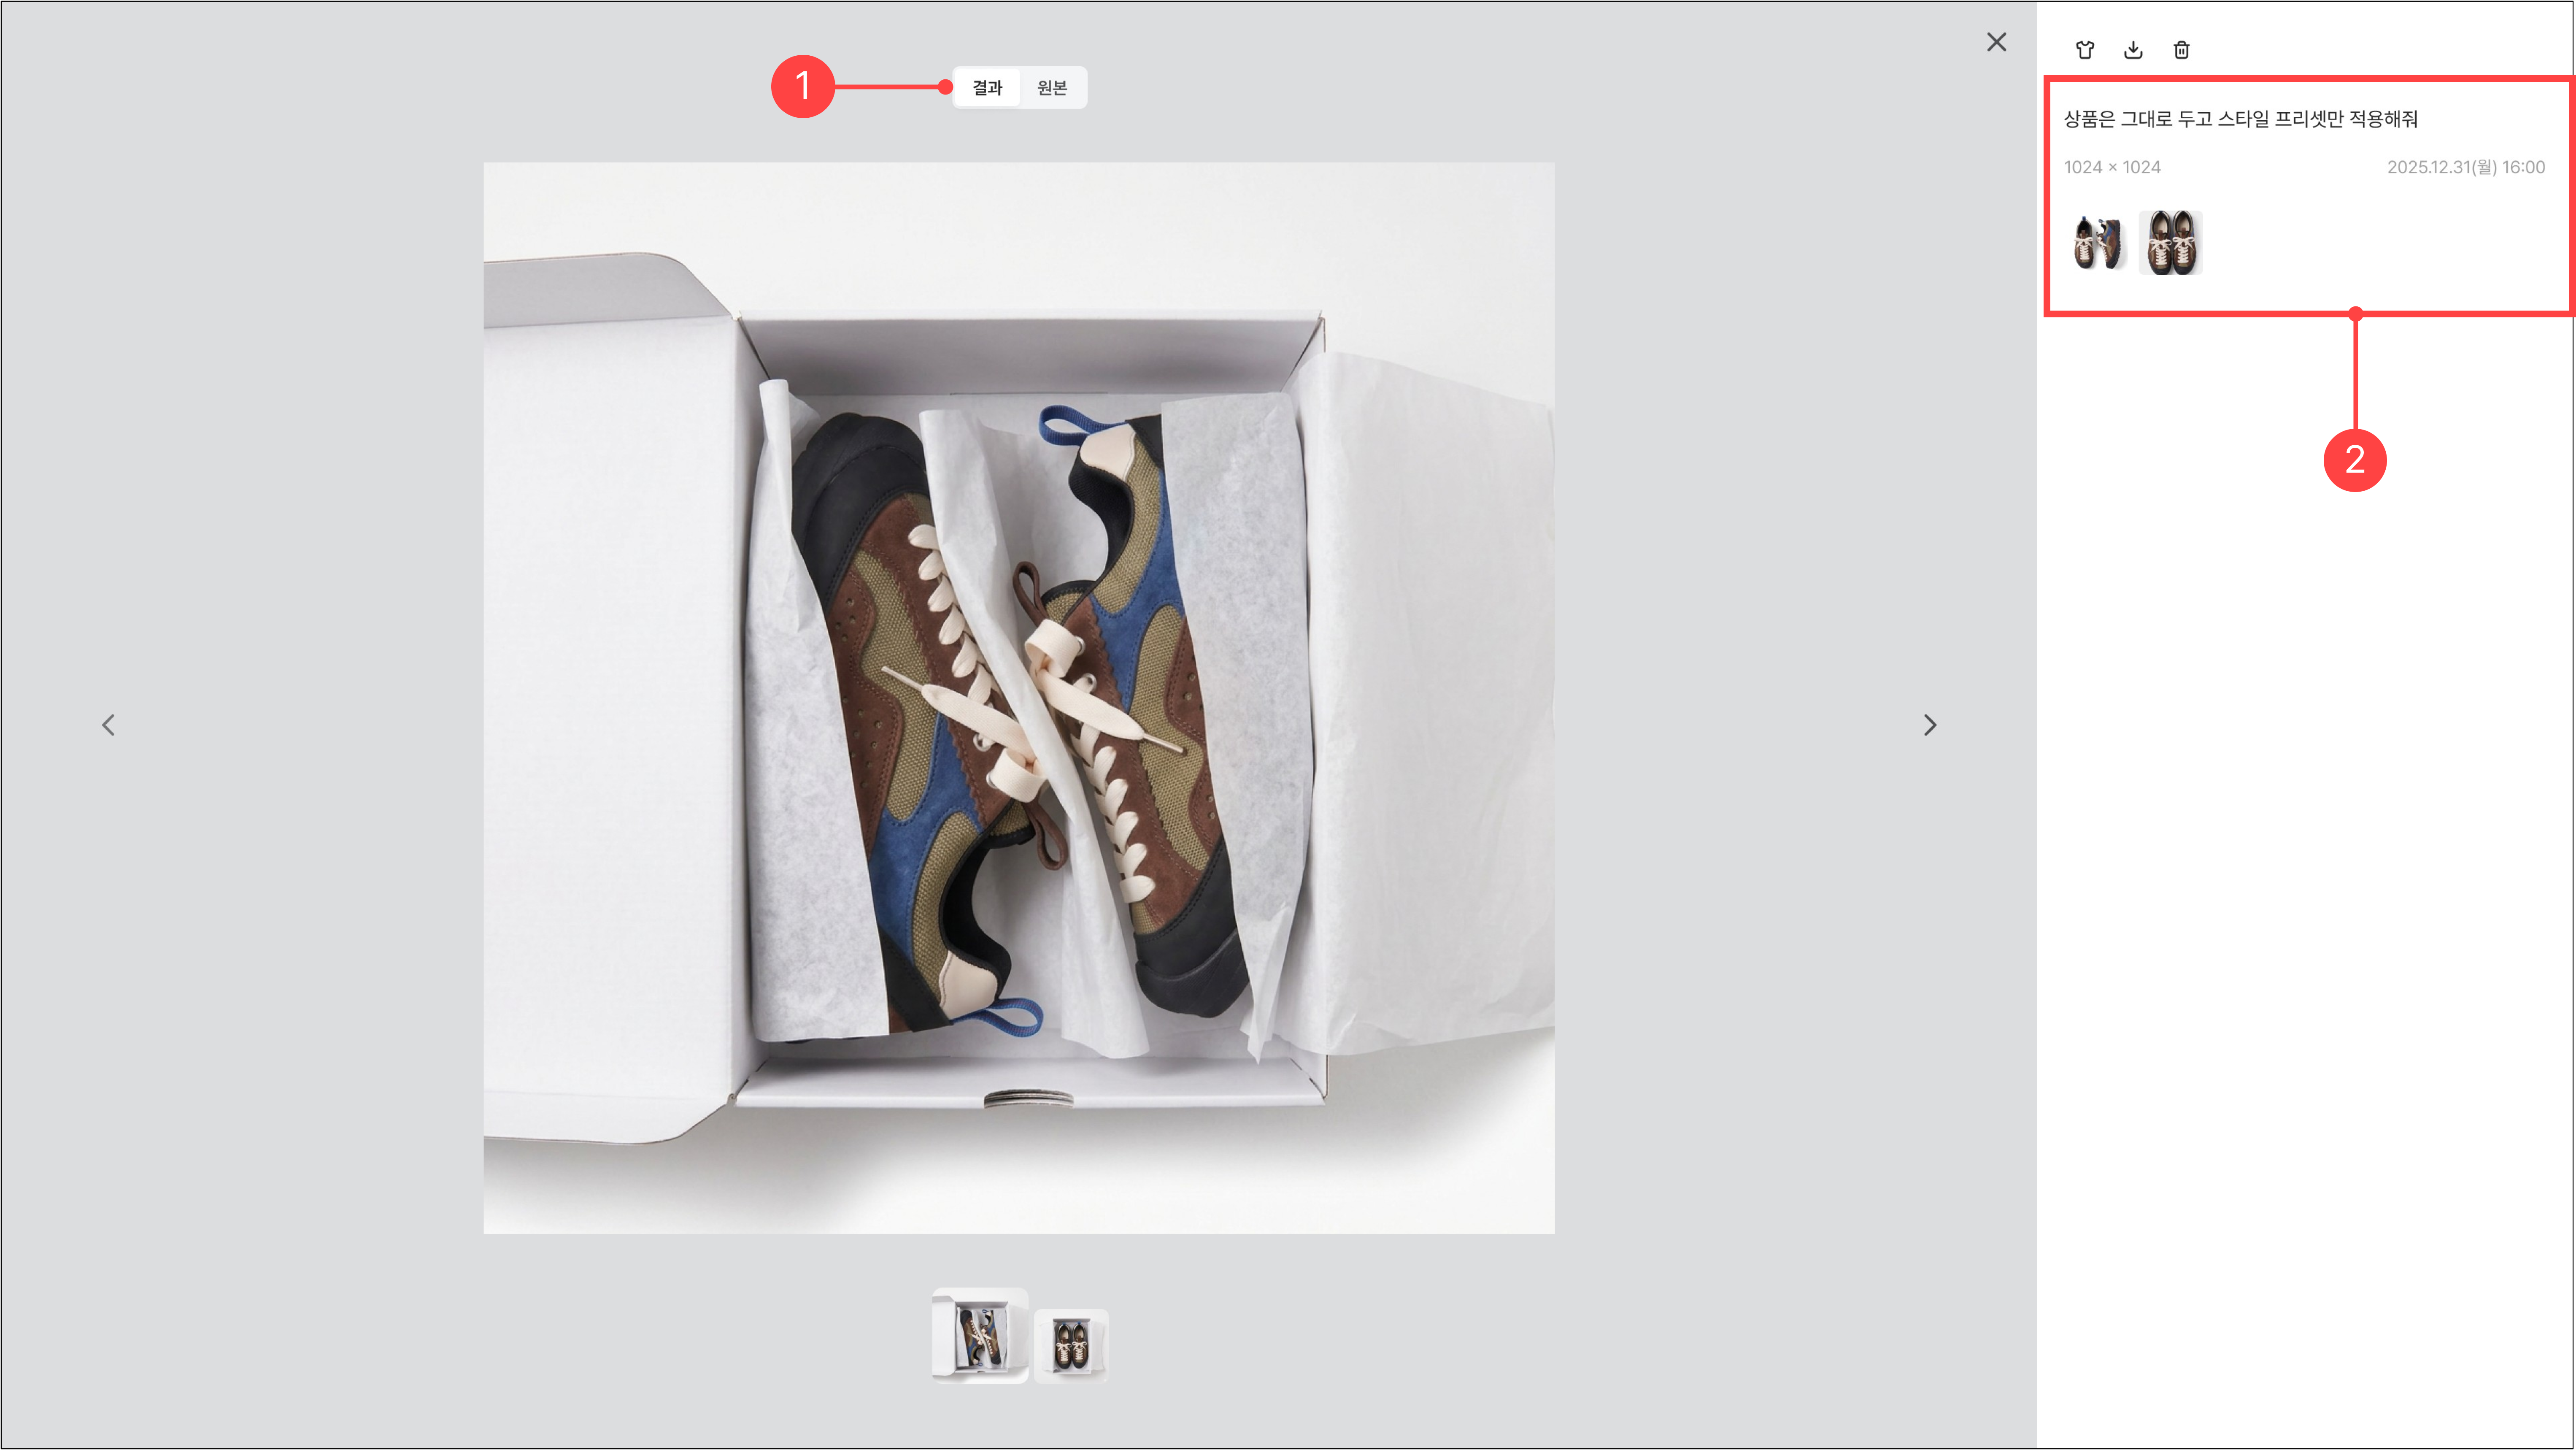
1.Clicking a finished edited image takes you to the image detail view, where you can compare the edited result with the original image.
2.In the right panel, you can check the prompt, image size, original image, and creation date and time.
3.Using style presets
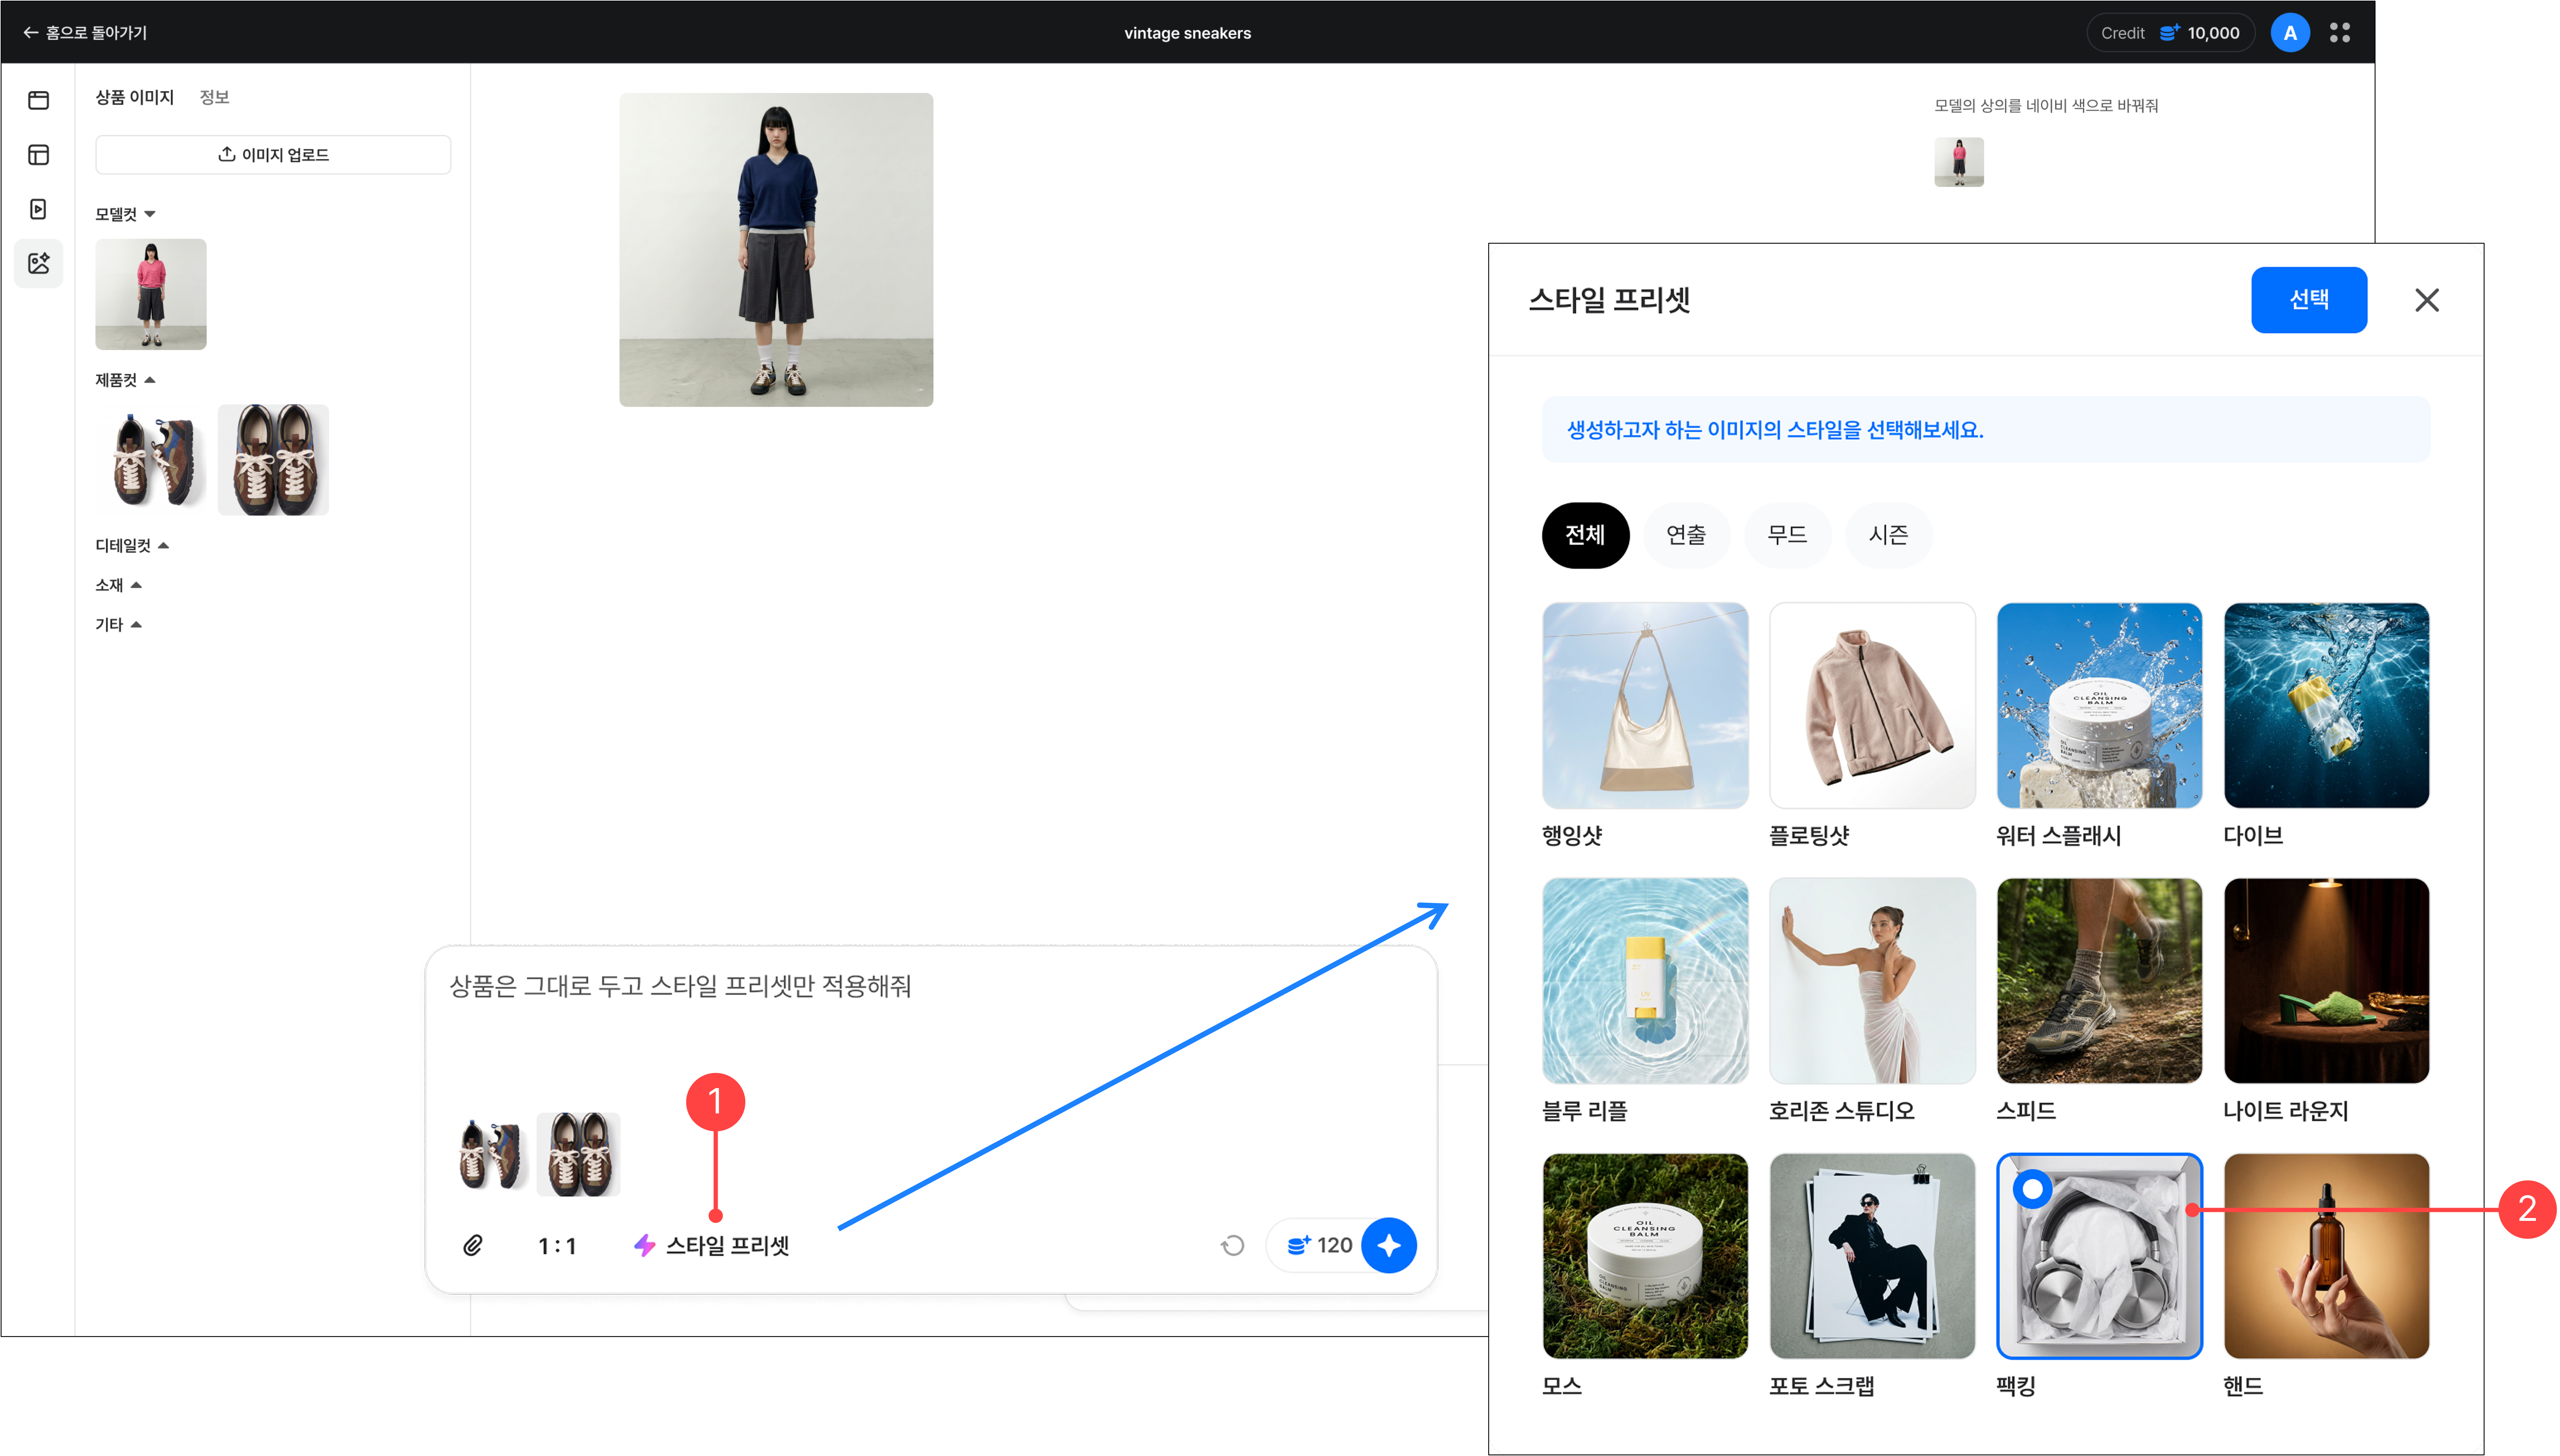
1.When editing an image, you can select a desired style to edit it easily. Click the Style presets button in the chat box.
2.In the style preset selection screen, choose the style for the image you want to generate. If you have specific edits in mind, you can additionally enter a text prompt.
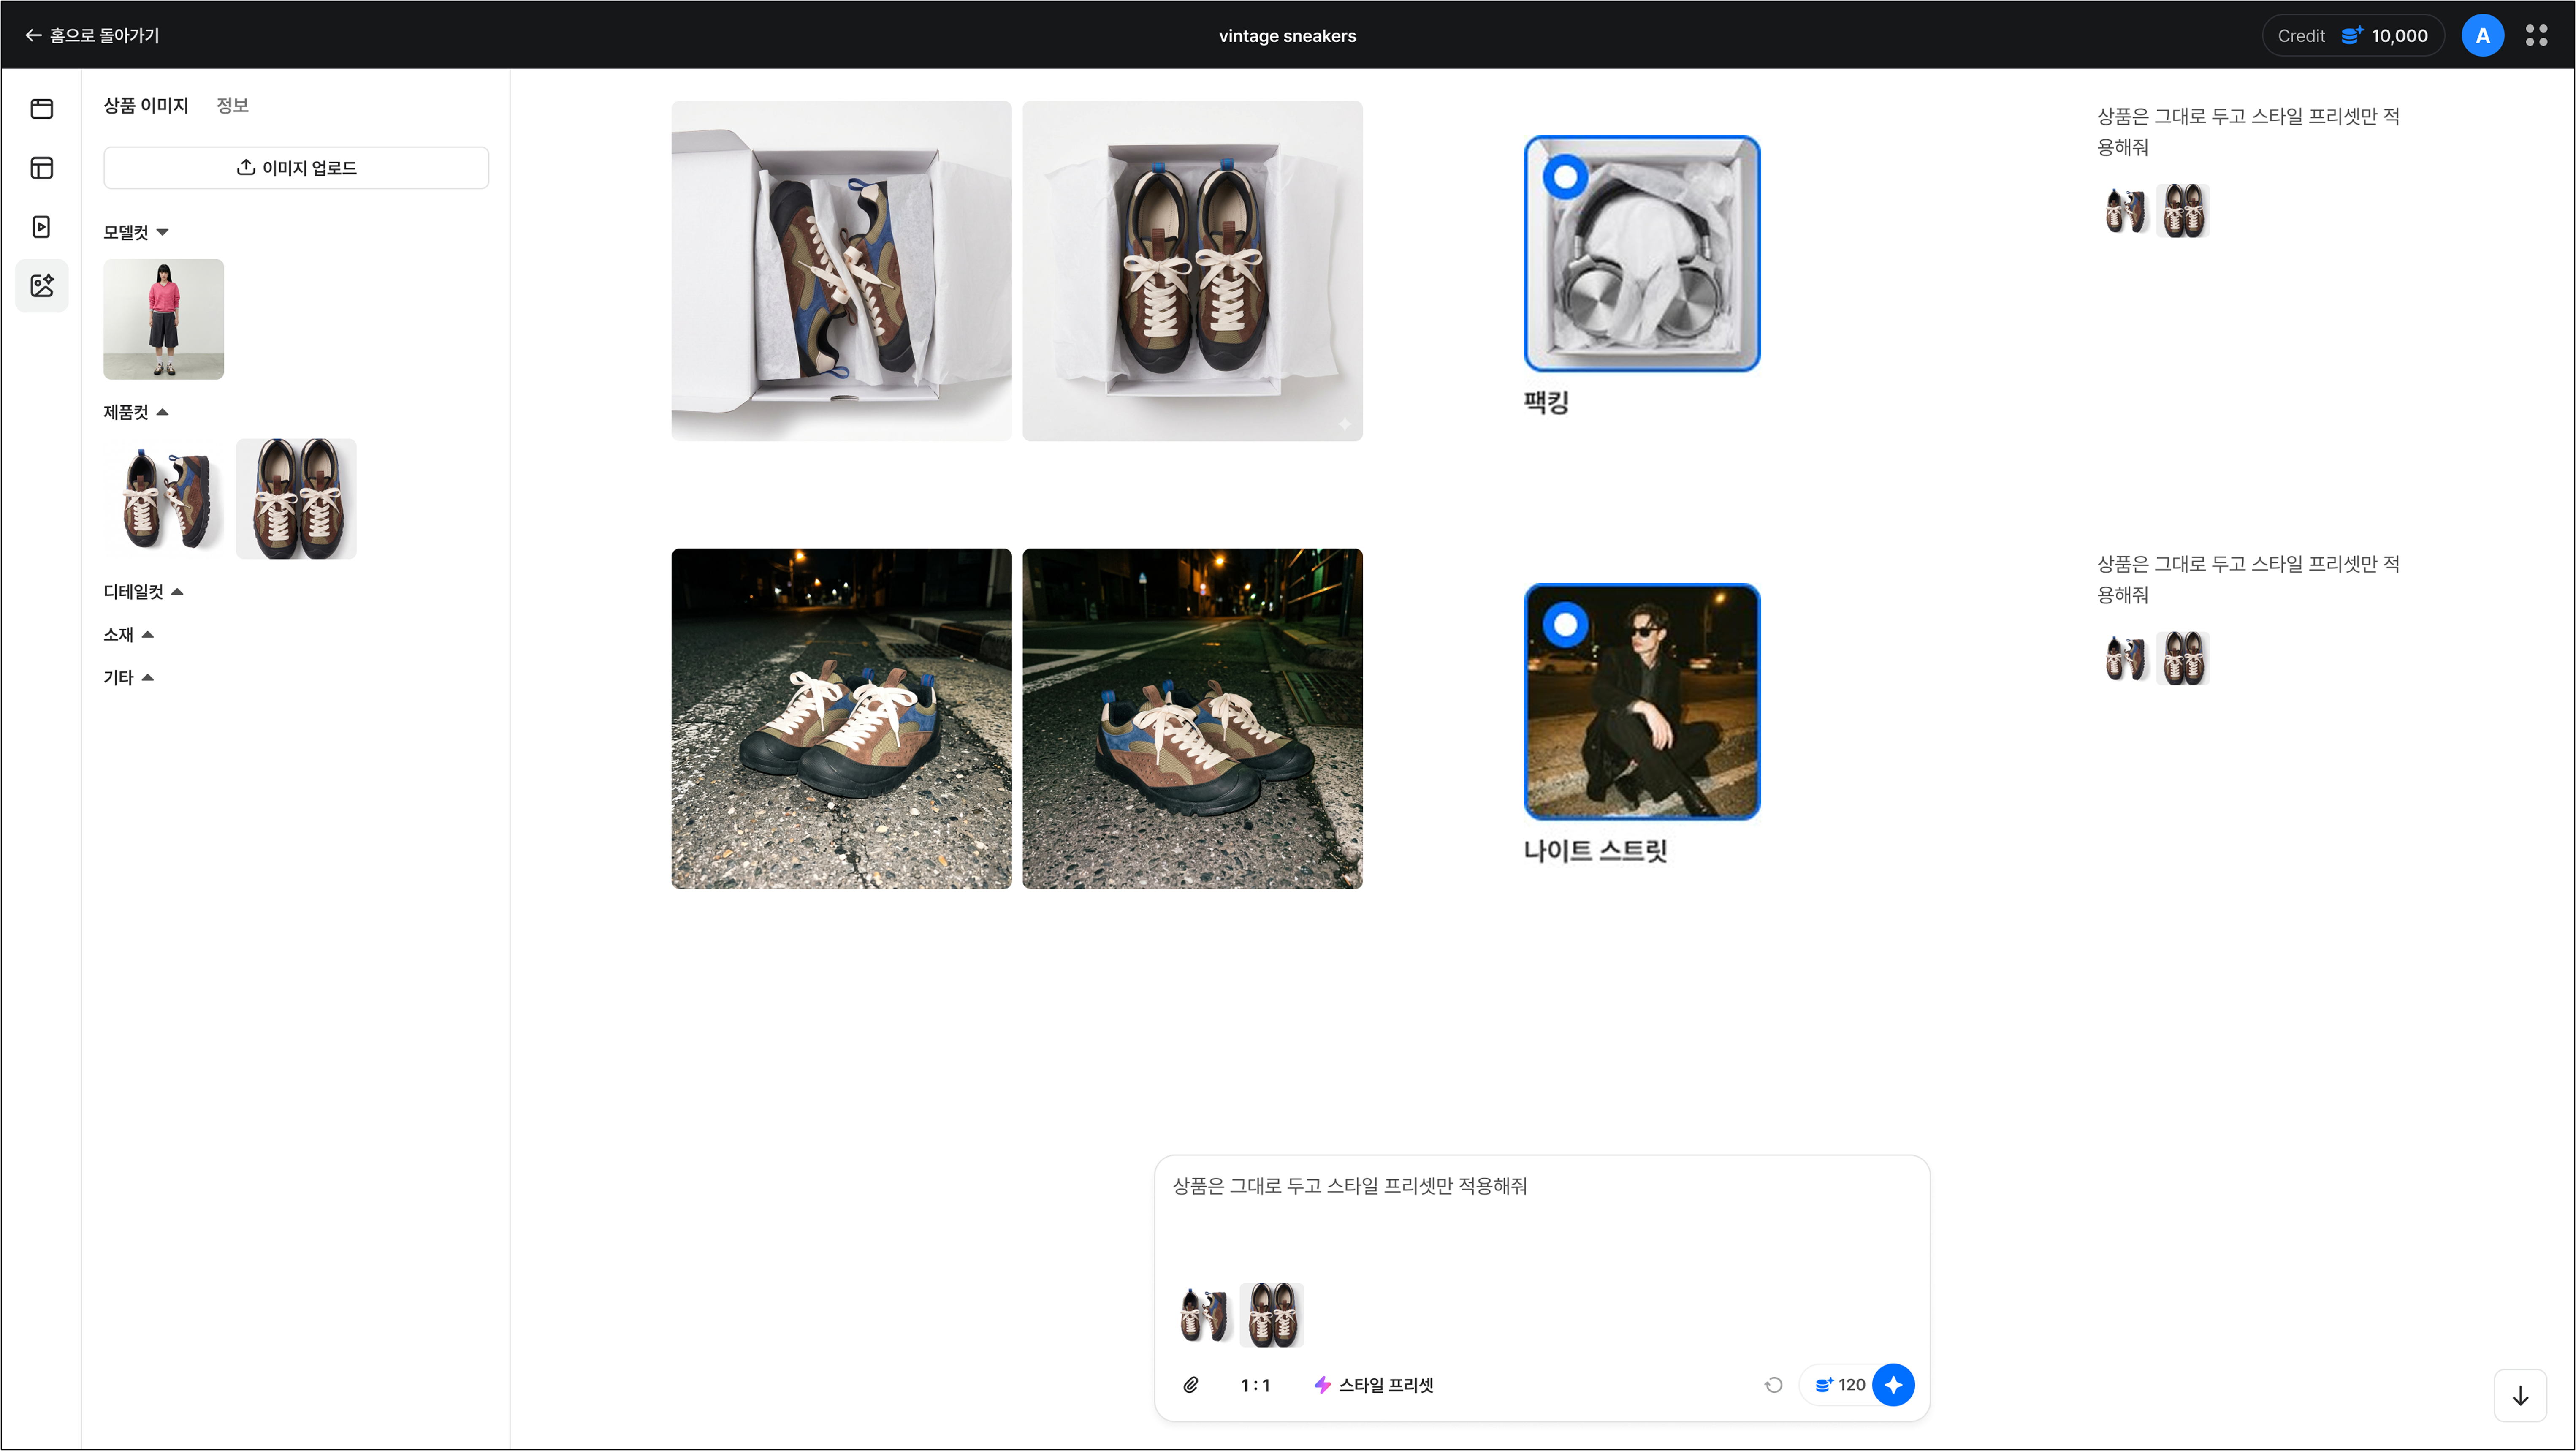
1.You can view the result image with the style preset applied.
4.Inpainting
A feature for precisely editing only a selected area of an image. Mask the area to edit and enter a text prompt to edit the image in the direction you want.
1.Hovering over the thumbnail of an edited image lets you go to the inpainting menu.
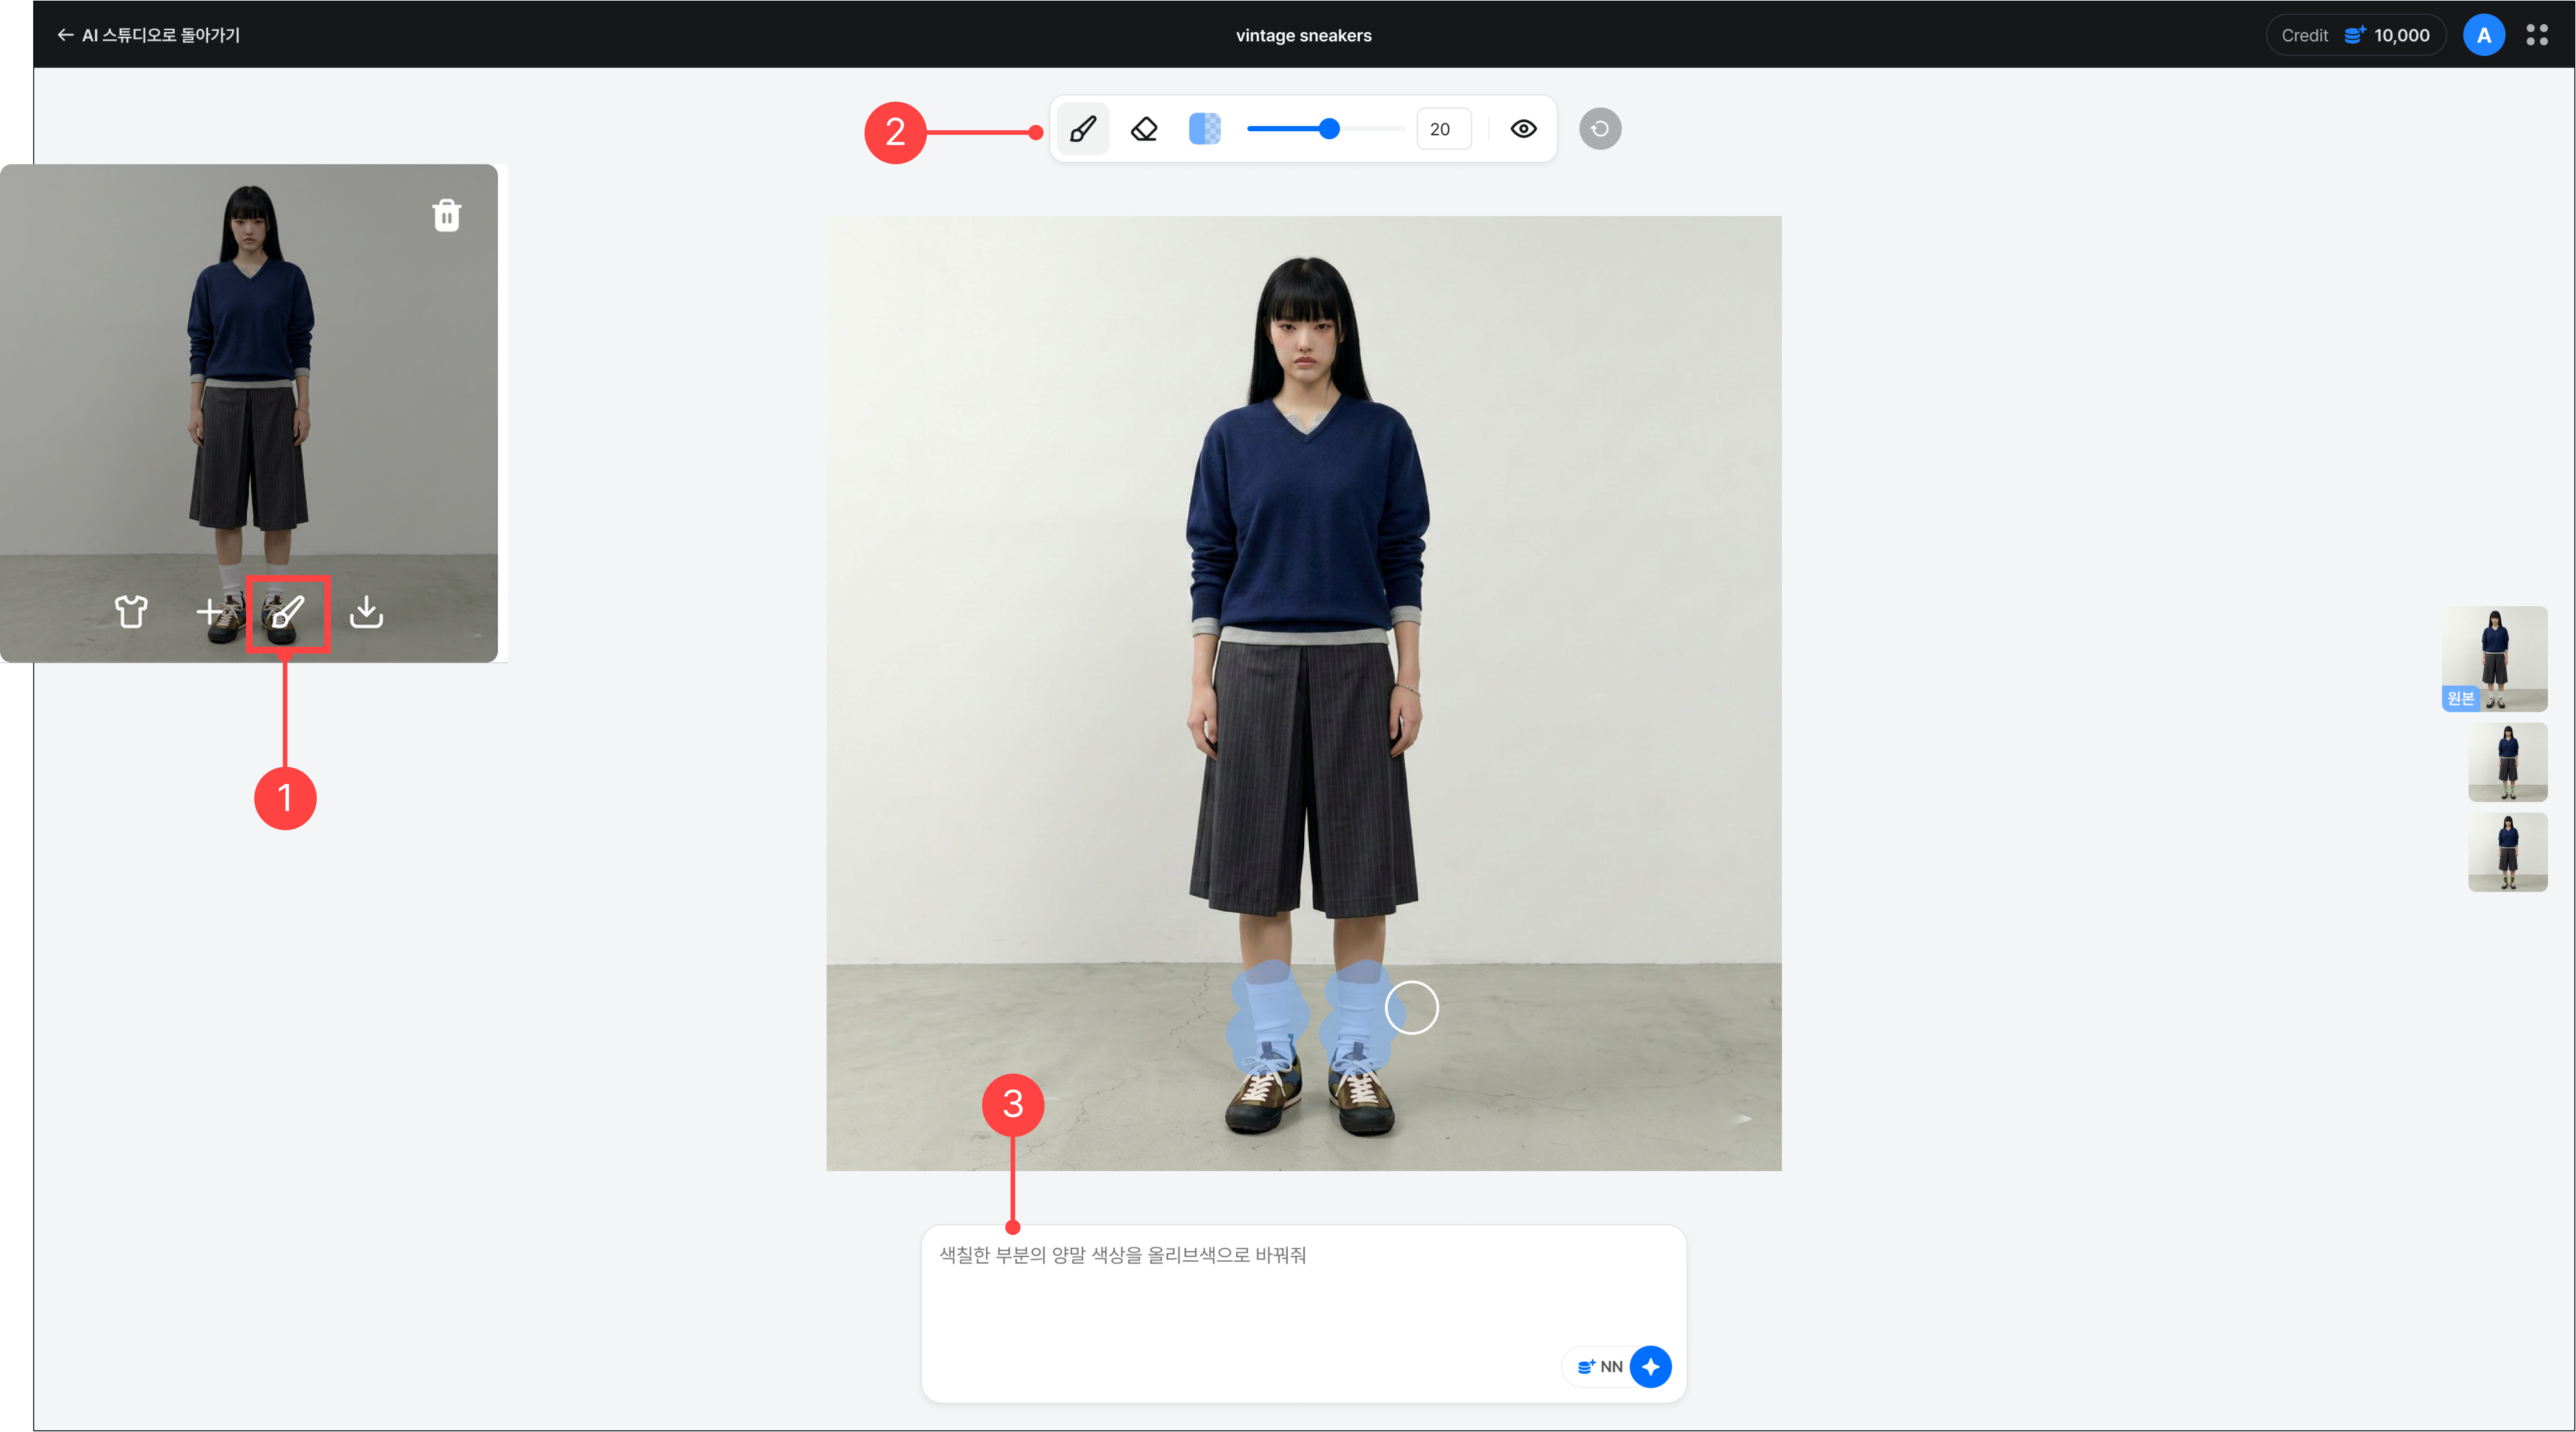
2.Select the brush in the top toolbar of the inpainting menu, then paint the area to edit. You can change the brush color and thickness, and correct mistakenly marked areas with the eraser.
3.Enter a text prompt for the area to edit, then click the Create button to proceed.
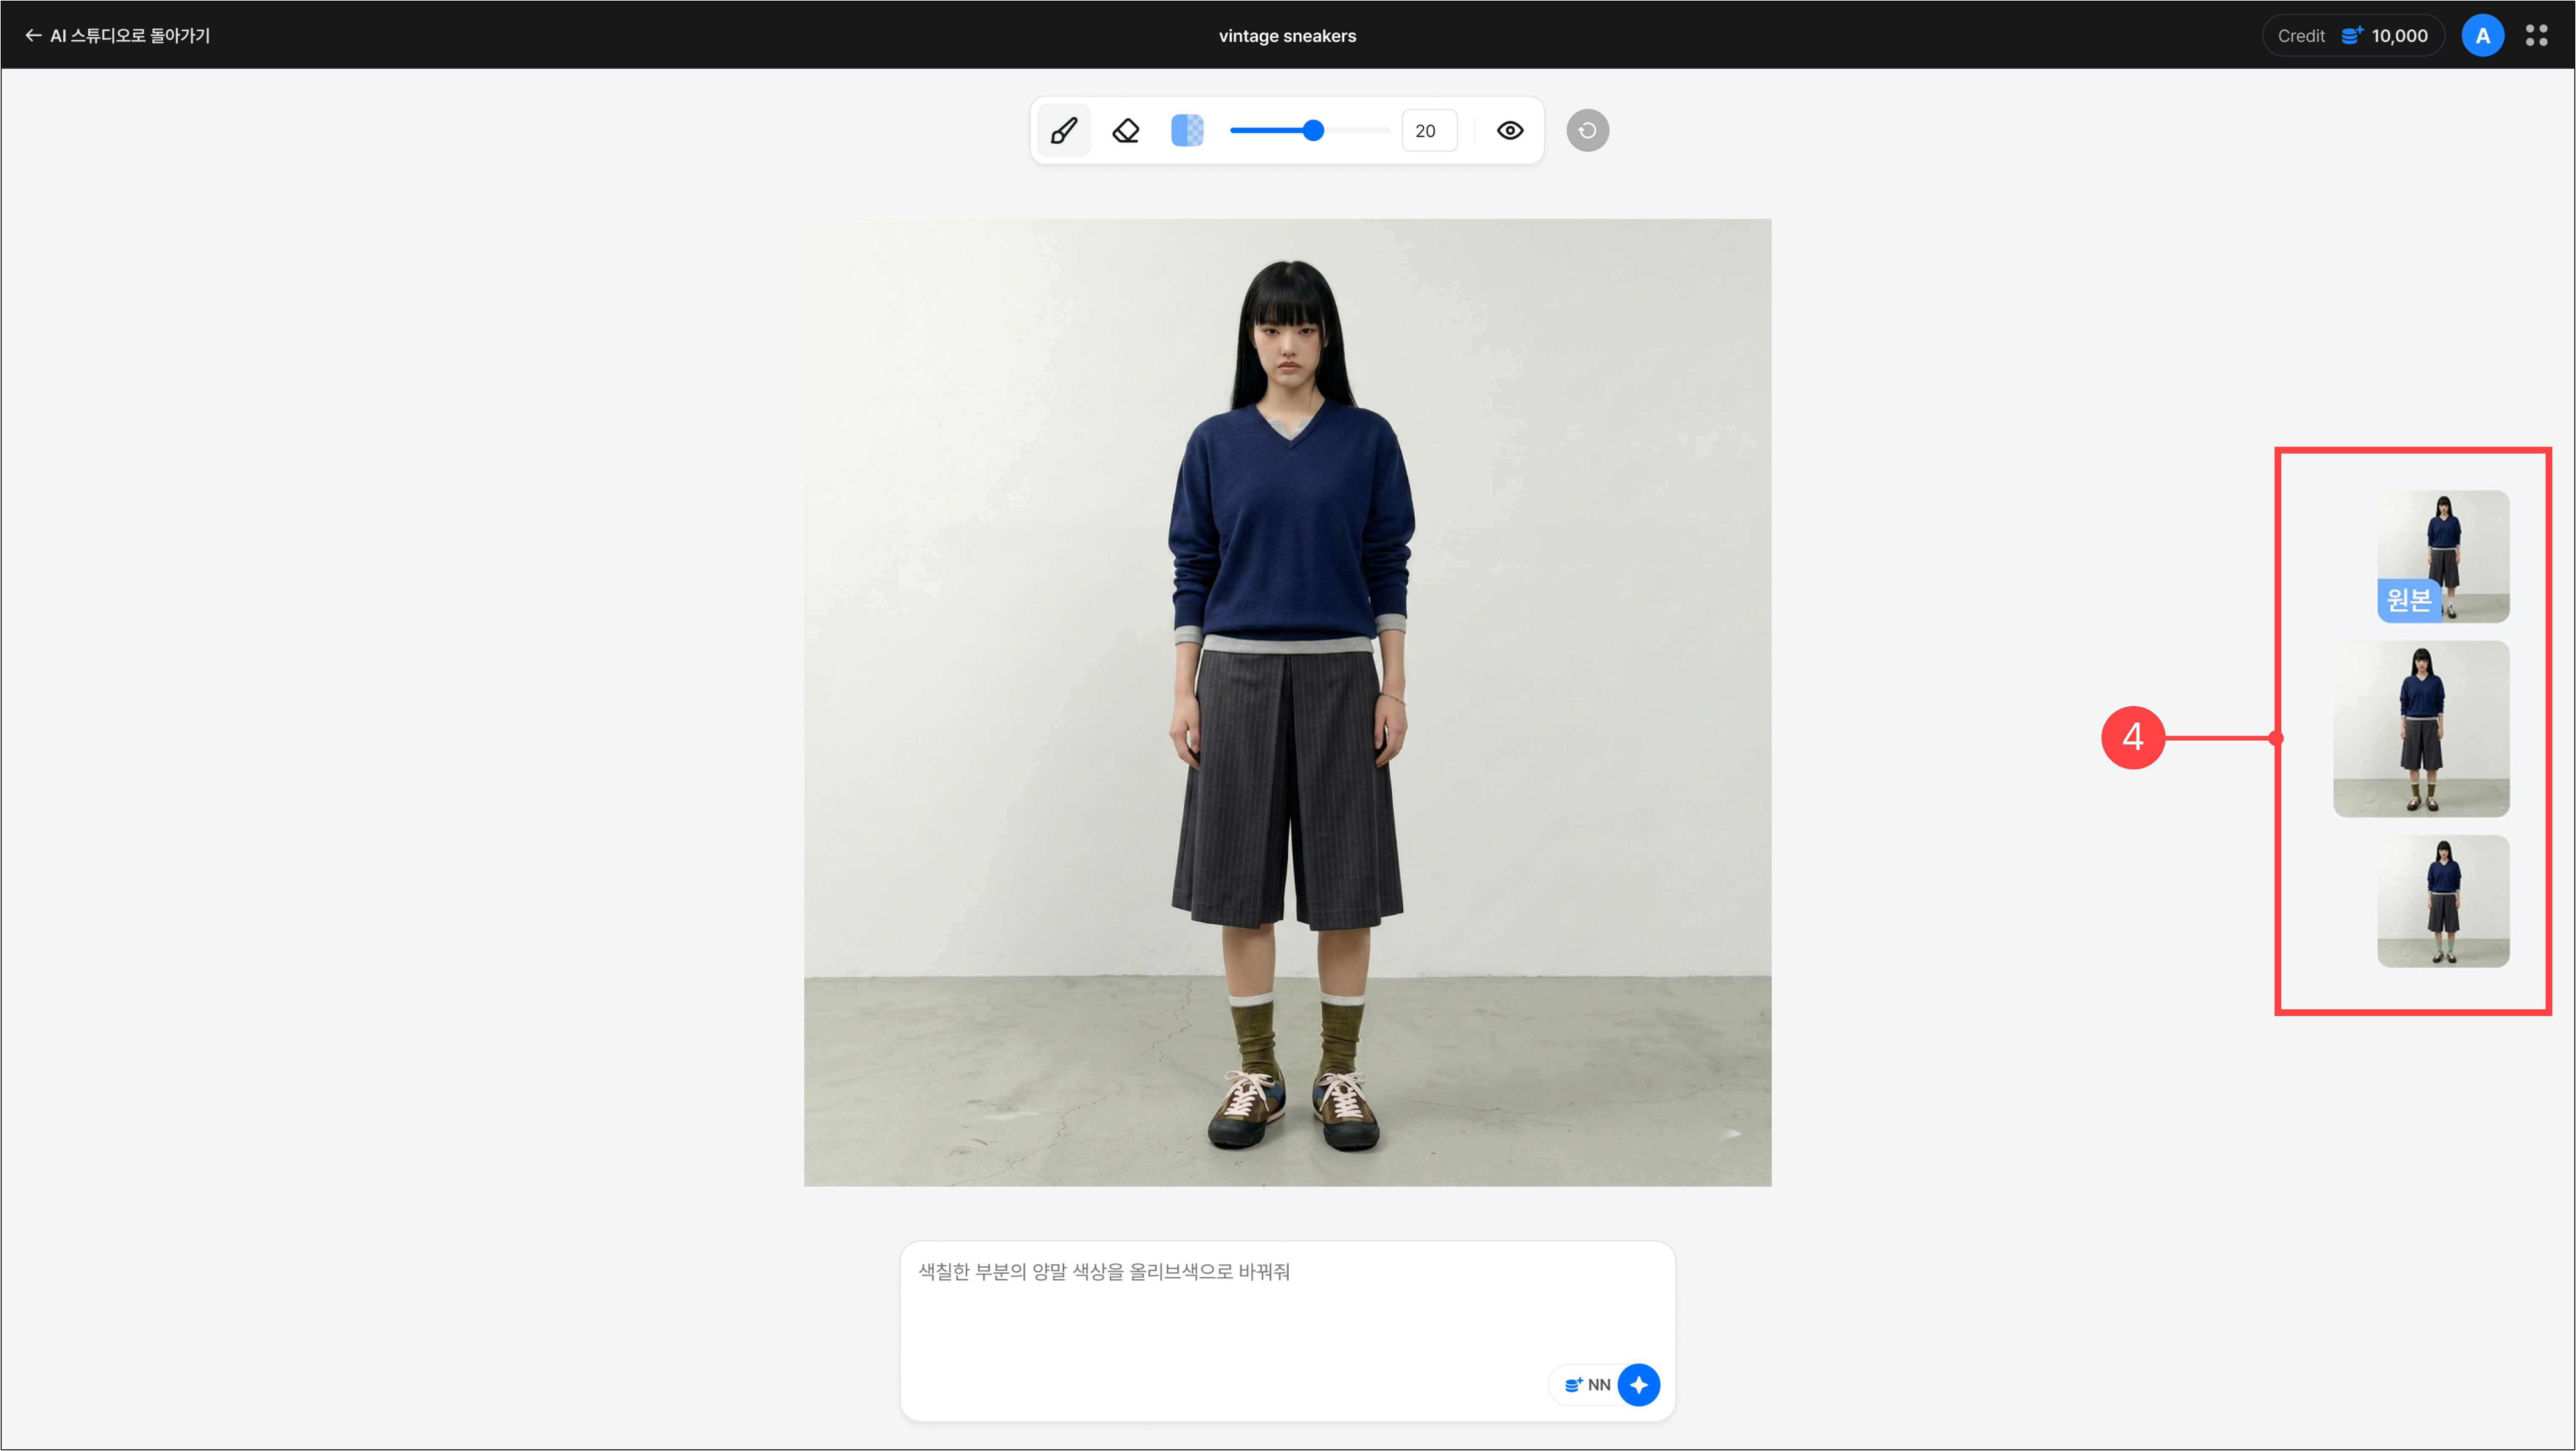
1.The generated images appear in sequence below the original image on the right. Click an image to enlarge it, and you can perform additional inpainting edits. The generated images can also be found in the AI Studio gallery.
Previous
Video creation guide