Service guide
Video creation guide
A guide to the full flow of creating videos from product images, then downloading and managing them.
Video creation follows the steps below. After entering the information and selecting the video options, upload images and AI generates the video.

1.Creating a video – New project
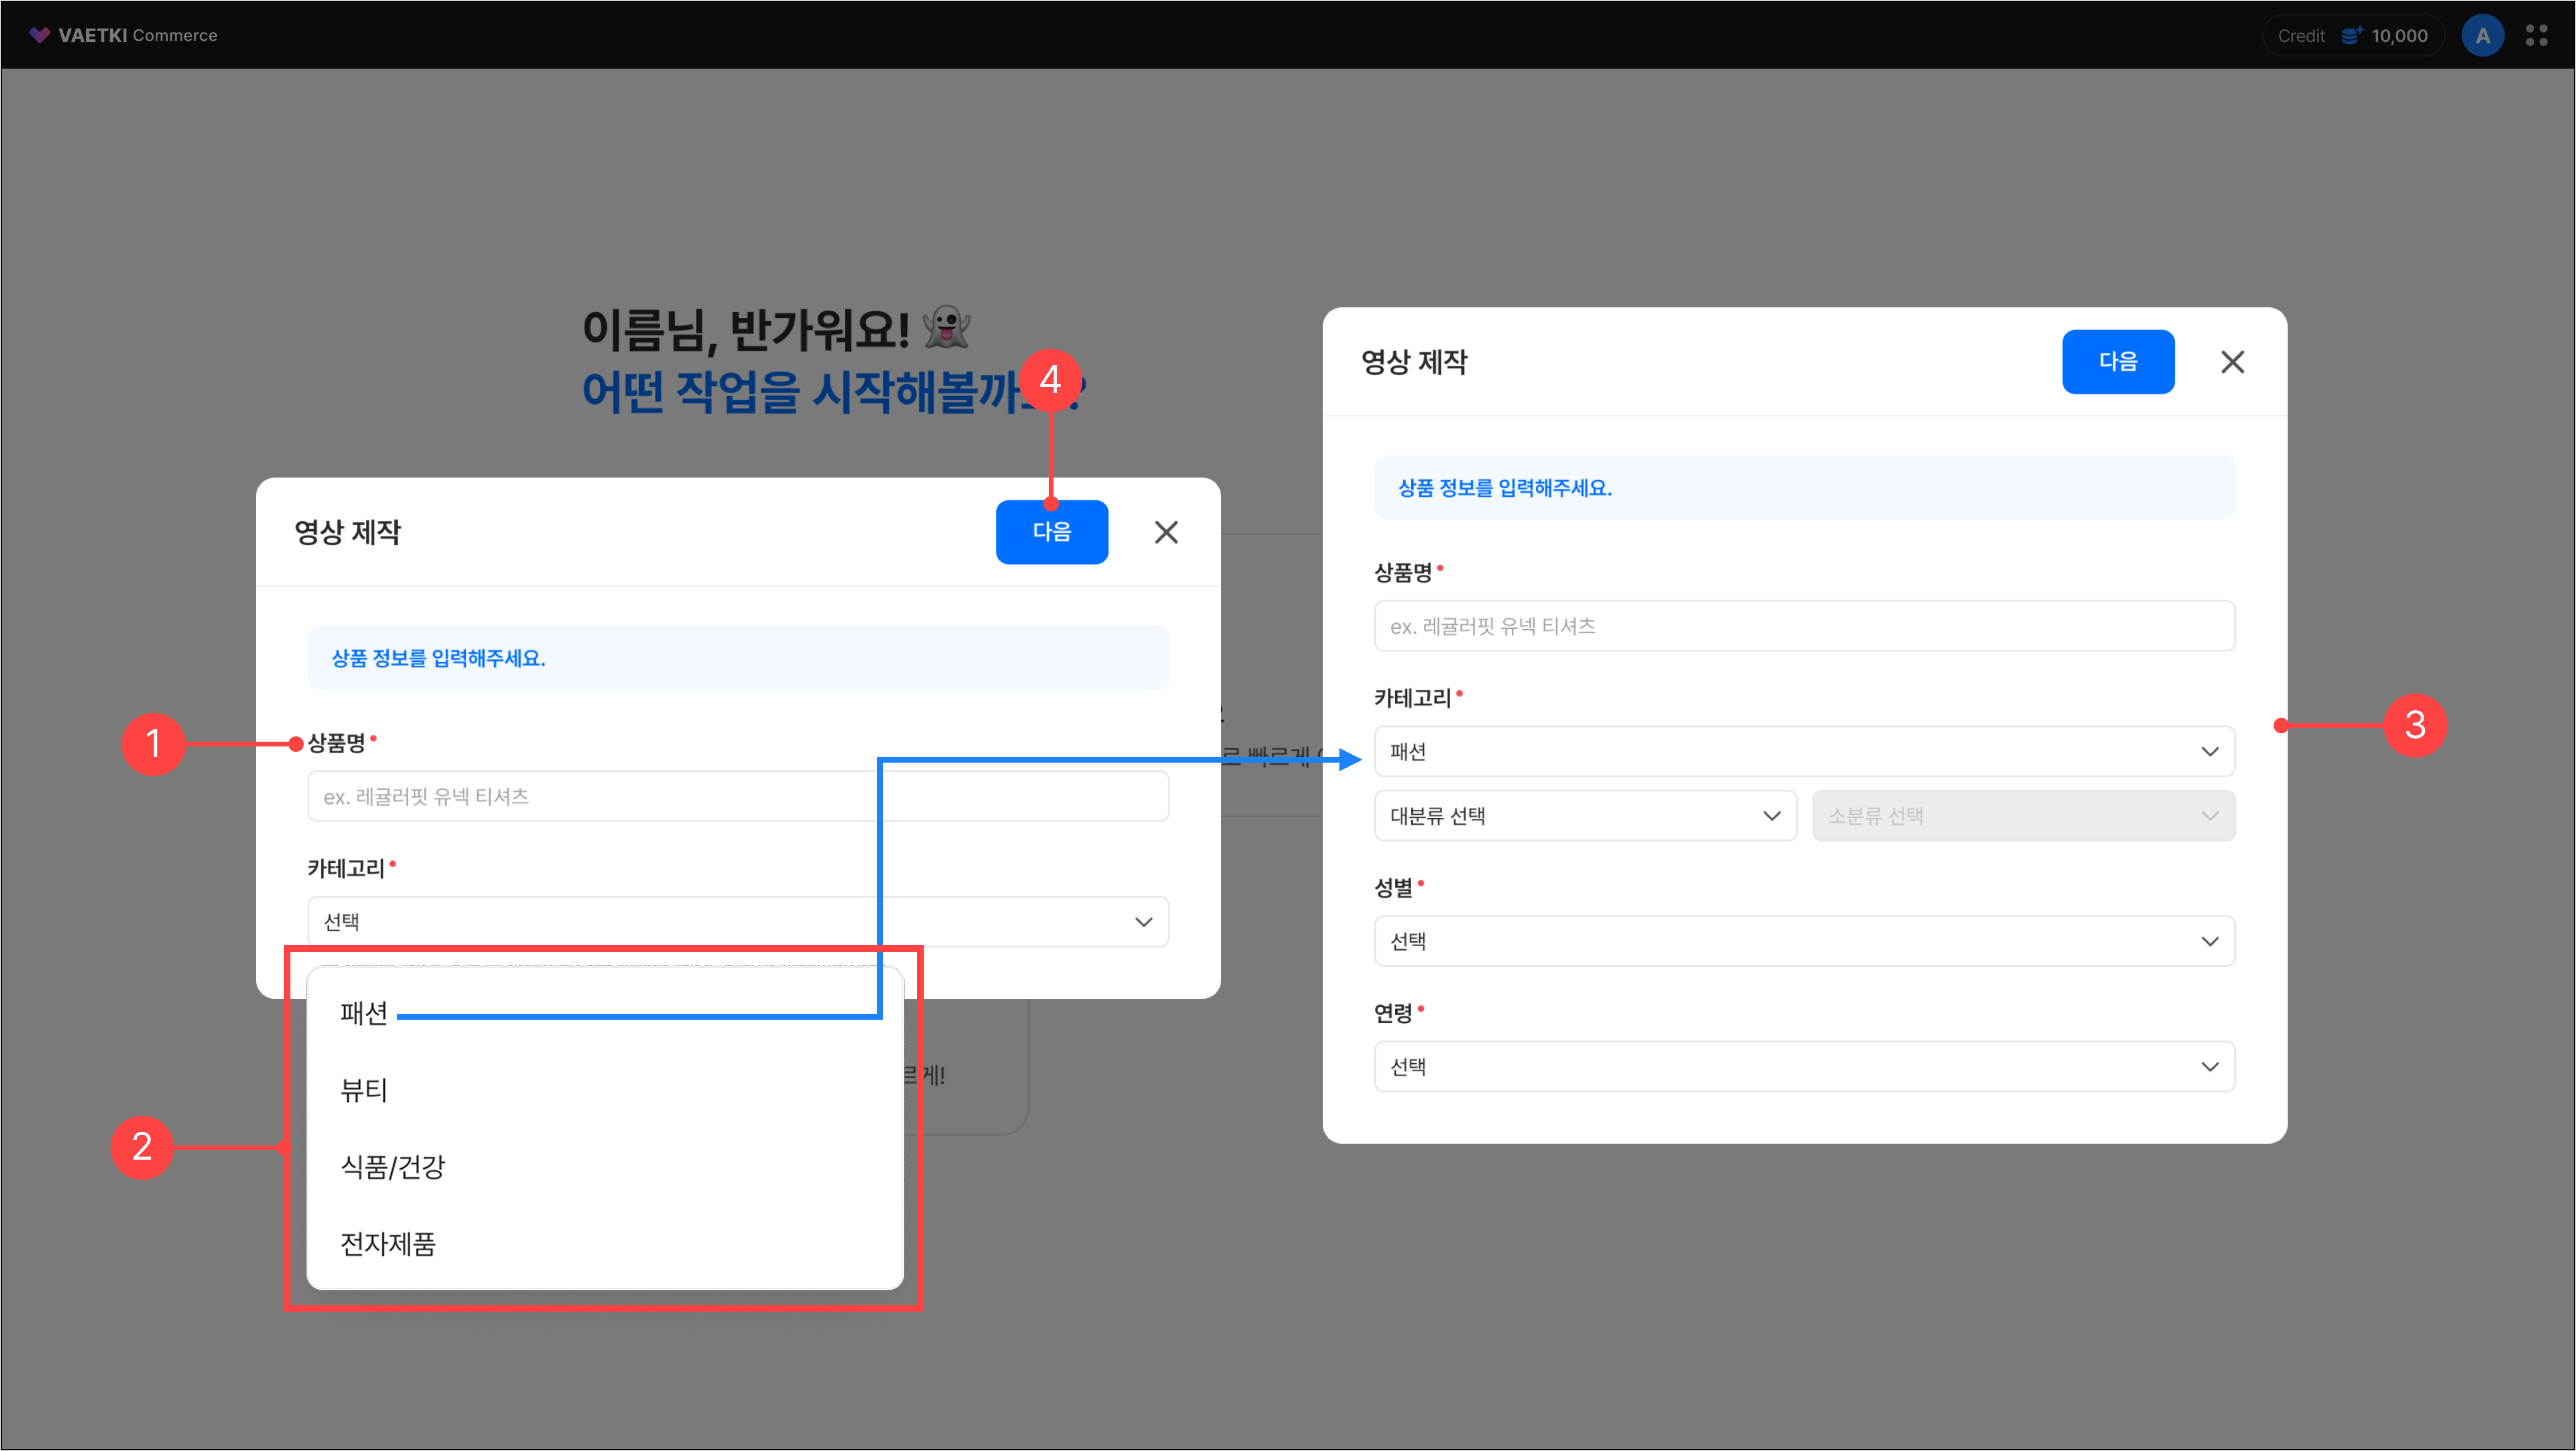
1.Enter the product name.
2.Select the product category. You can choose from four top-level categories.
3.If you select Fashion as the top-level category, you must additionally enter the category, subcategory, gender, and age.
4.Once the Next button is enabled, you move to the screen where you can select the options needed for video creation.
*Product name character limit: 100 characters
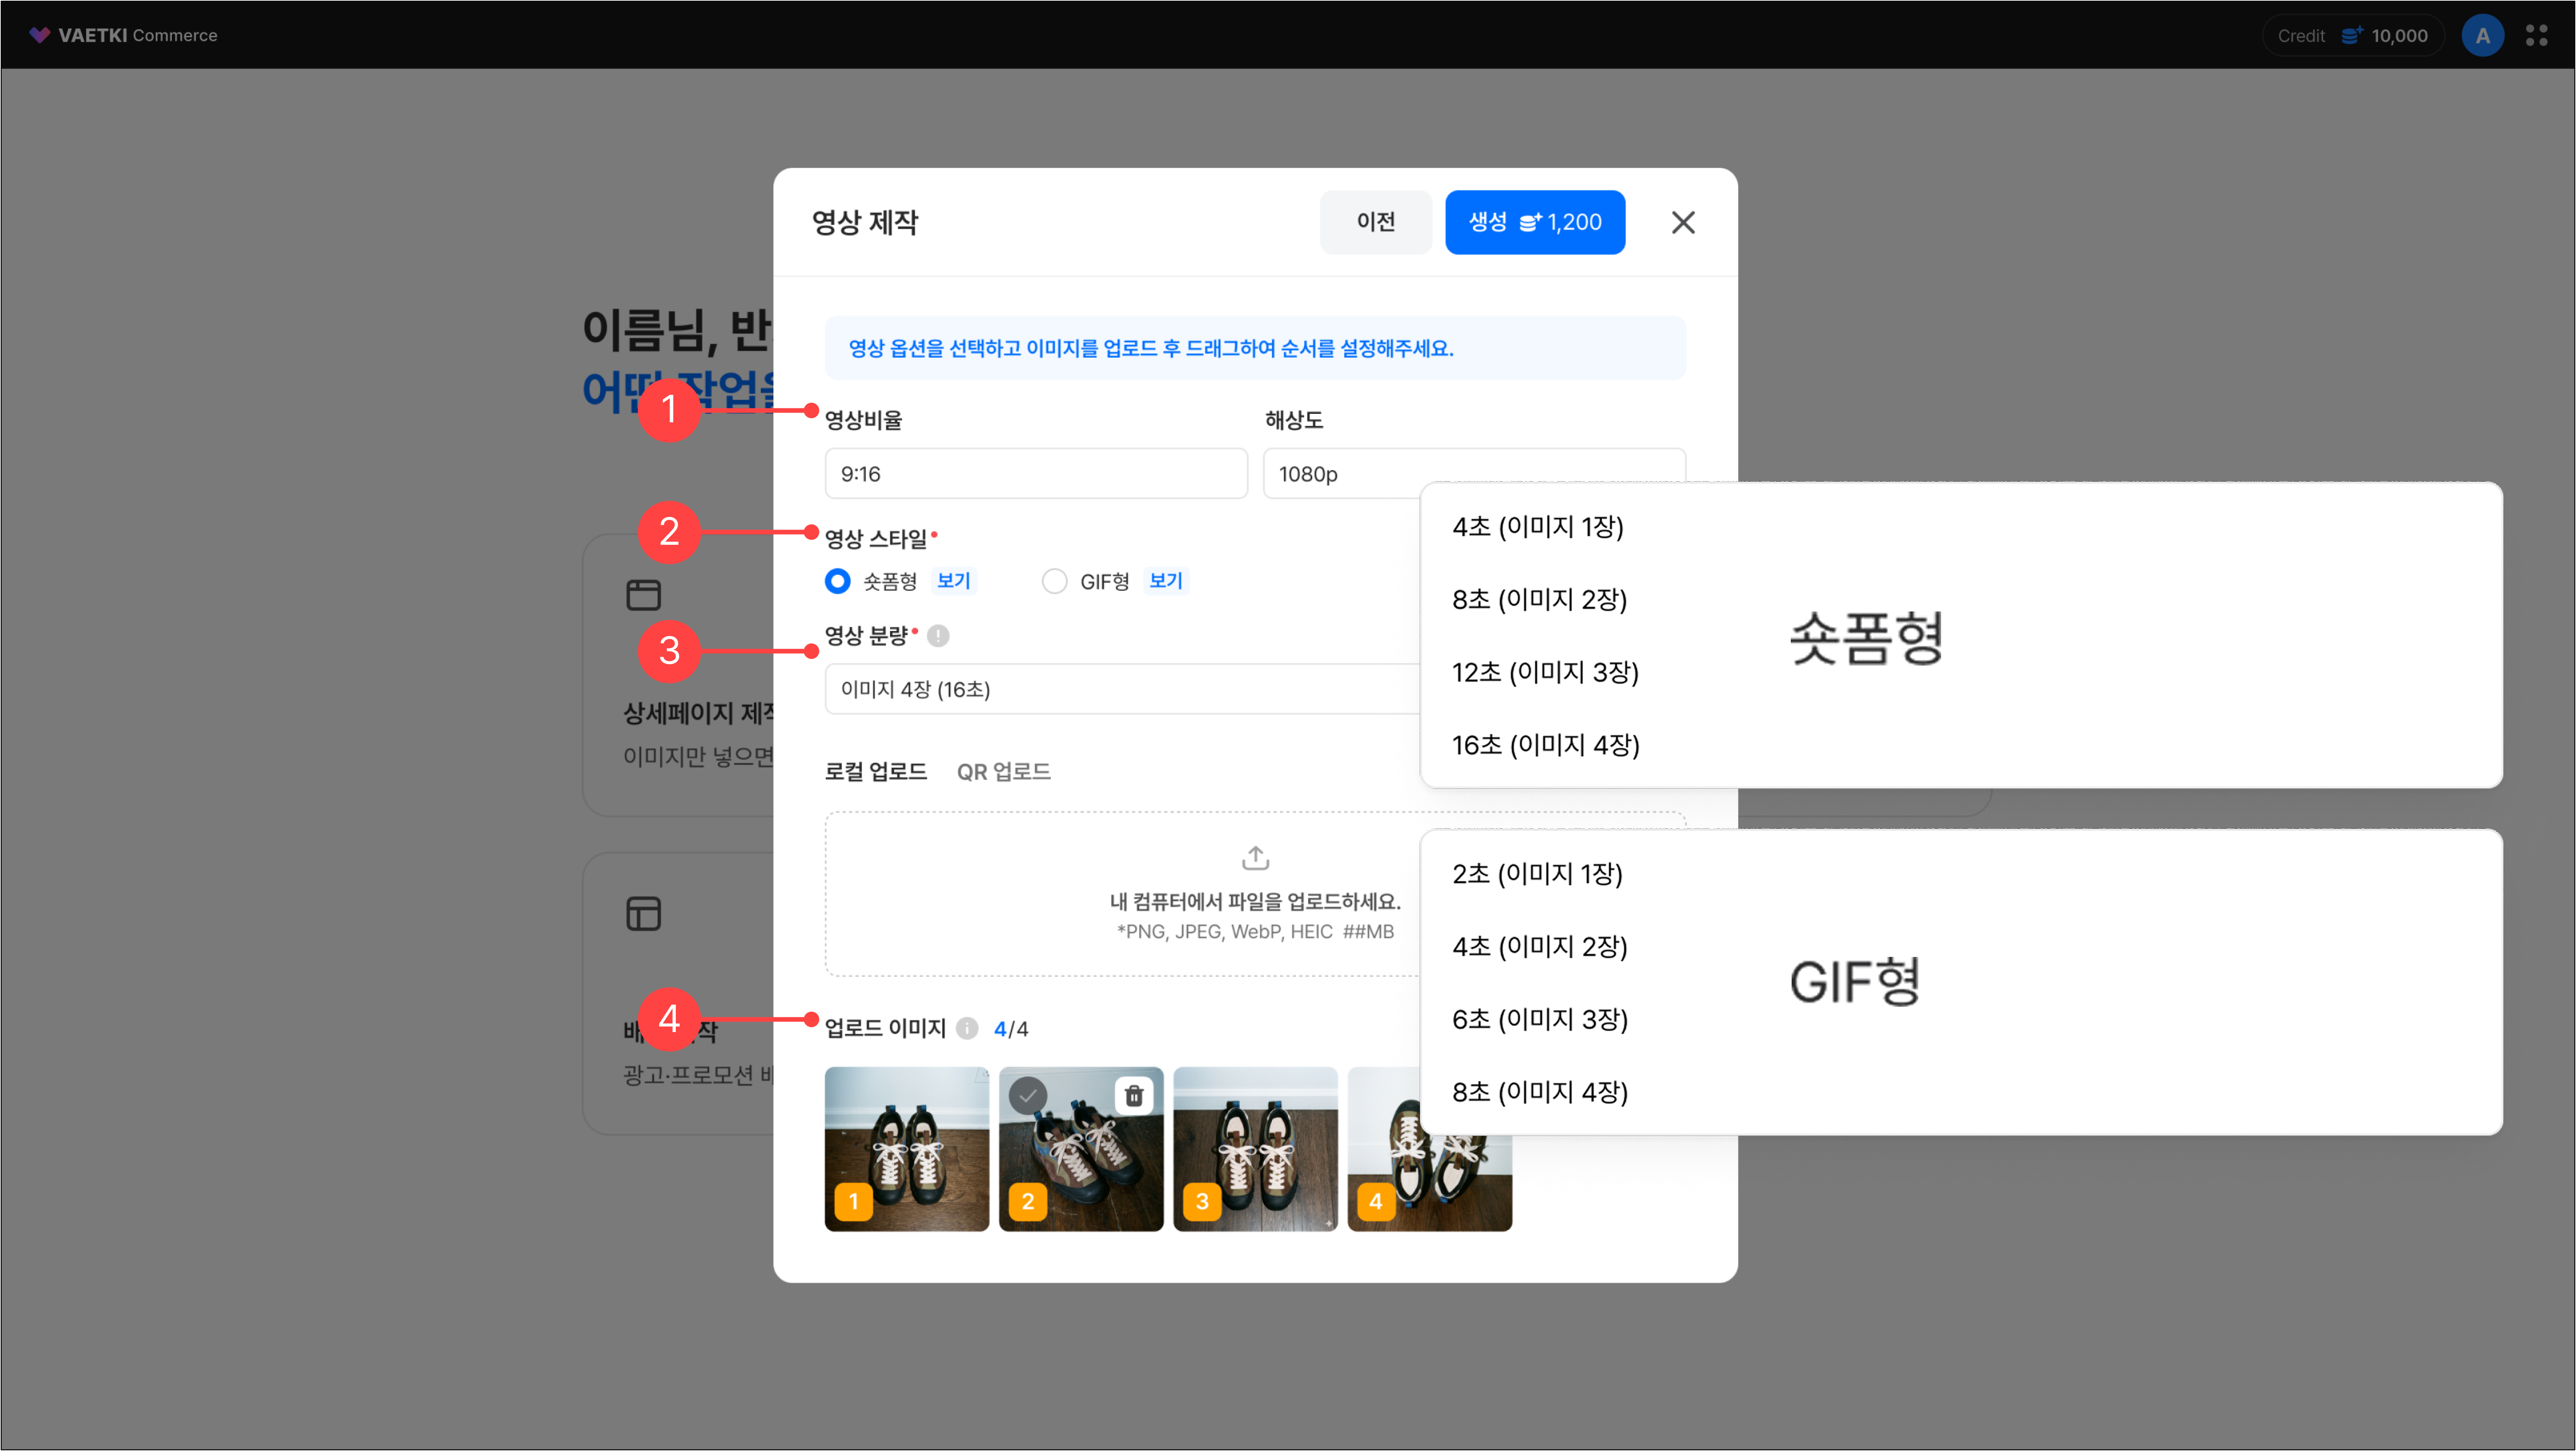
1.The video's ratio and resolution are fixed values.
2.Select a video style. Depending on the selected style, the length of video generated per image varies. Click the 'View' button to see an example video for each style.
-Short-form: 4 seconds of video are generated per image, and you can select up to 4 images (16 seconds).
-GIF: 2 seconds of video are generated per image, and you can select up to 4 images (8 seconds).
3.Select the video length. The number of images you can upload varies depending on the selected length.
4.Upload the images to use for the video. You can reorder uploaded images by drag and drop, and they are reflected in the video in the order you set.
2.Creating a video – Existing product
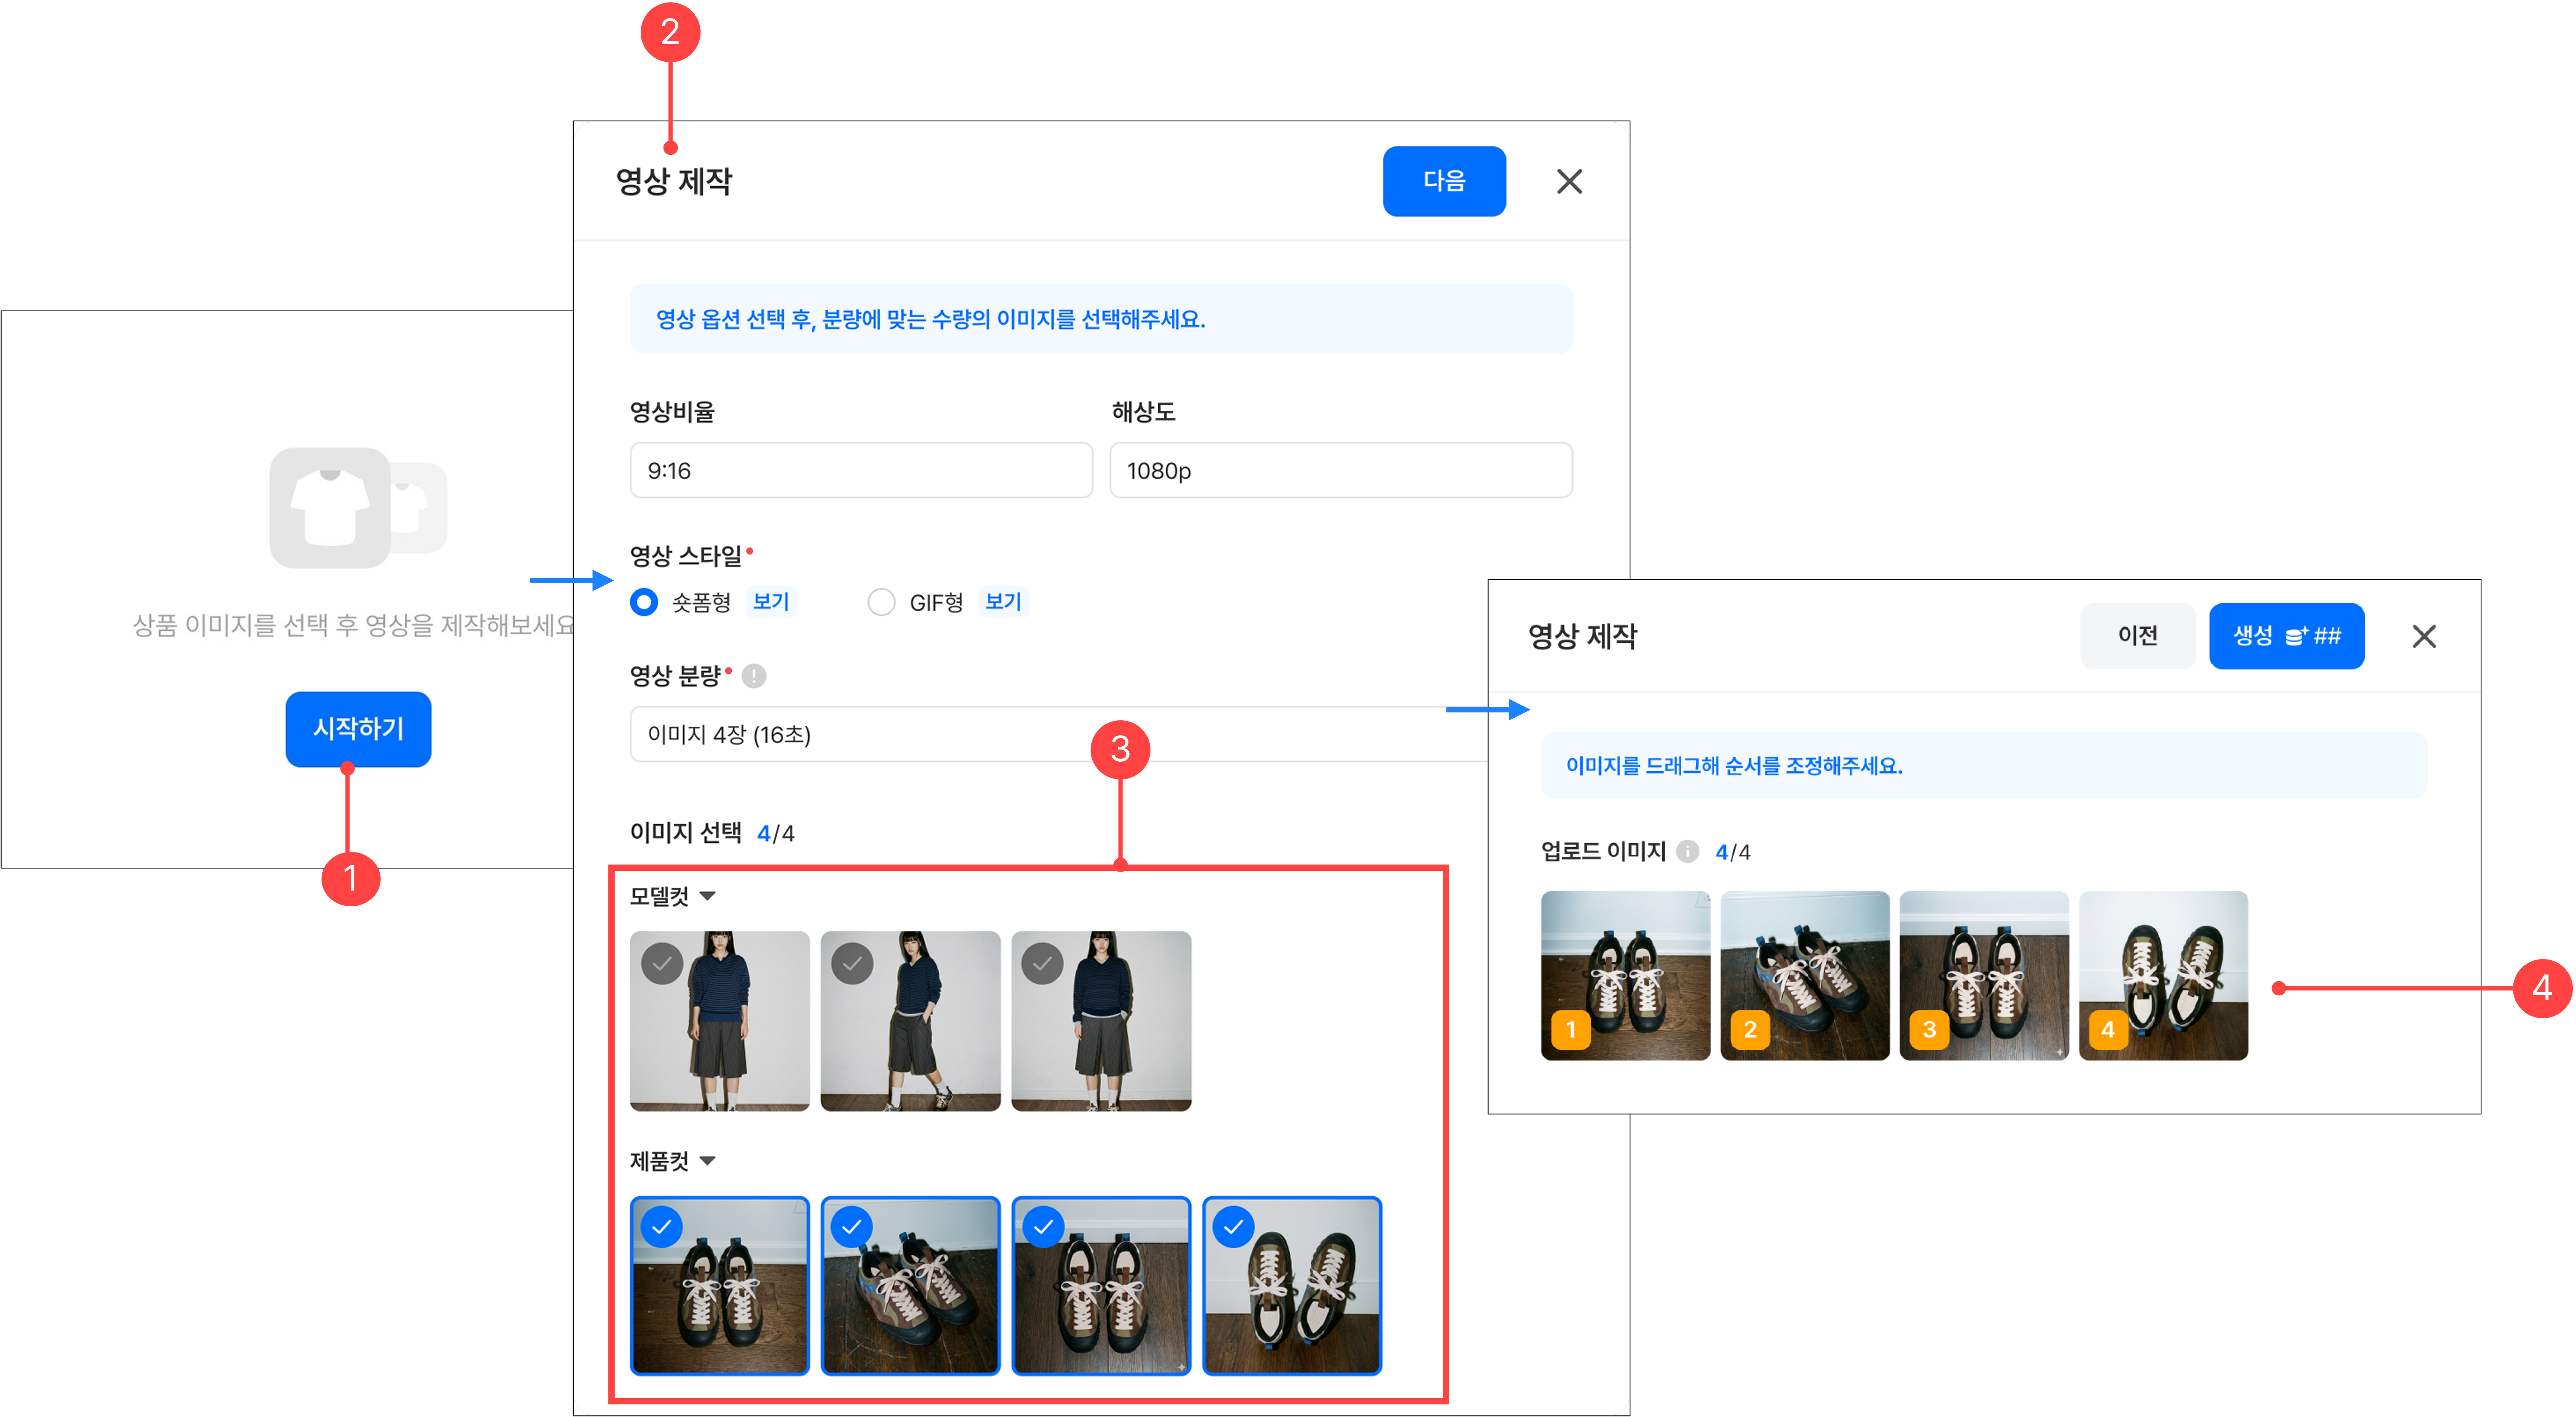
1.In the left menu of a previously created product, click the Create video button to go to the video creation menu. In the video creation menu, click the 'Start' button to begin.
2.Select the video ratio/resolution, video length, and video style, and select previously uploaded images.
3.Uploaded images are categorized by shot type. If you need additional images, upload them in the asset panel.
4.Clicking Next lets you set the order of the images to use in the video. After setting the order, click Generate to start video generation.
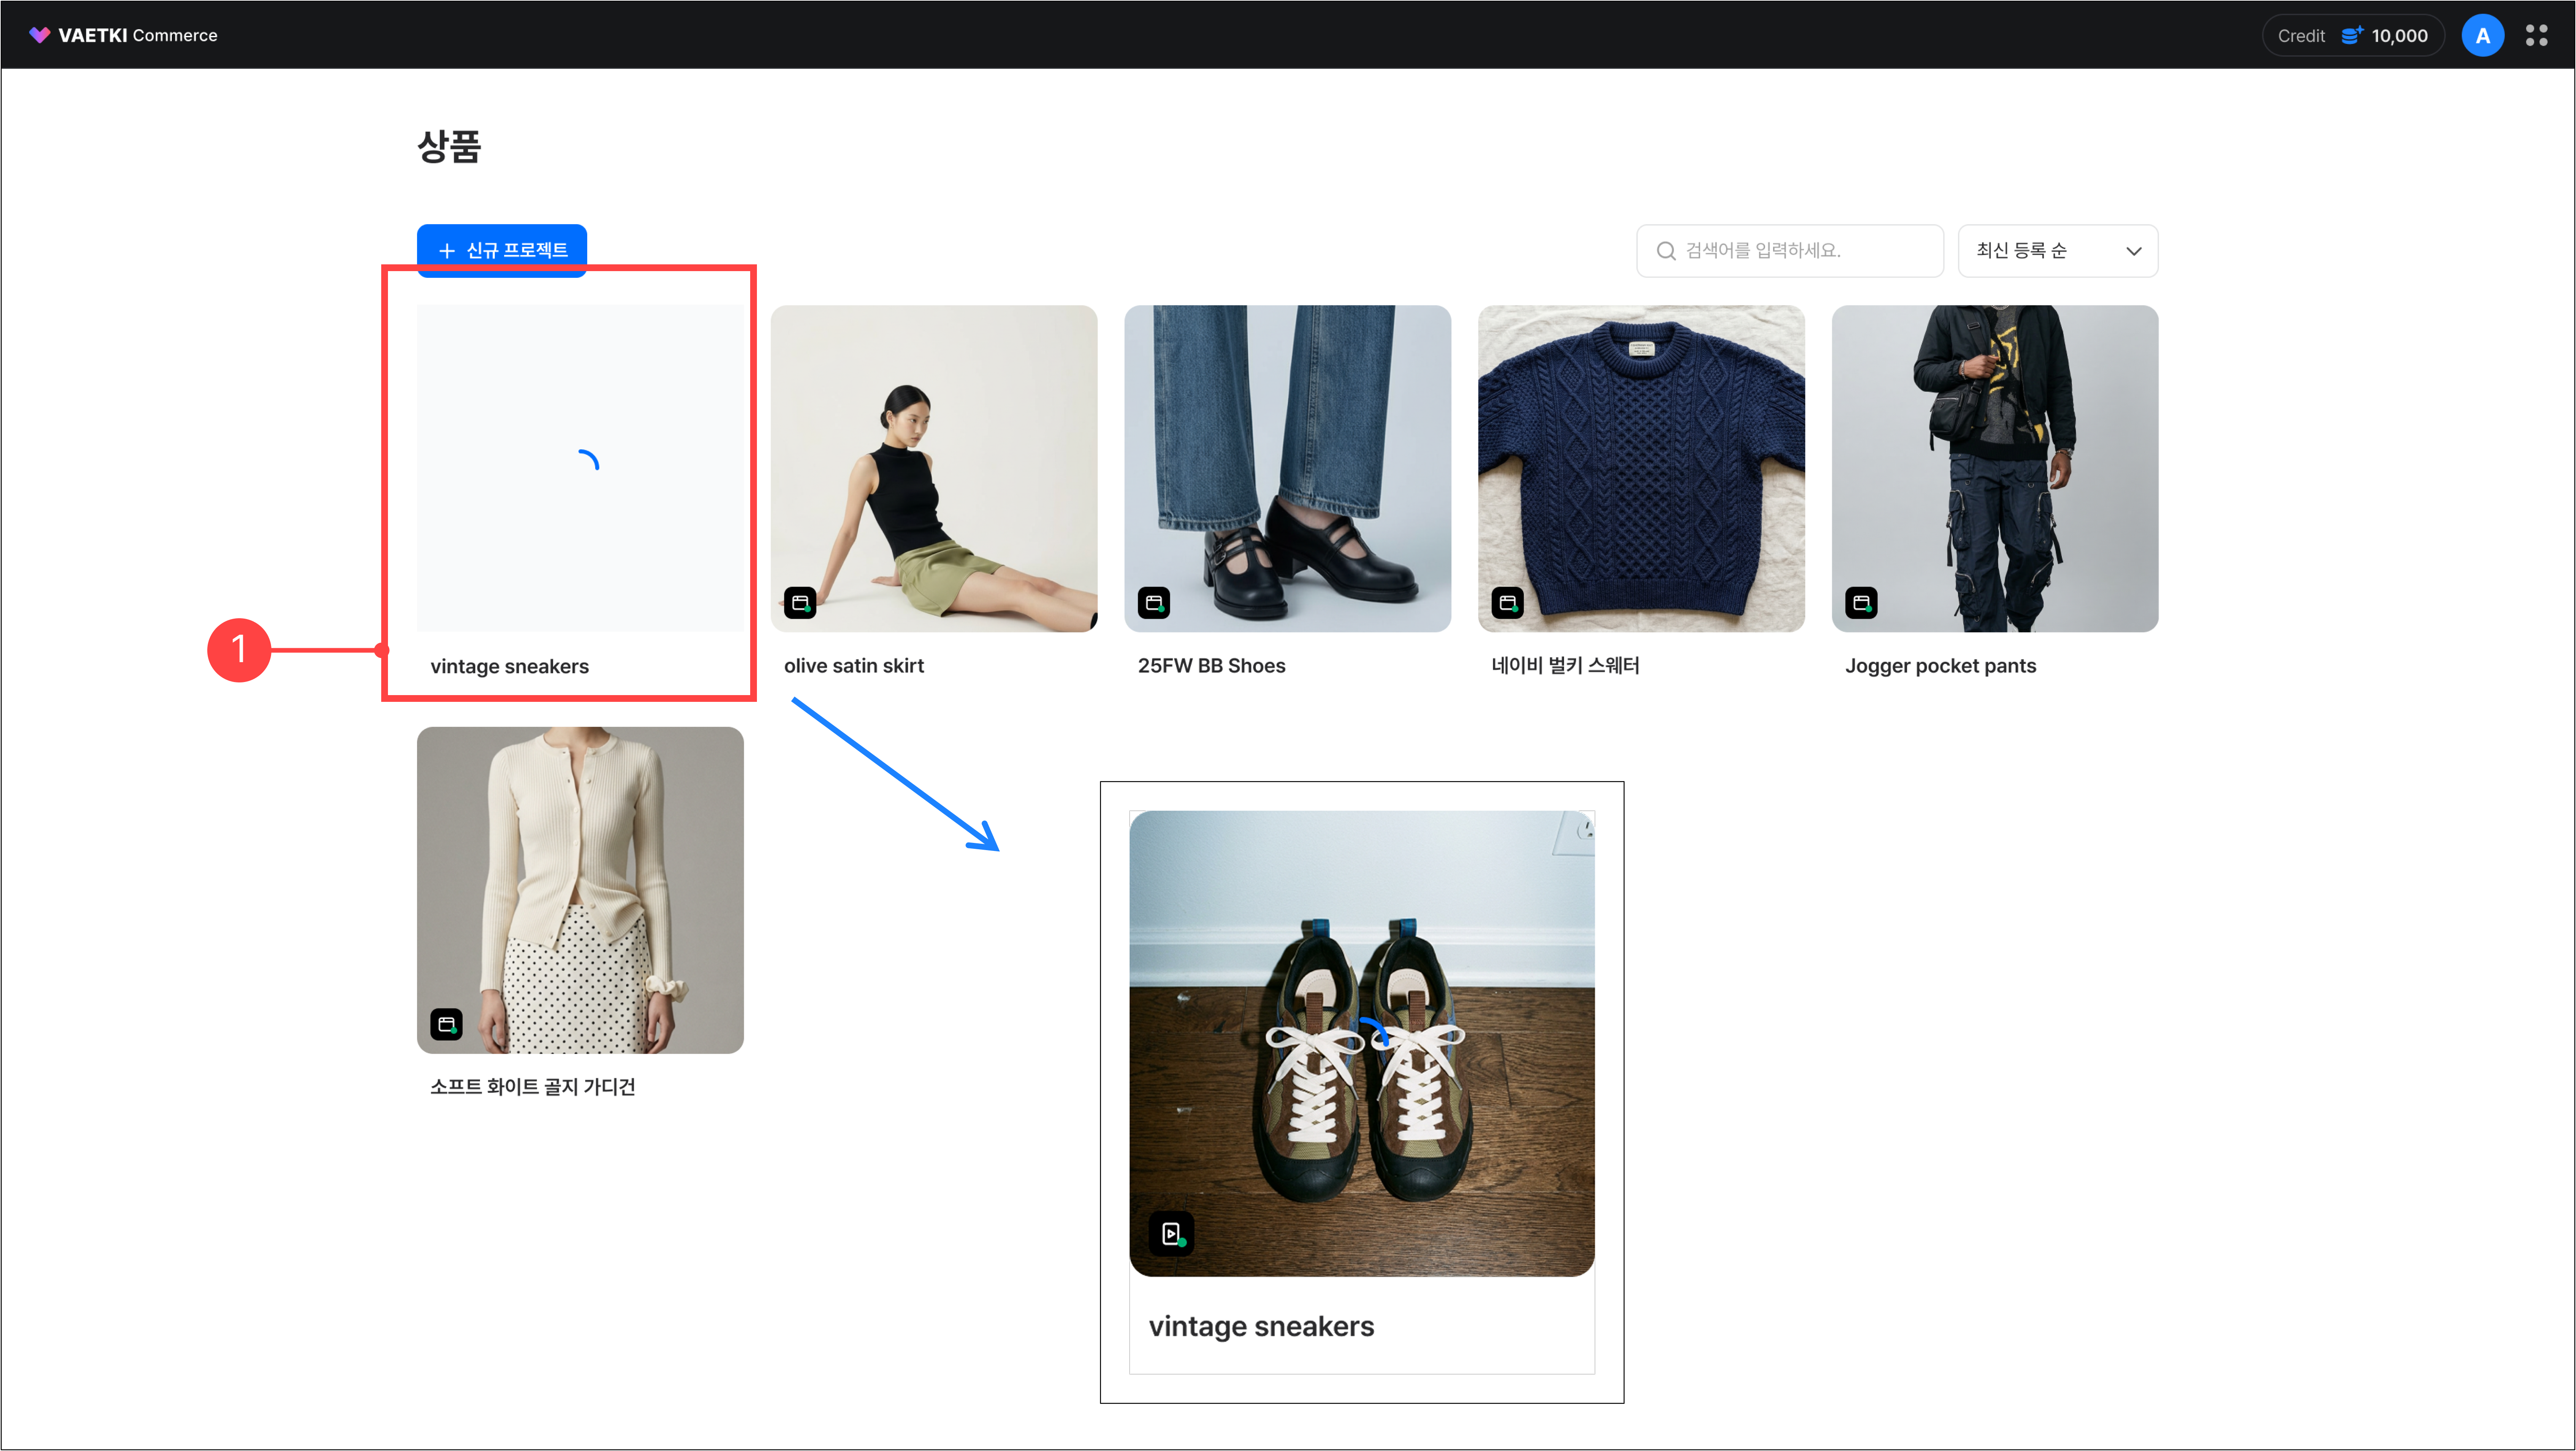
1.Once generation starts, you can see the product being generated in the product list.
2.When video generation is complete, the video indicator turns green.
3.Video list
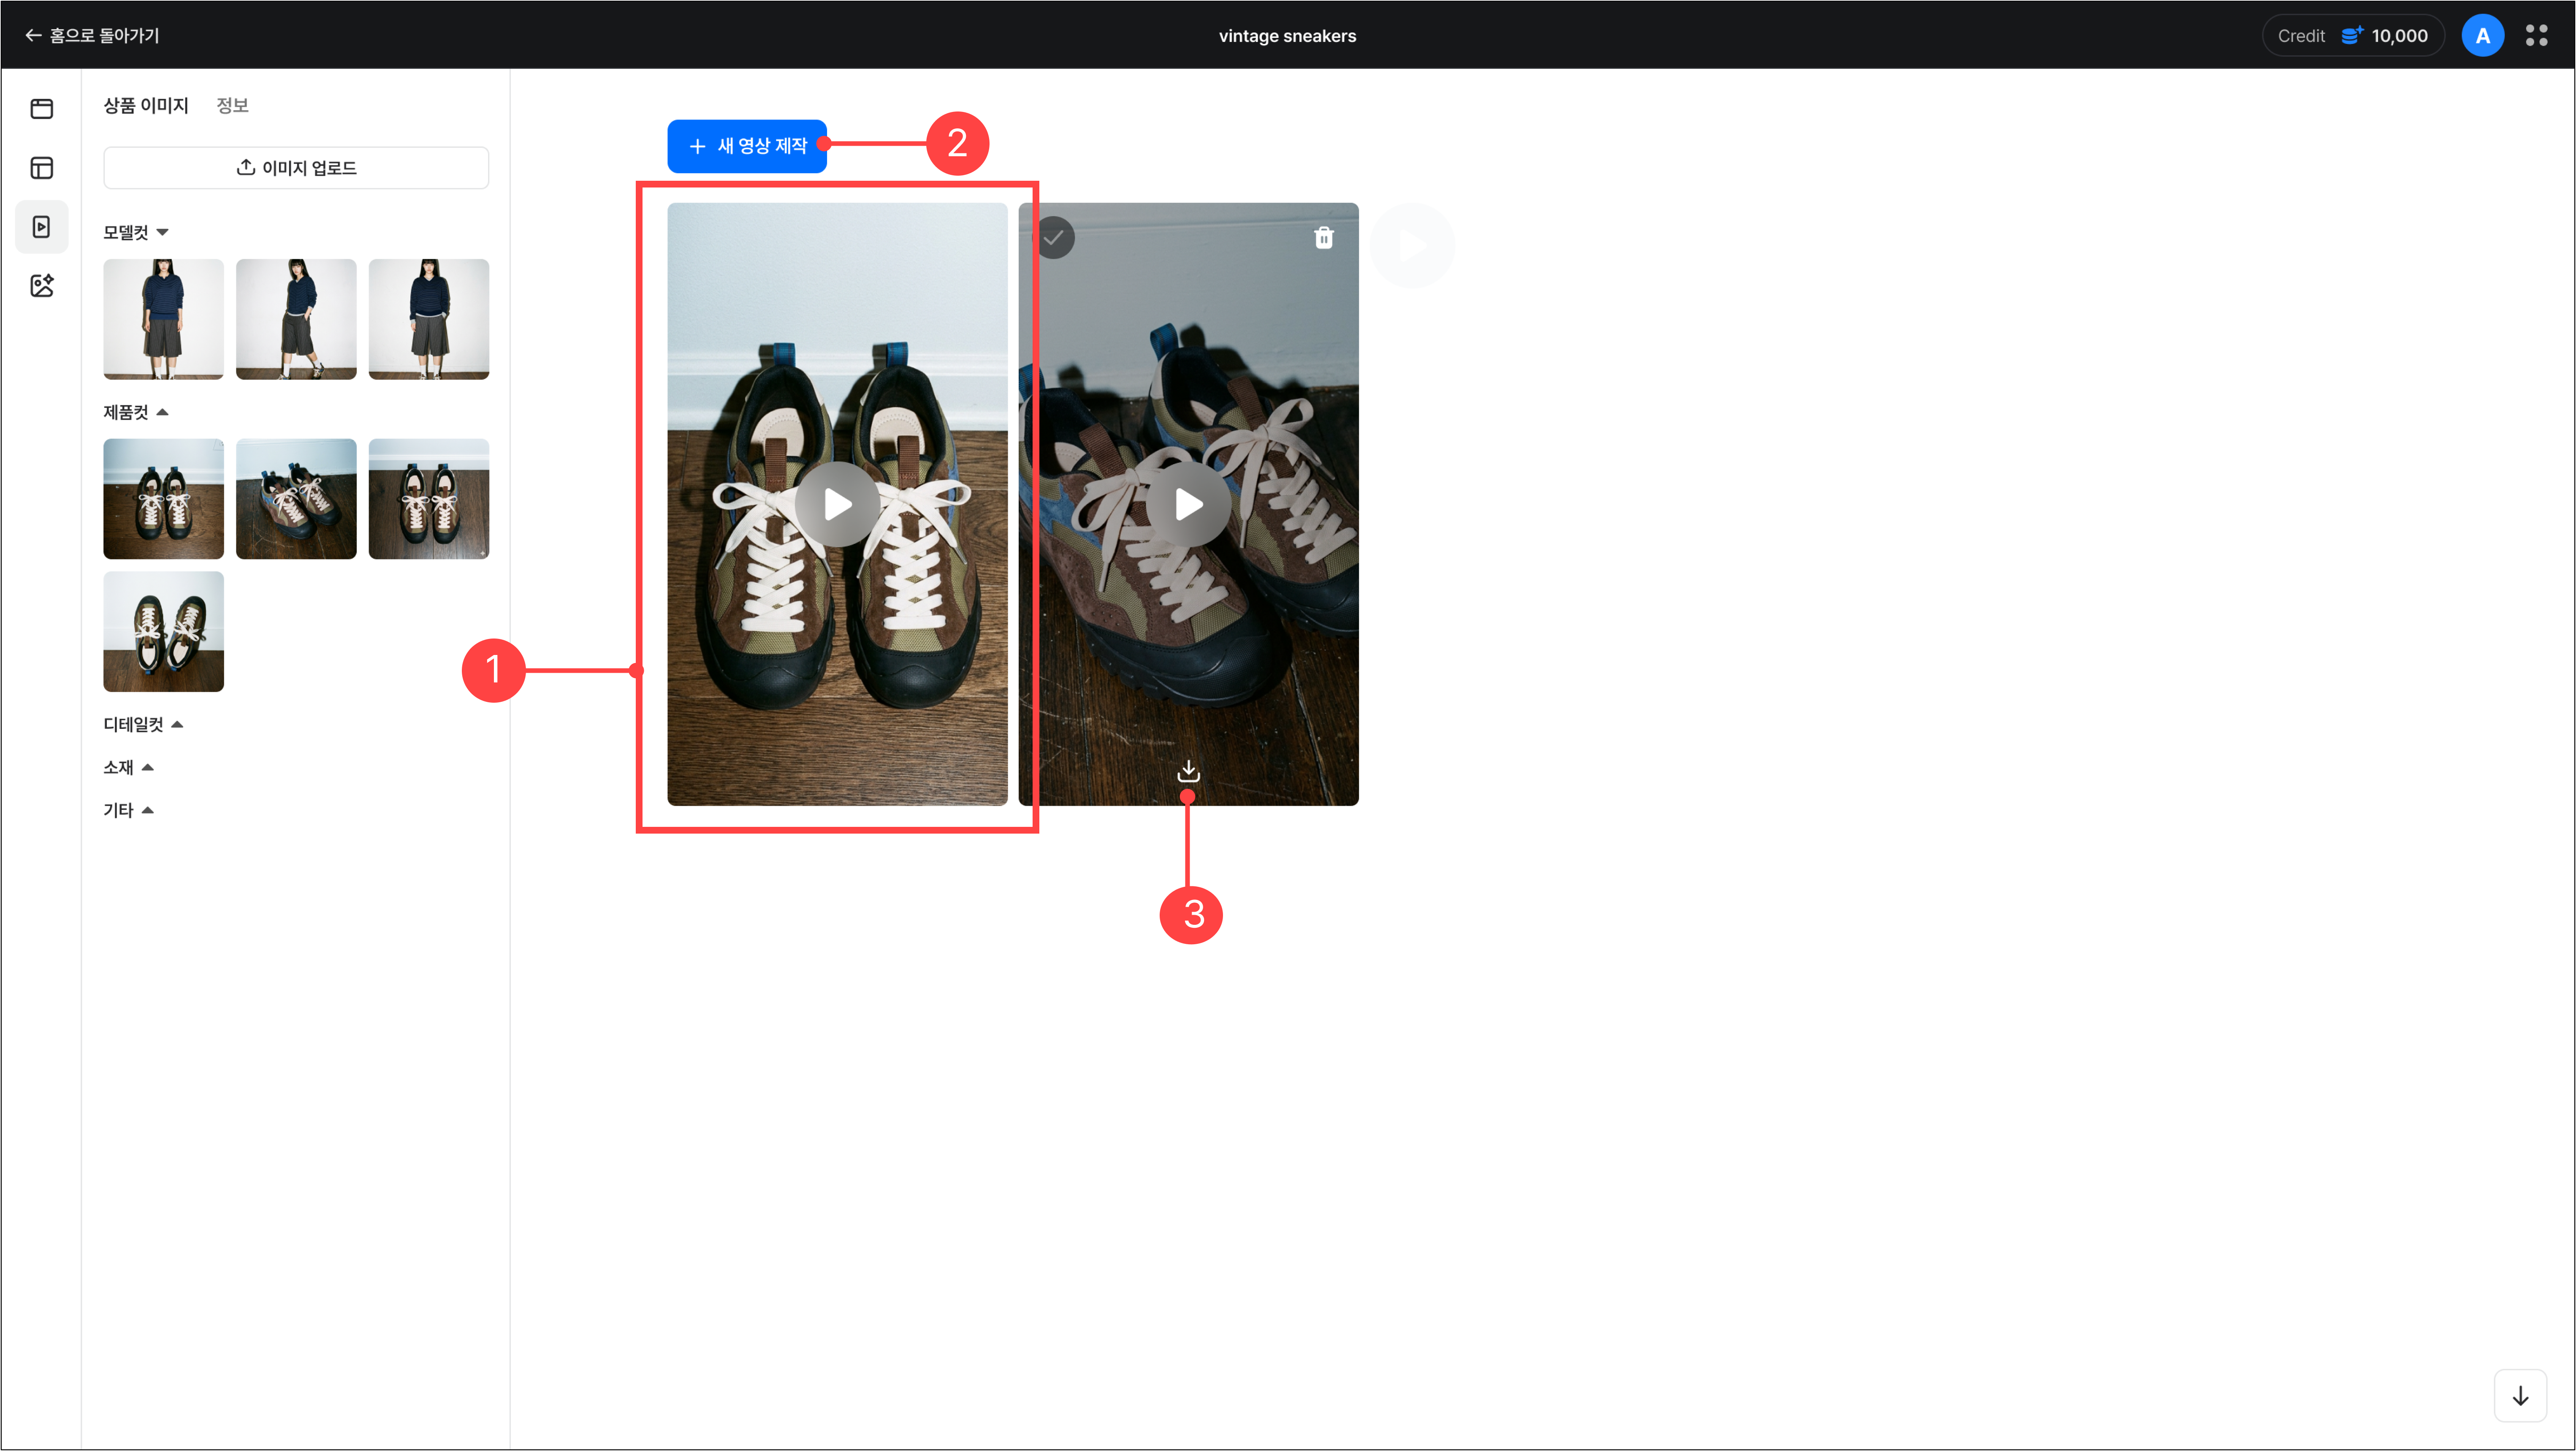
1.Click a completed product to go to the video creation menu, where you can view the generated videos.
2.You can create a new video from the same product using the Create new video button.
3.You can download the generated video in one of two formats, GIF or MP4. When you select your preferred format, both the Full video and the Clip videos are downloaded as a zip file.
In the video creation menu, you can download or delete generated videos. You can also select multiple videos for batch download.
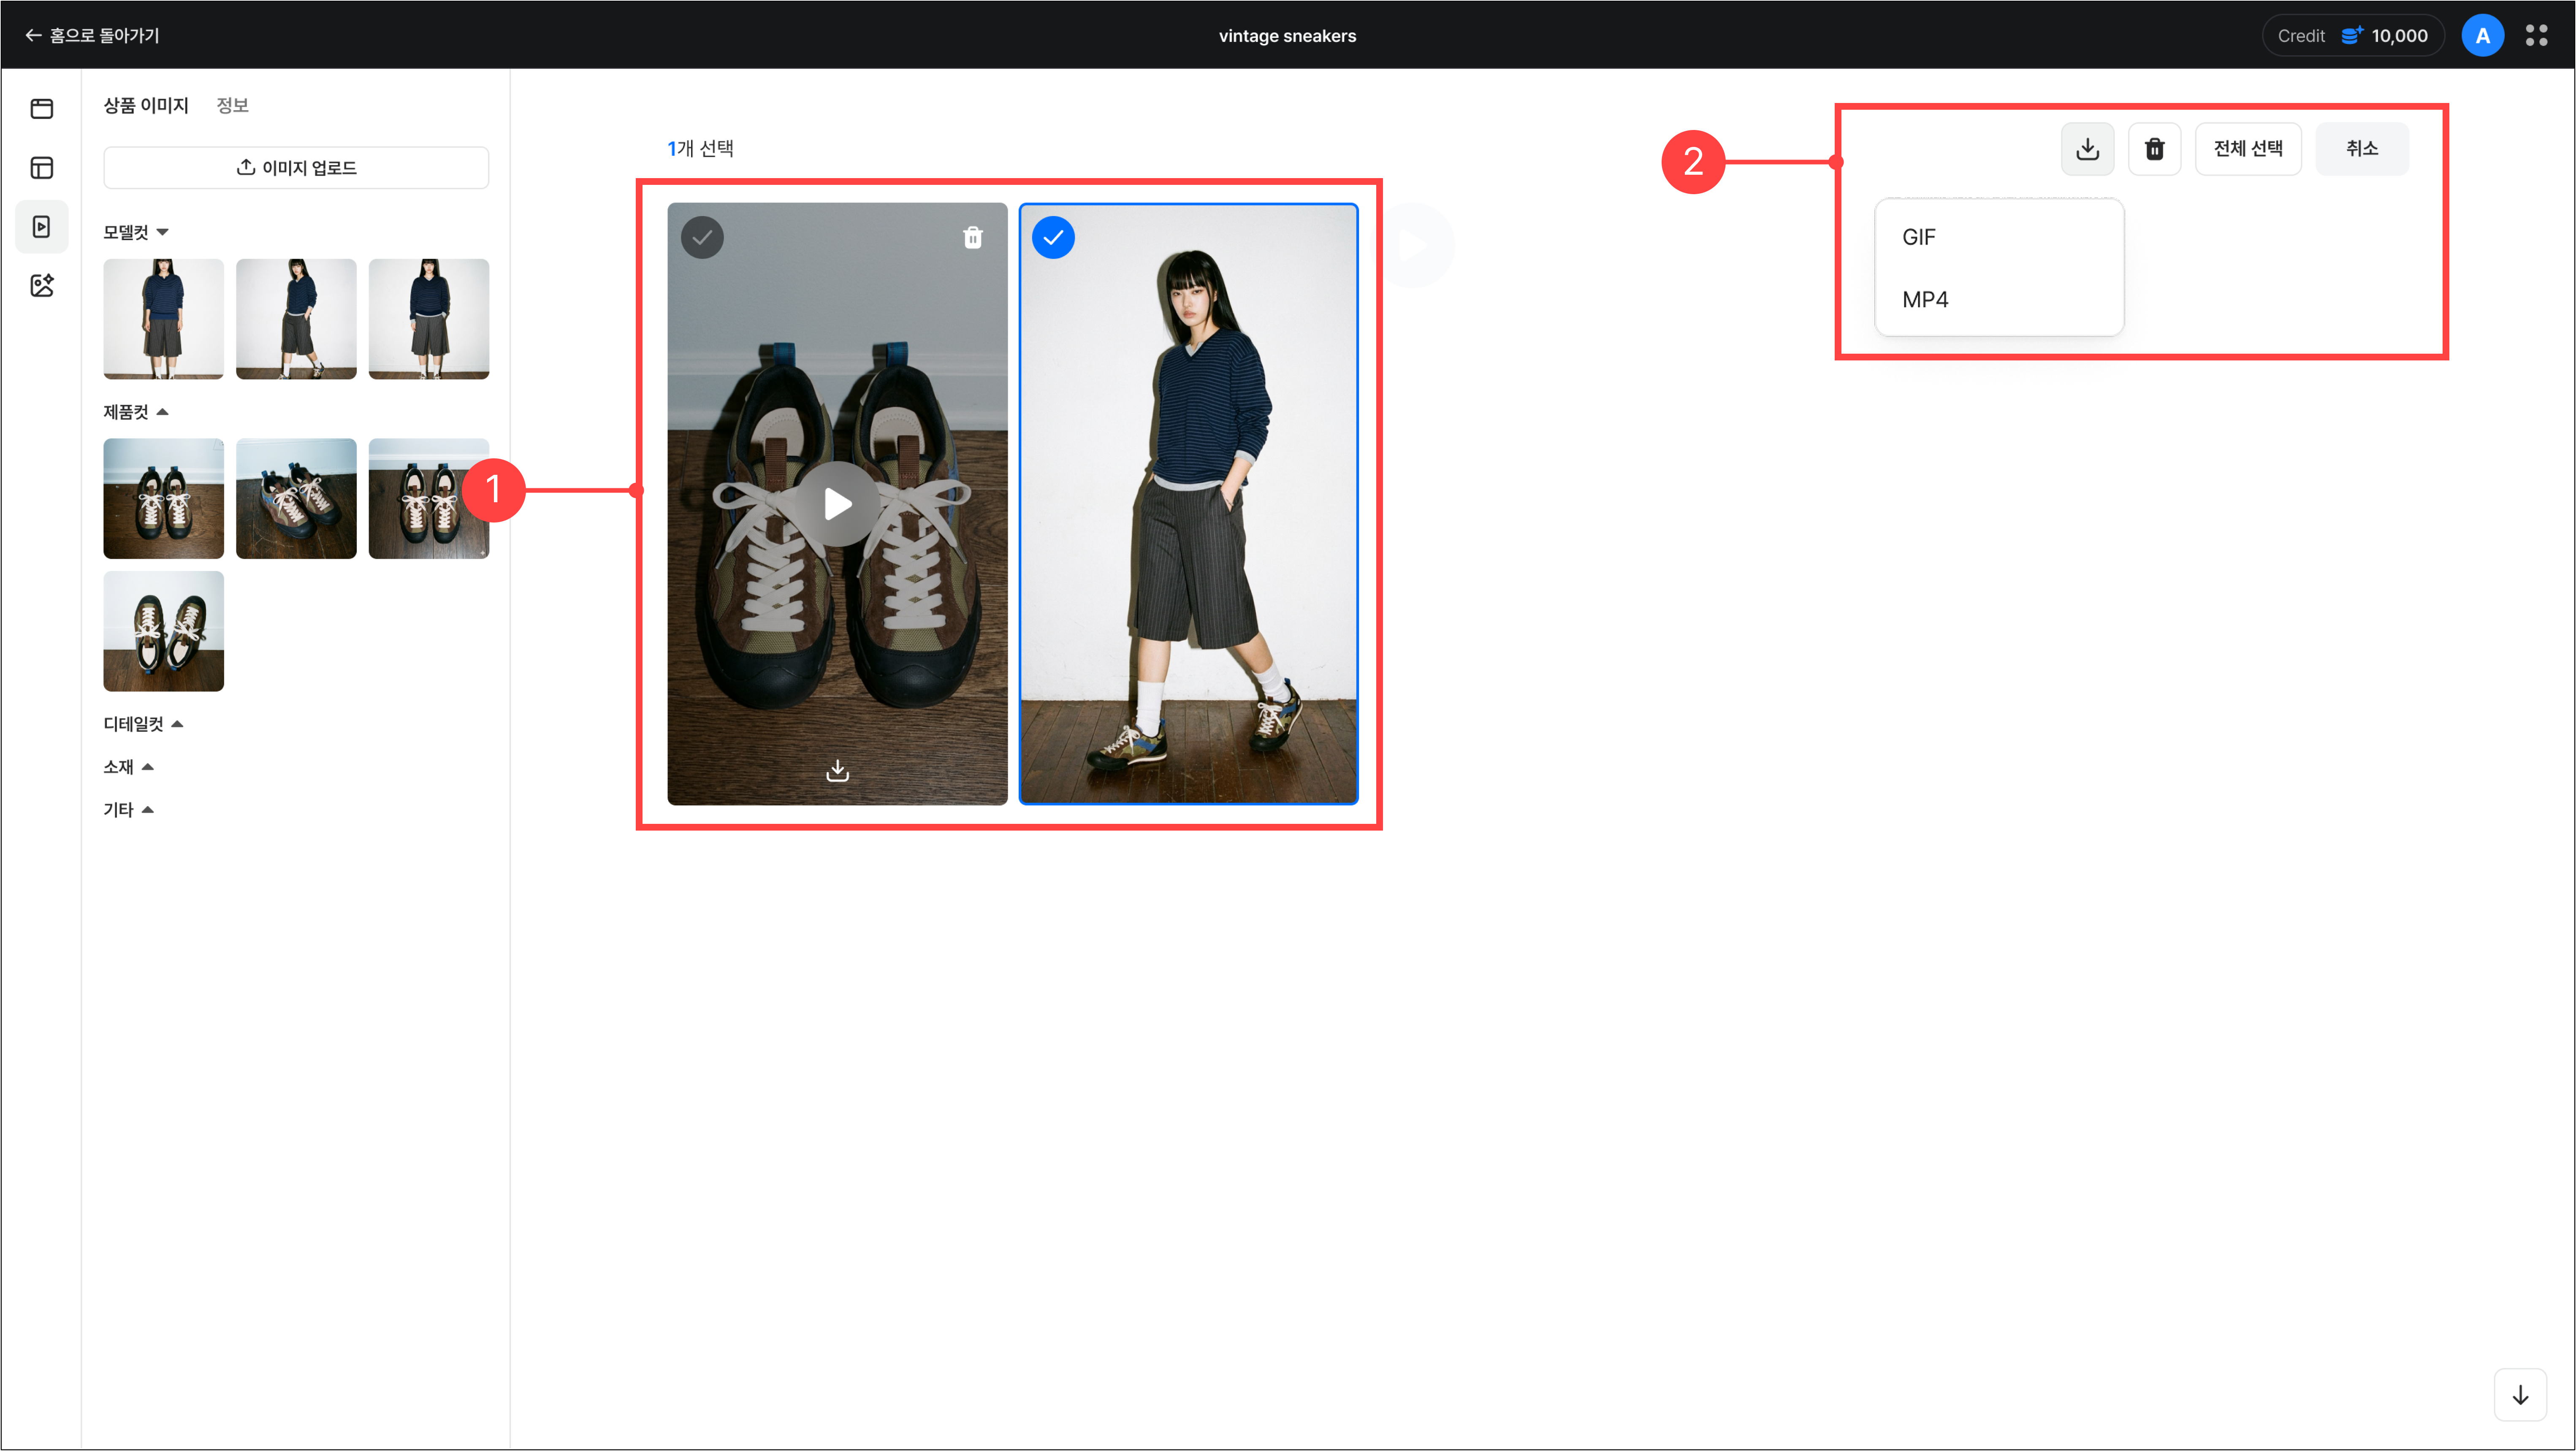
1.Hovering over a video thumbnail shows download/delete options, and you can select multiple videos.
2.When multiple videos are selected, the menu in the top right is enabled, letting you batch download or delete the selected videos.
4.Individual video detail view
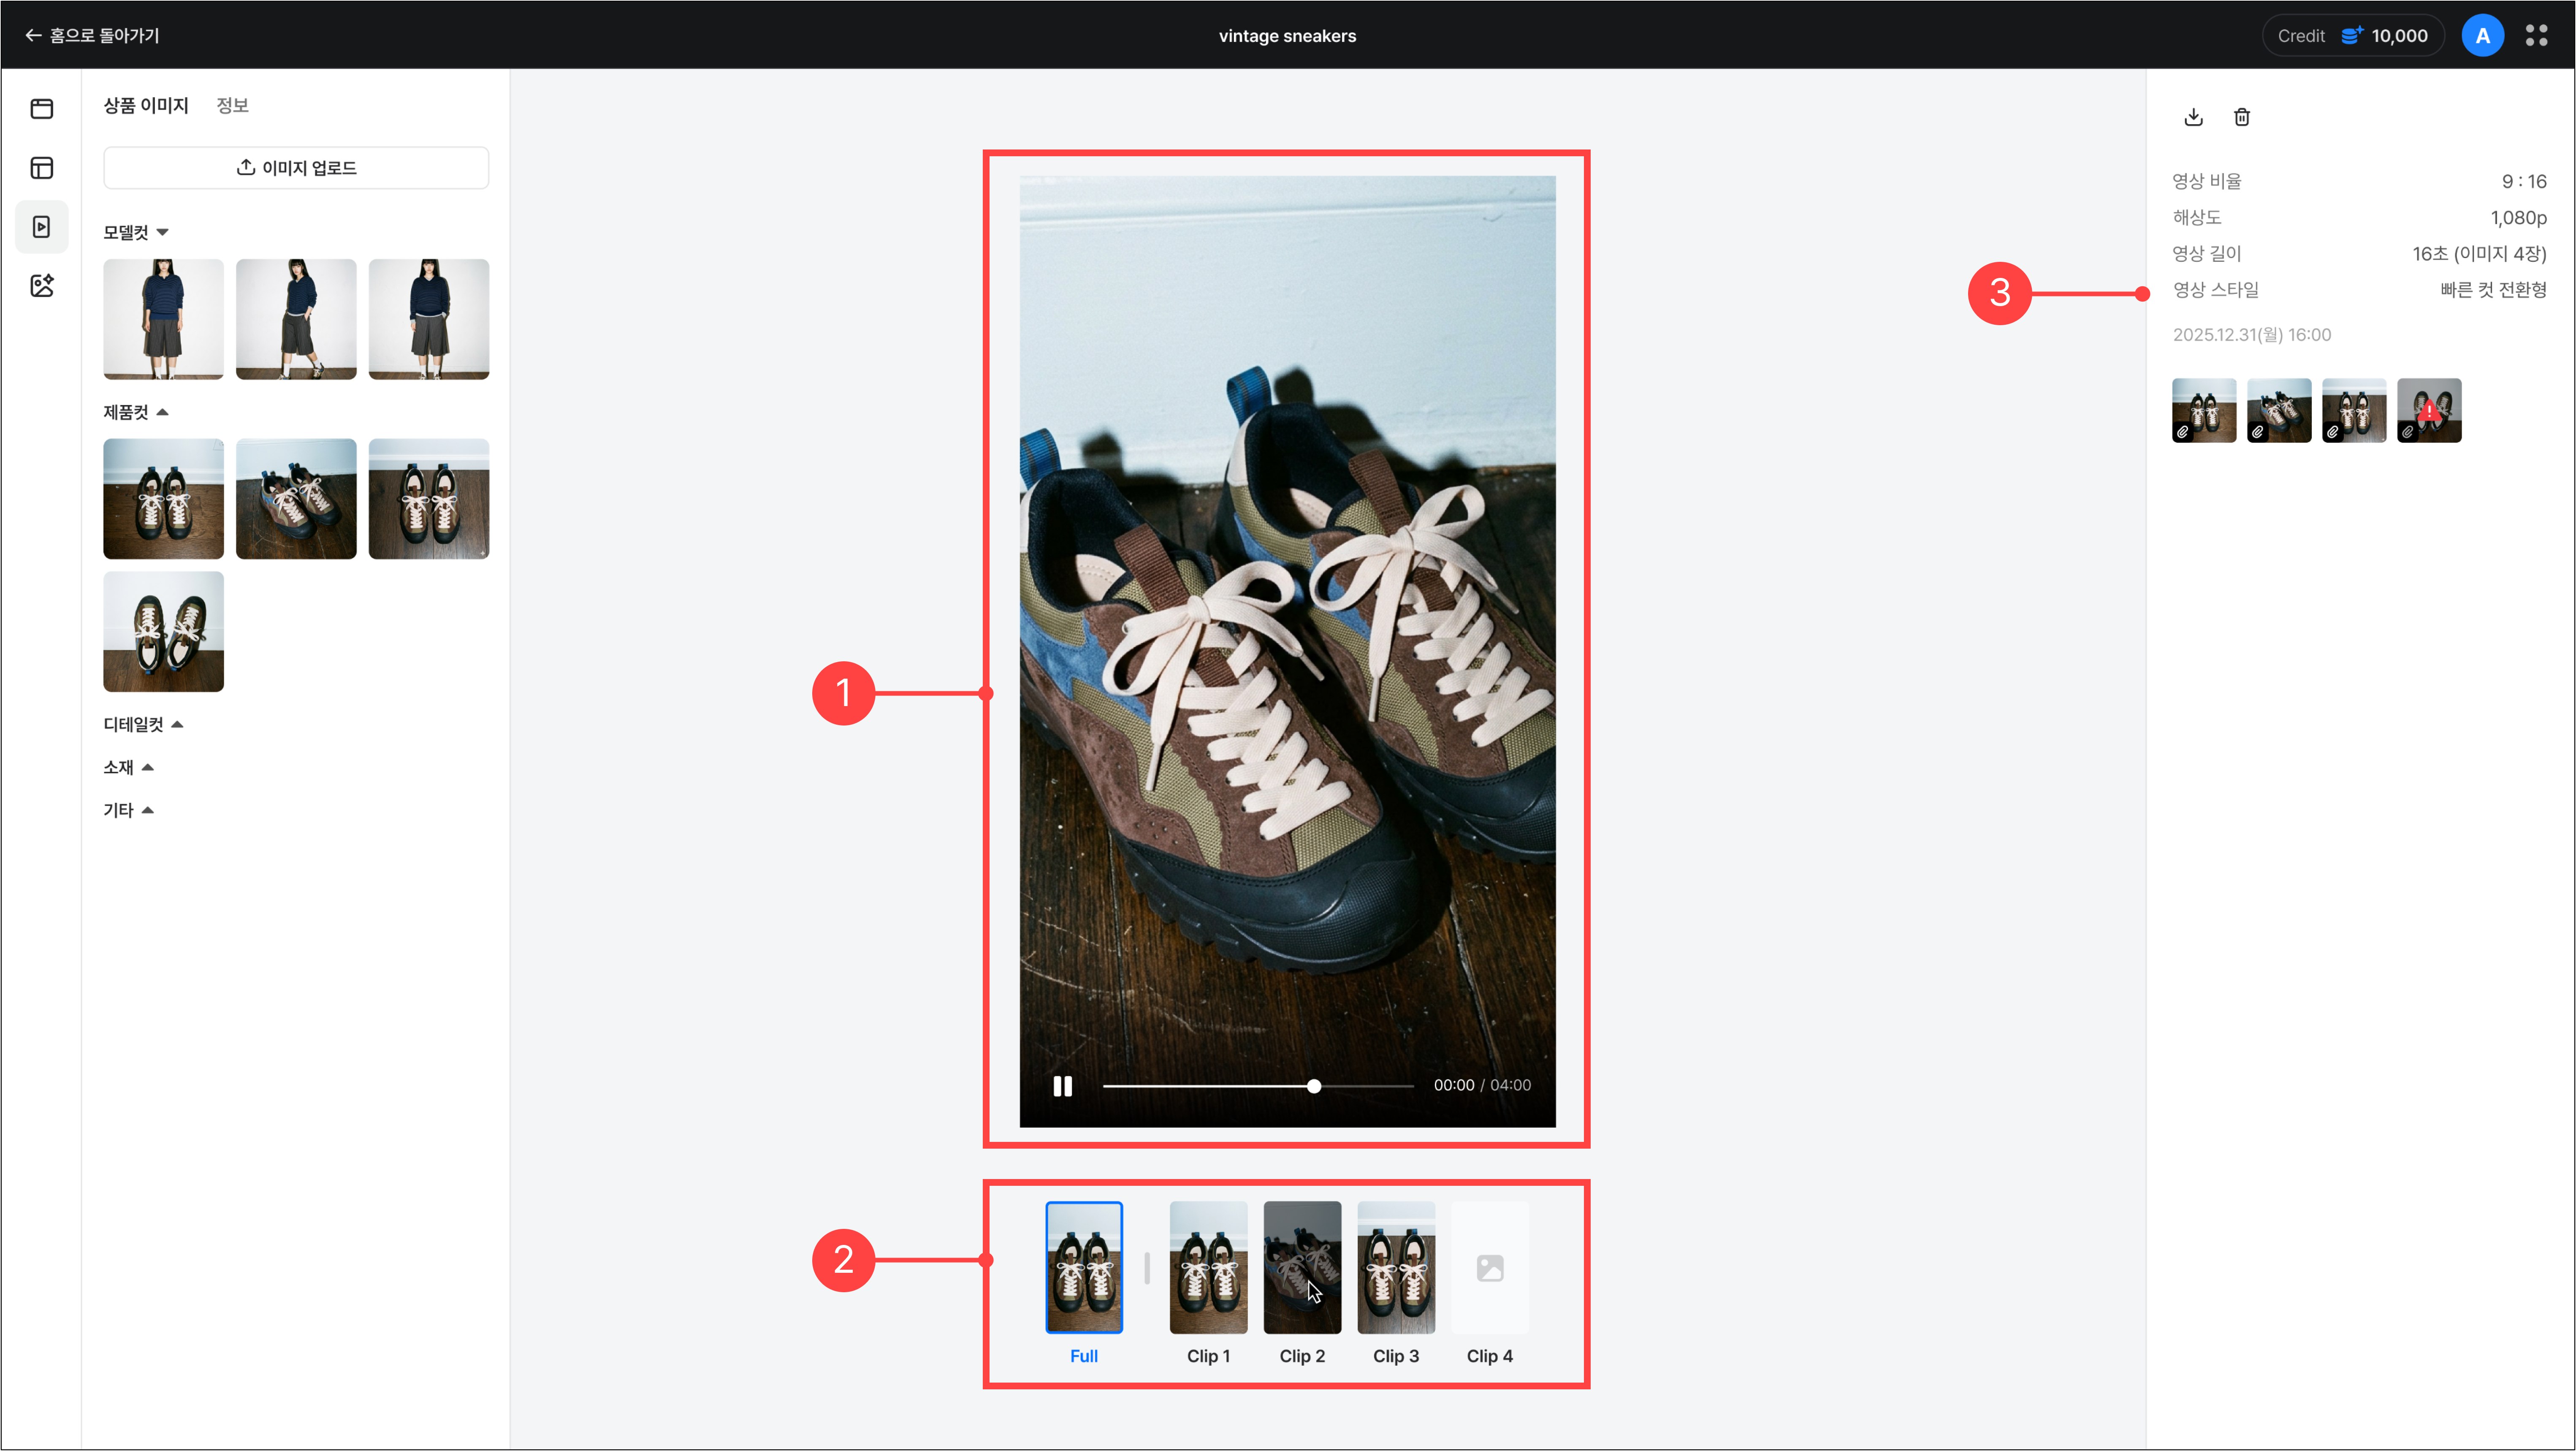
1.Clicking a video in the video creation menu takes you to the individual video detail view. The generated video plays automatically in the center of the screen.
2.At the bottom of the video, you can see the full video (Full) and the partial videos created from individual images (Clip).
3.In the right panel, you can download or delete the video and view its ratio, resolution, length, style, and creation date. You can also see which images were used and which were not generated during video creation.
5.Troubleshooting
Video generation failure due to a GUIDELINE_FAILED error
In accordance with AI safety policies, video generation is restricted for images containing the following.
-Real people such as celebrities or public figures
-Child models
-Sexually suggestive content (e.g., highly revealing images)
-Images exposing personal information (card numbers, addresses, etc.)
-Other content that violates AI safety standards
Please remove the image and try again. If the same problem recurs, contact customer support. (vaetki-commerce@ncsoft.com)
*This measure is in place to protect portrait rights and comply with AI content generation guidelines.
Previous
Banner creation guideNext
AI Studio guide