Service guide
Banner creation guide
A guide to the full flow of creating a banner from a new project, then editing and exporting it.
Banner creation follows the steps below. Using the New project button in the product list, enter the information, select banner options, and upload images, and AI generates the banner. The generated banner can be edited on the canvas.

1.1.Creating a banner – New project
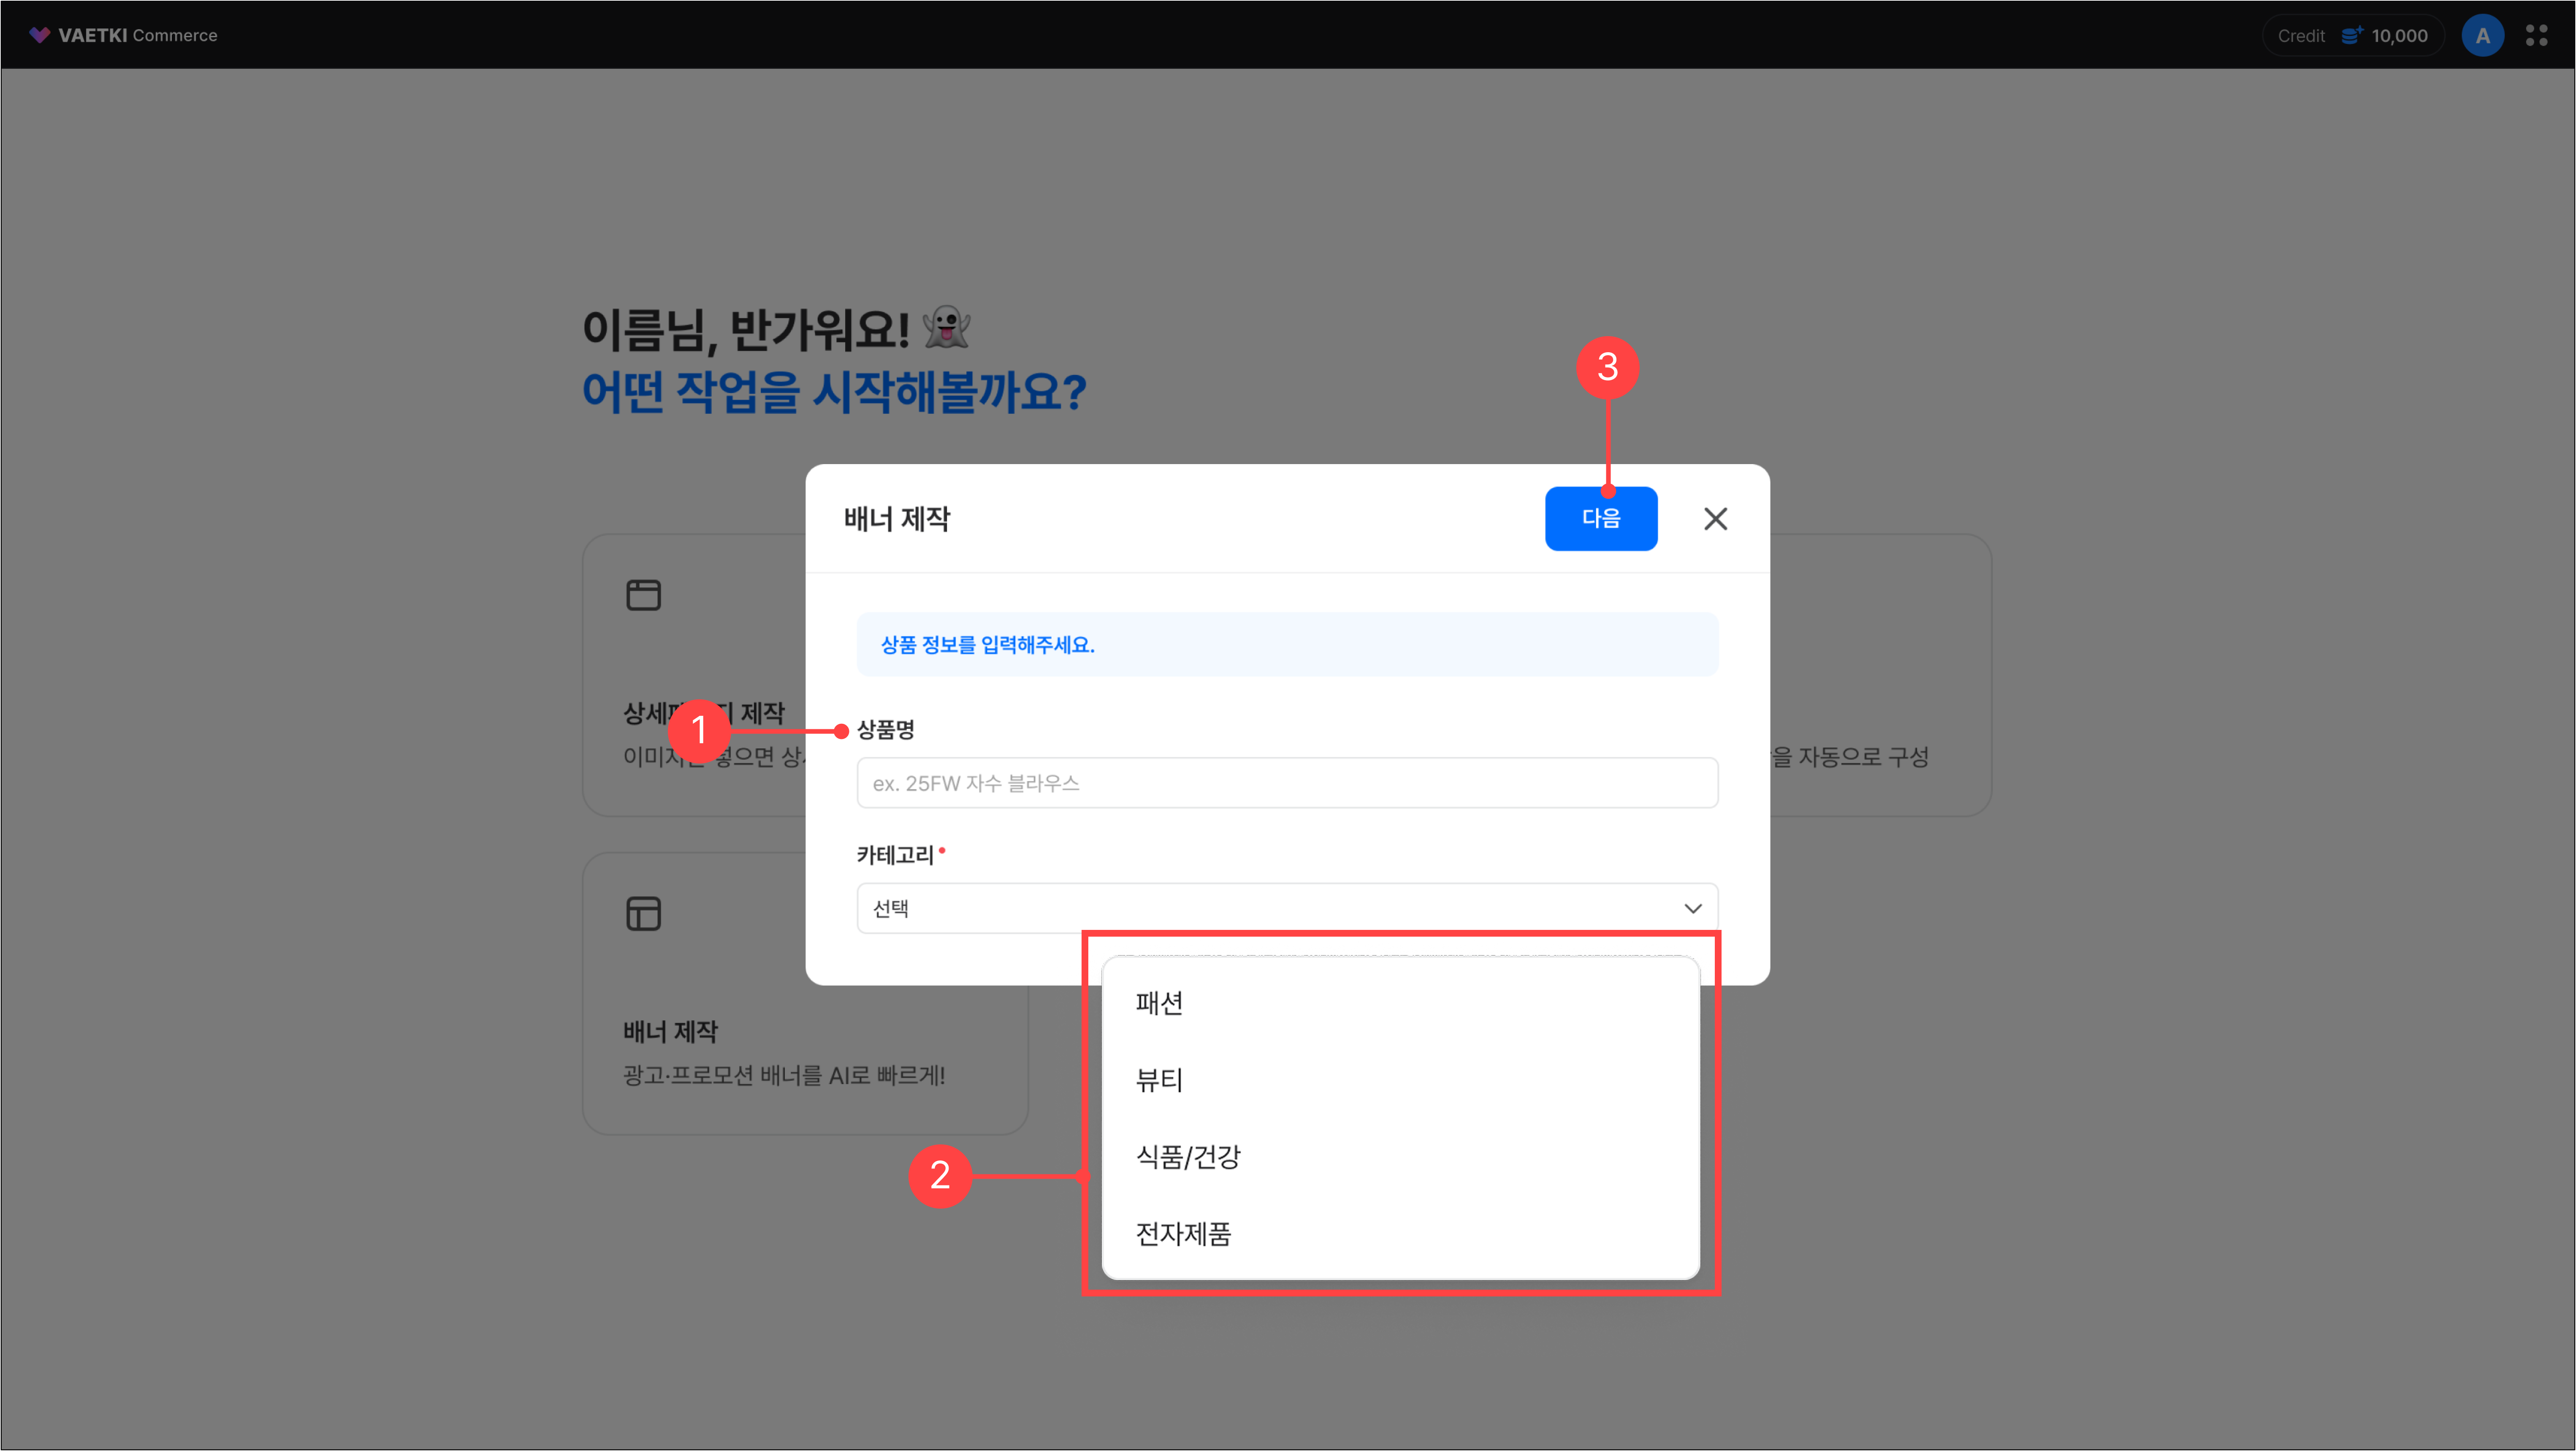
1.Enter the product name.
2.Select the product category. You can choose from four top-level categories. If you select Fashion as the top-level category, you must additionally enter the category, subcategory, gender, and age.
3.Once the Next button is enabled, you move to the screen where you can select the options needed for banner creation.
*Product name character limit: 100 characters
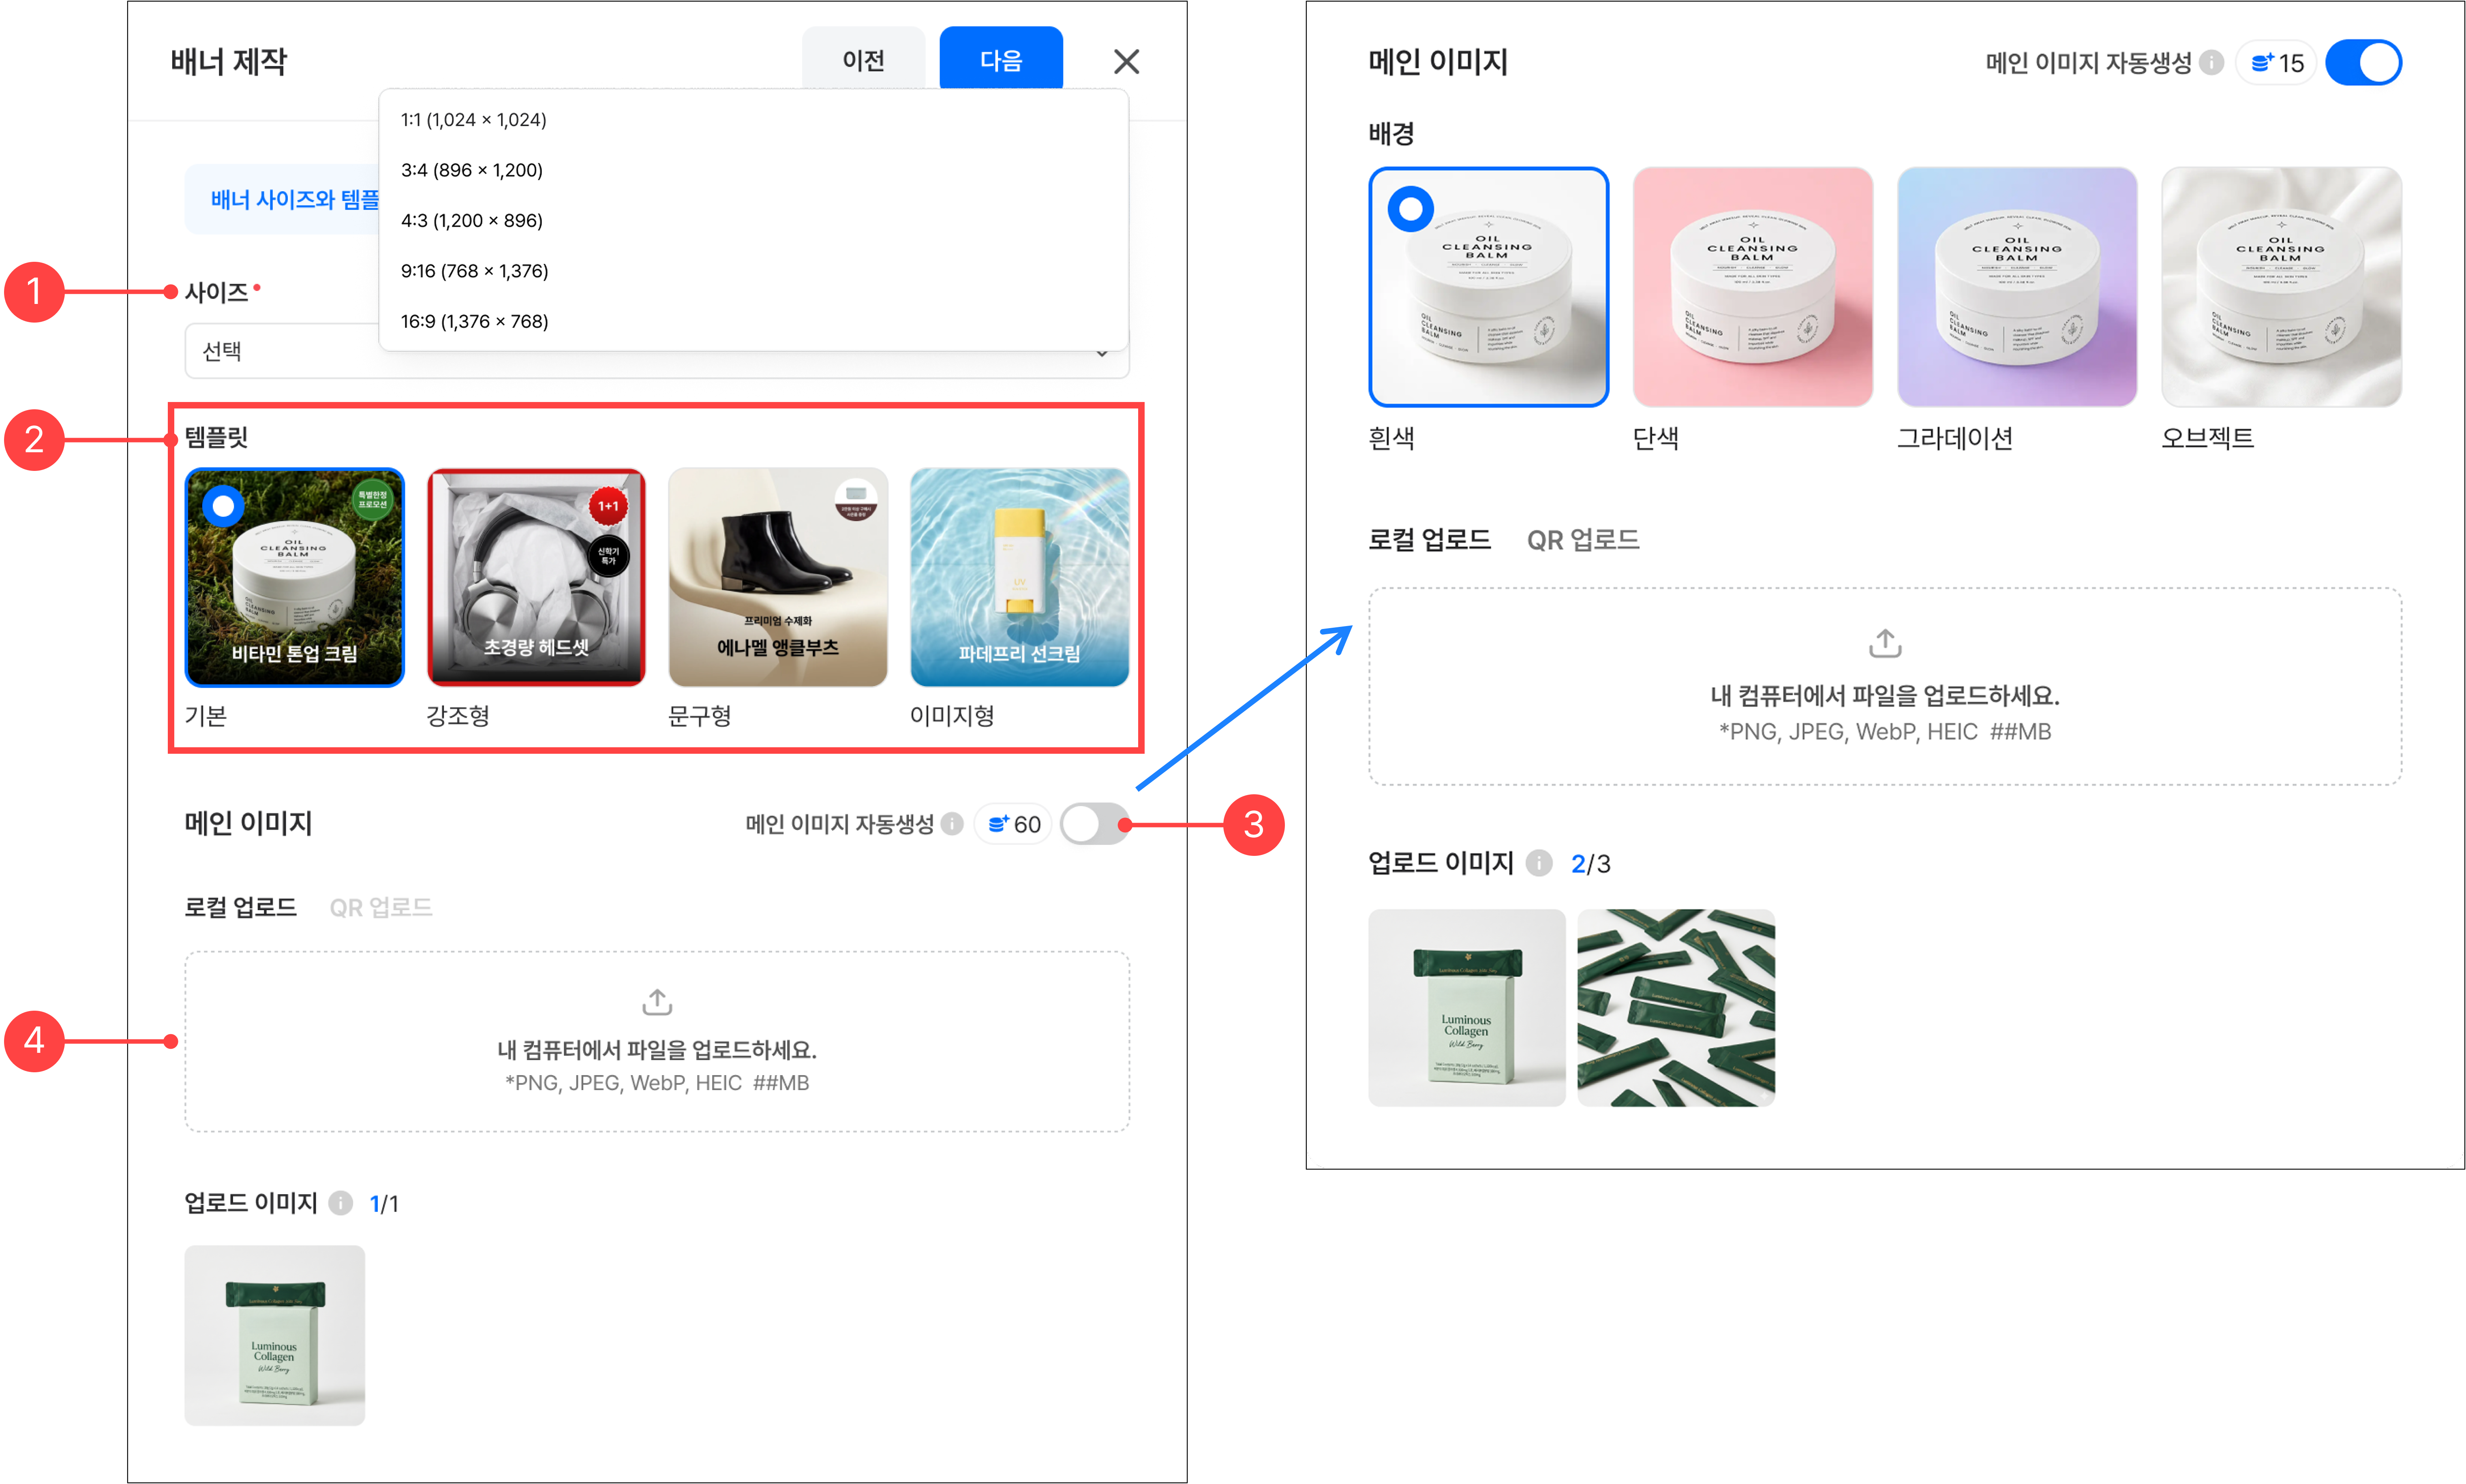
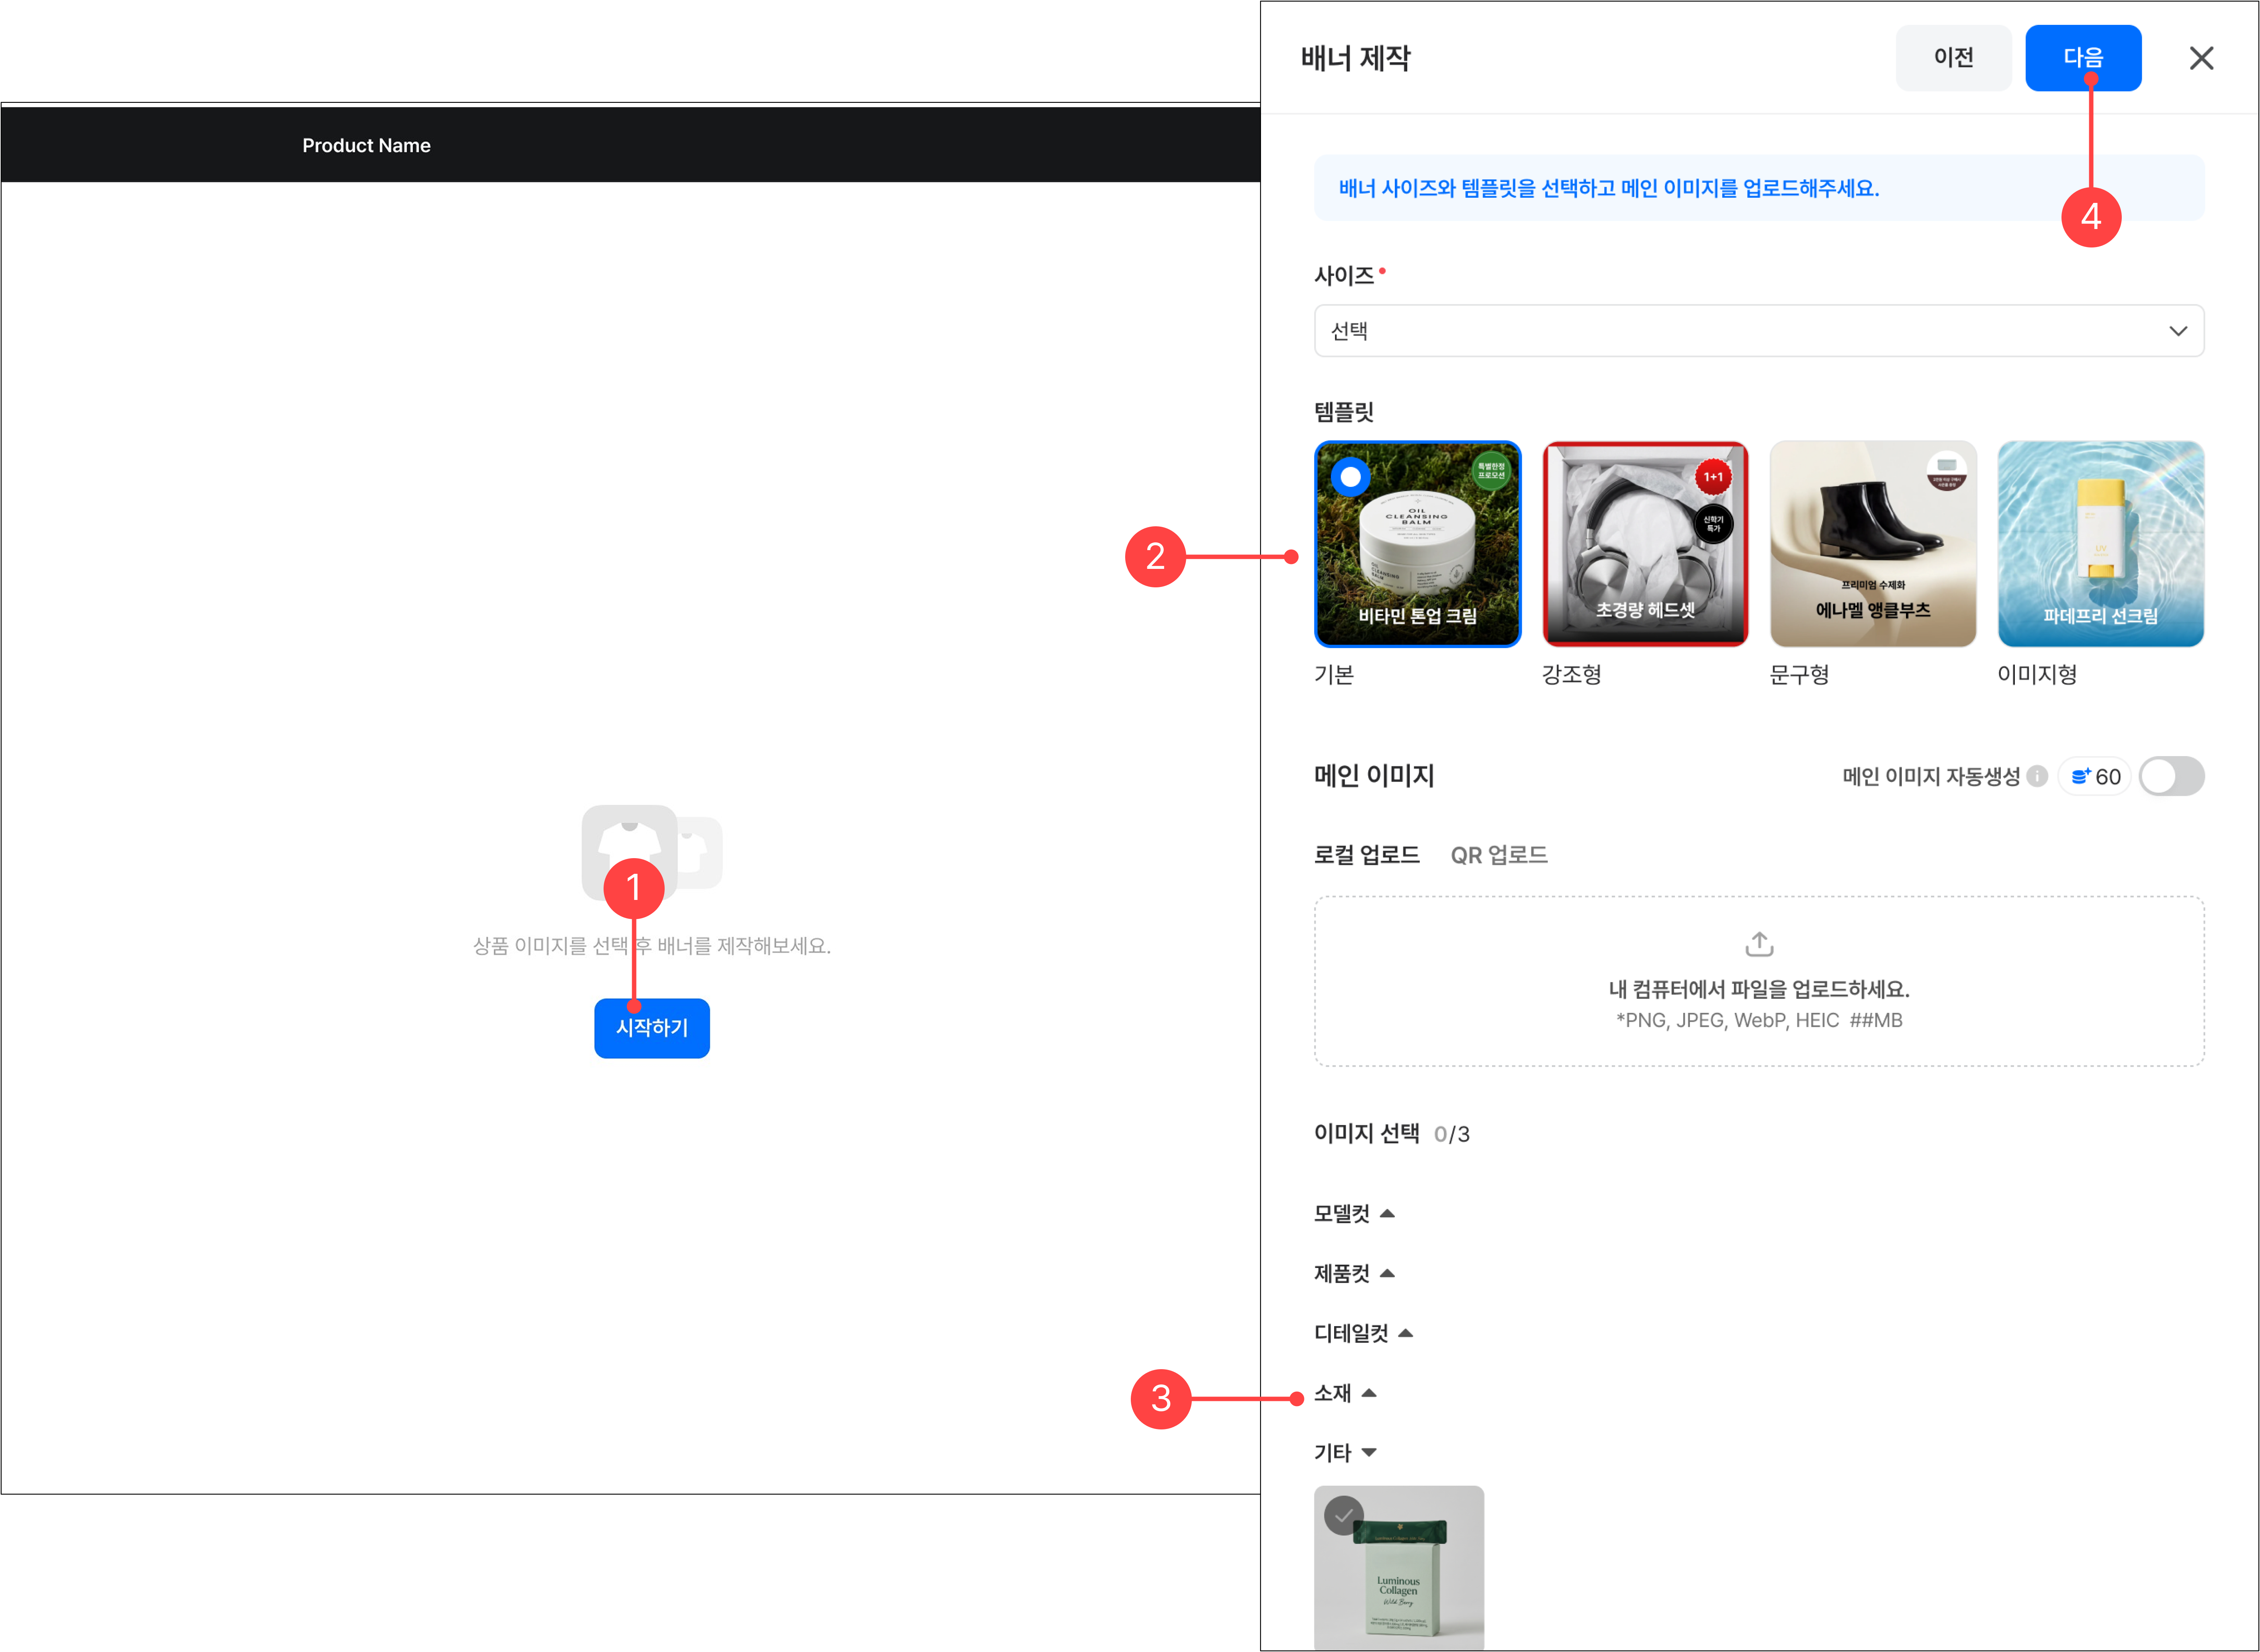
1.Select the banner size. A total of five banner sizes are available.
2.Select a banner template. Four templates are available, and each template differs in text length and layout.
3.You can use the automatic main image generation feature. It automatically generates the banner’s main image based on your uploaded product images, and you can also choose a background style. You can upload up to three images.
4.After uploading images, click the 'Next' button to move to the text and sticker input step.
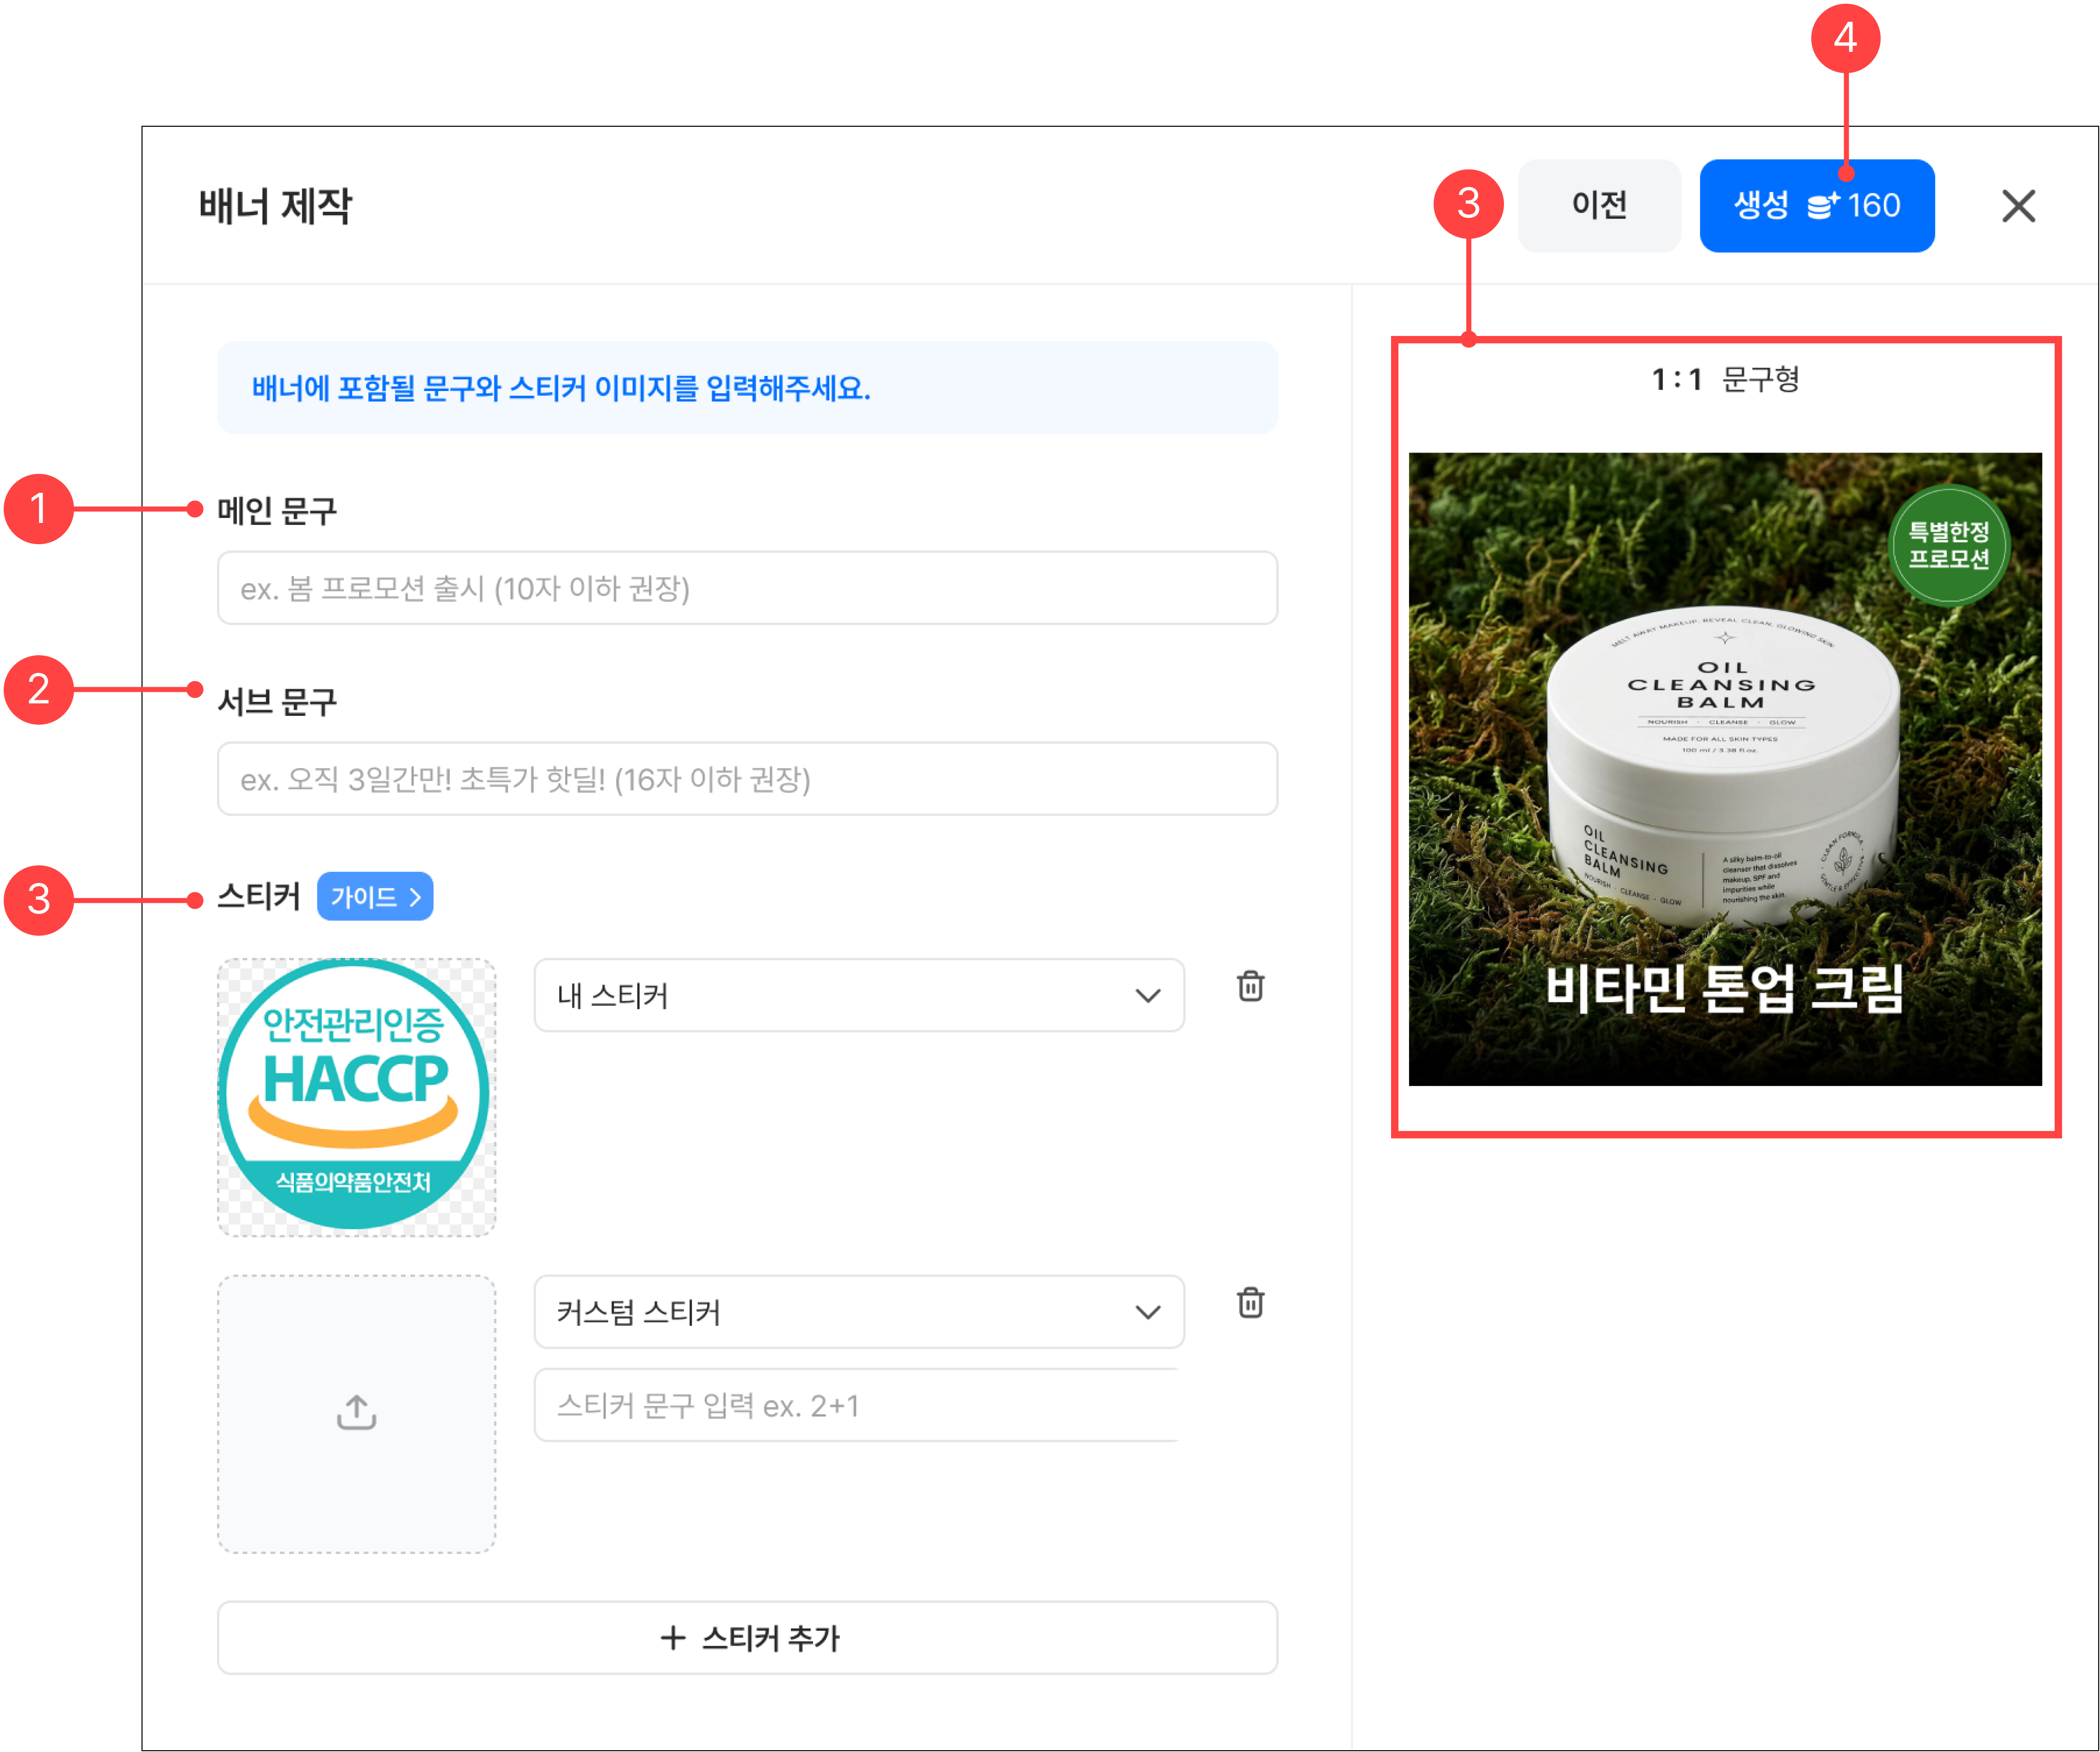
1.Enter the main text to include in the banner. The recommended character count differs per template, so check it before entering text.
2.Enter the subtext. Subtext is only available in some templates.
3.You can add stickers to the banner.
-My sticker: Upload your own stickers directly.
-Custom sticker: Create a sticker by entering your desired background image or text.
-Stickers are not required; you can create a banner without adding them.
4.Once all inputs are complete, the Generate button is enabled, and clicking it starts banner generation.
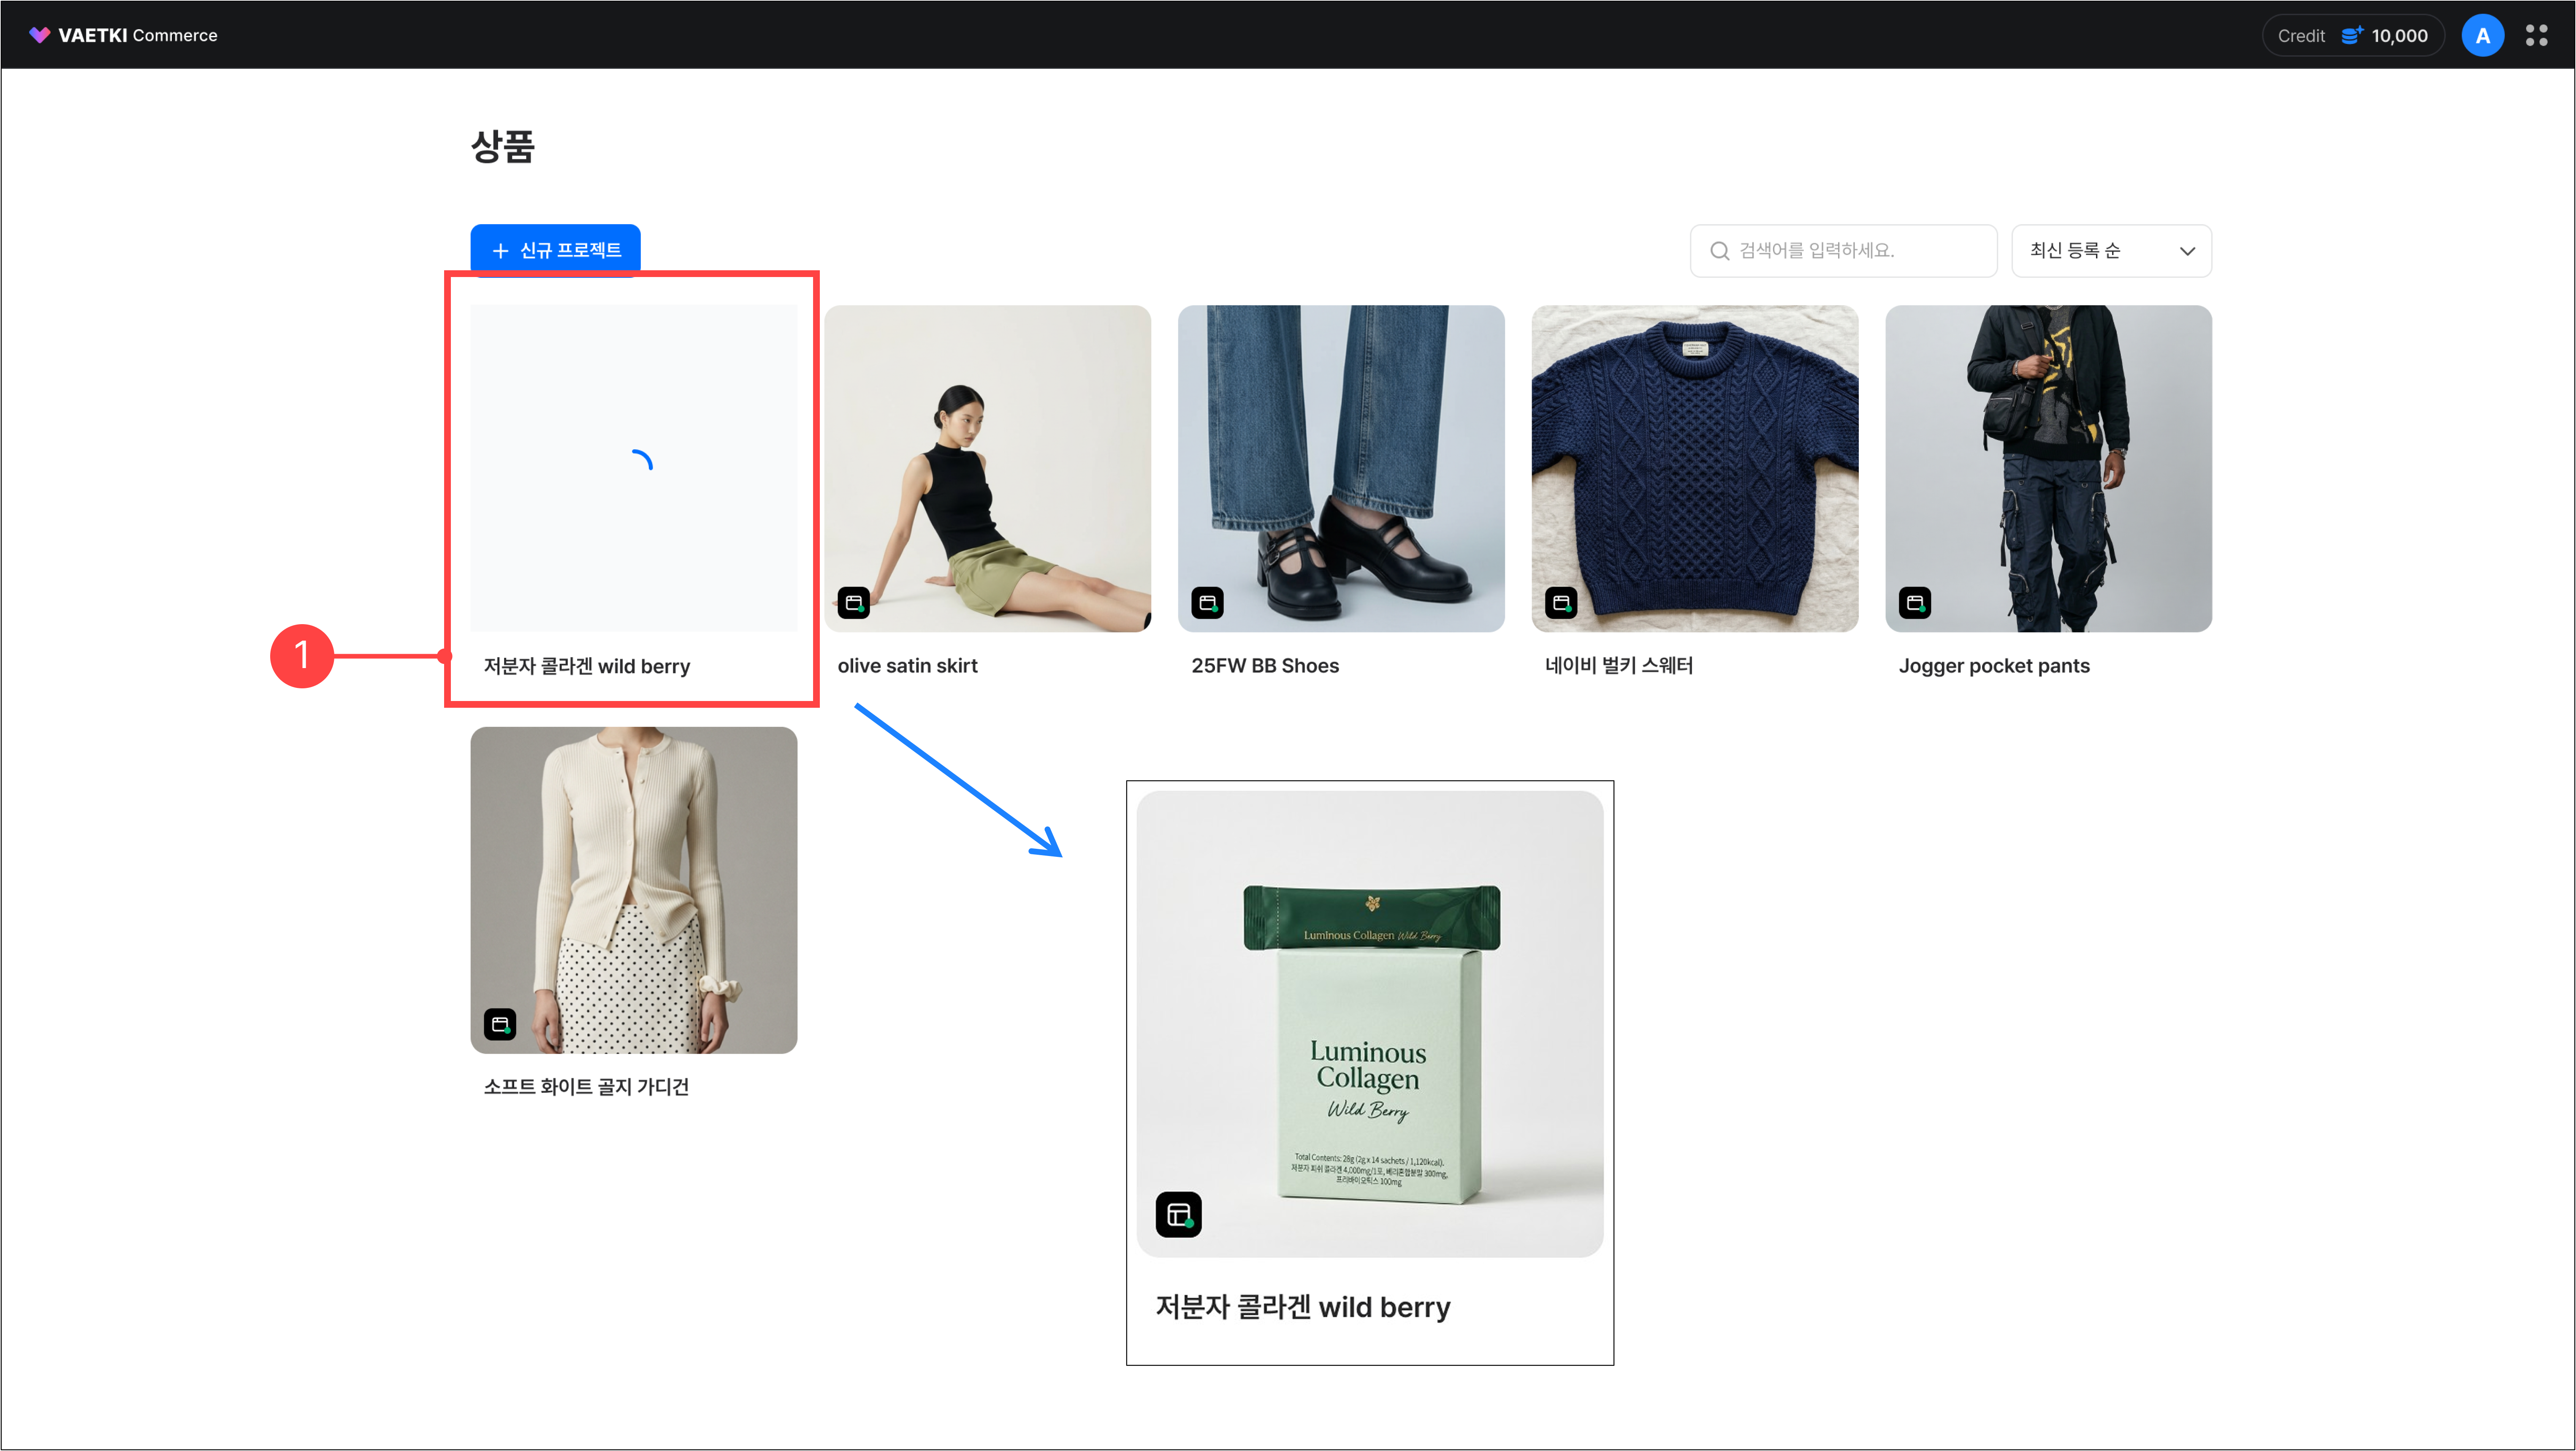
1.You can see the product being generated in the product list.
2.When banner generation is complete, the banner indicator turns green.

Sticker guide
1.Stickers fall into two main types.
-My sticker: Applied to a square layout exactly as the uploaded image.
-Custom sticker: Applied to a sticker template depending on whether text and an image are entered.
2.You can add up to three stickers, placed sequentially starting from the top right of the banner.
3.Custom stickers use different templates depending on whether an image is entered and how many characters are entered.
-Neither the image nor the text is required, but if neither is entered, the sticker is not displayed.
4.After the banner is generated, you can edit applied stickers in the editing screen and add new stickers via the Sticker presets button.
1.2.Creating a banner – Existing product
1.From the left menu of a previously created product, go to the banner creation menu and click the 'Start' button to begin.
2.In the banner creation menu, select options and choose previously uploaded images.
3.Uploaded images are categorized by shot type. If you need additional images, upload them in the asset panel.
4.Clicking Next moves you to the text and sticker input step, just like banner creation in a new project.
1.3.Creating a banner – Completion & editing
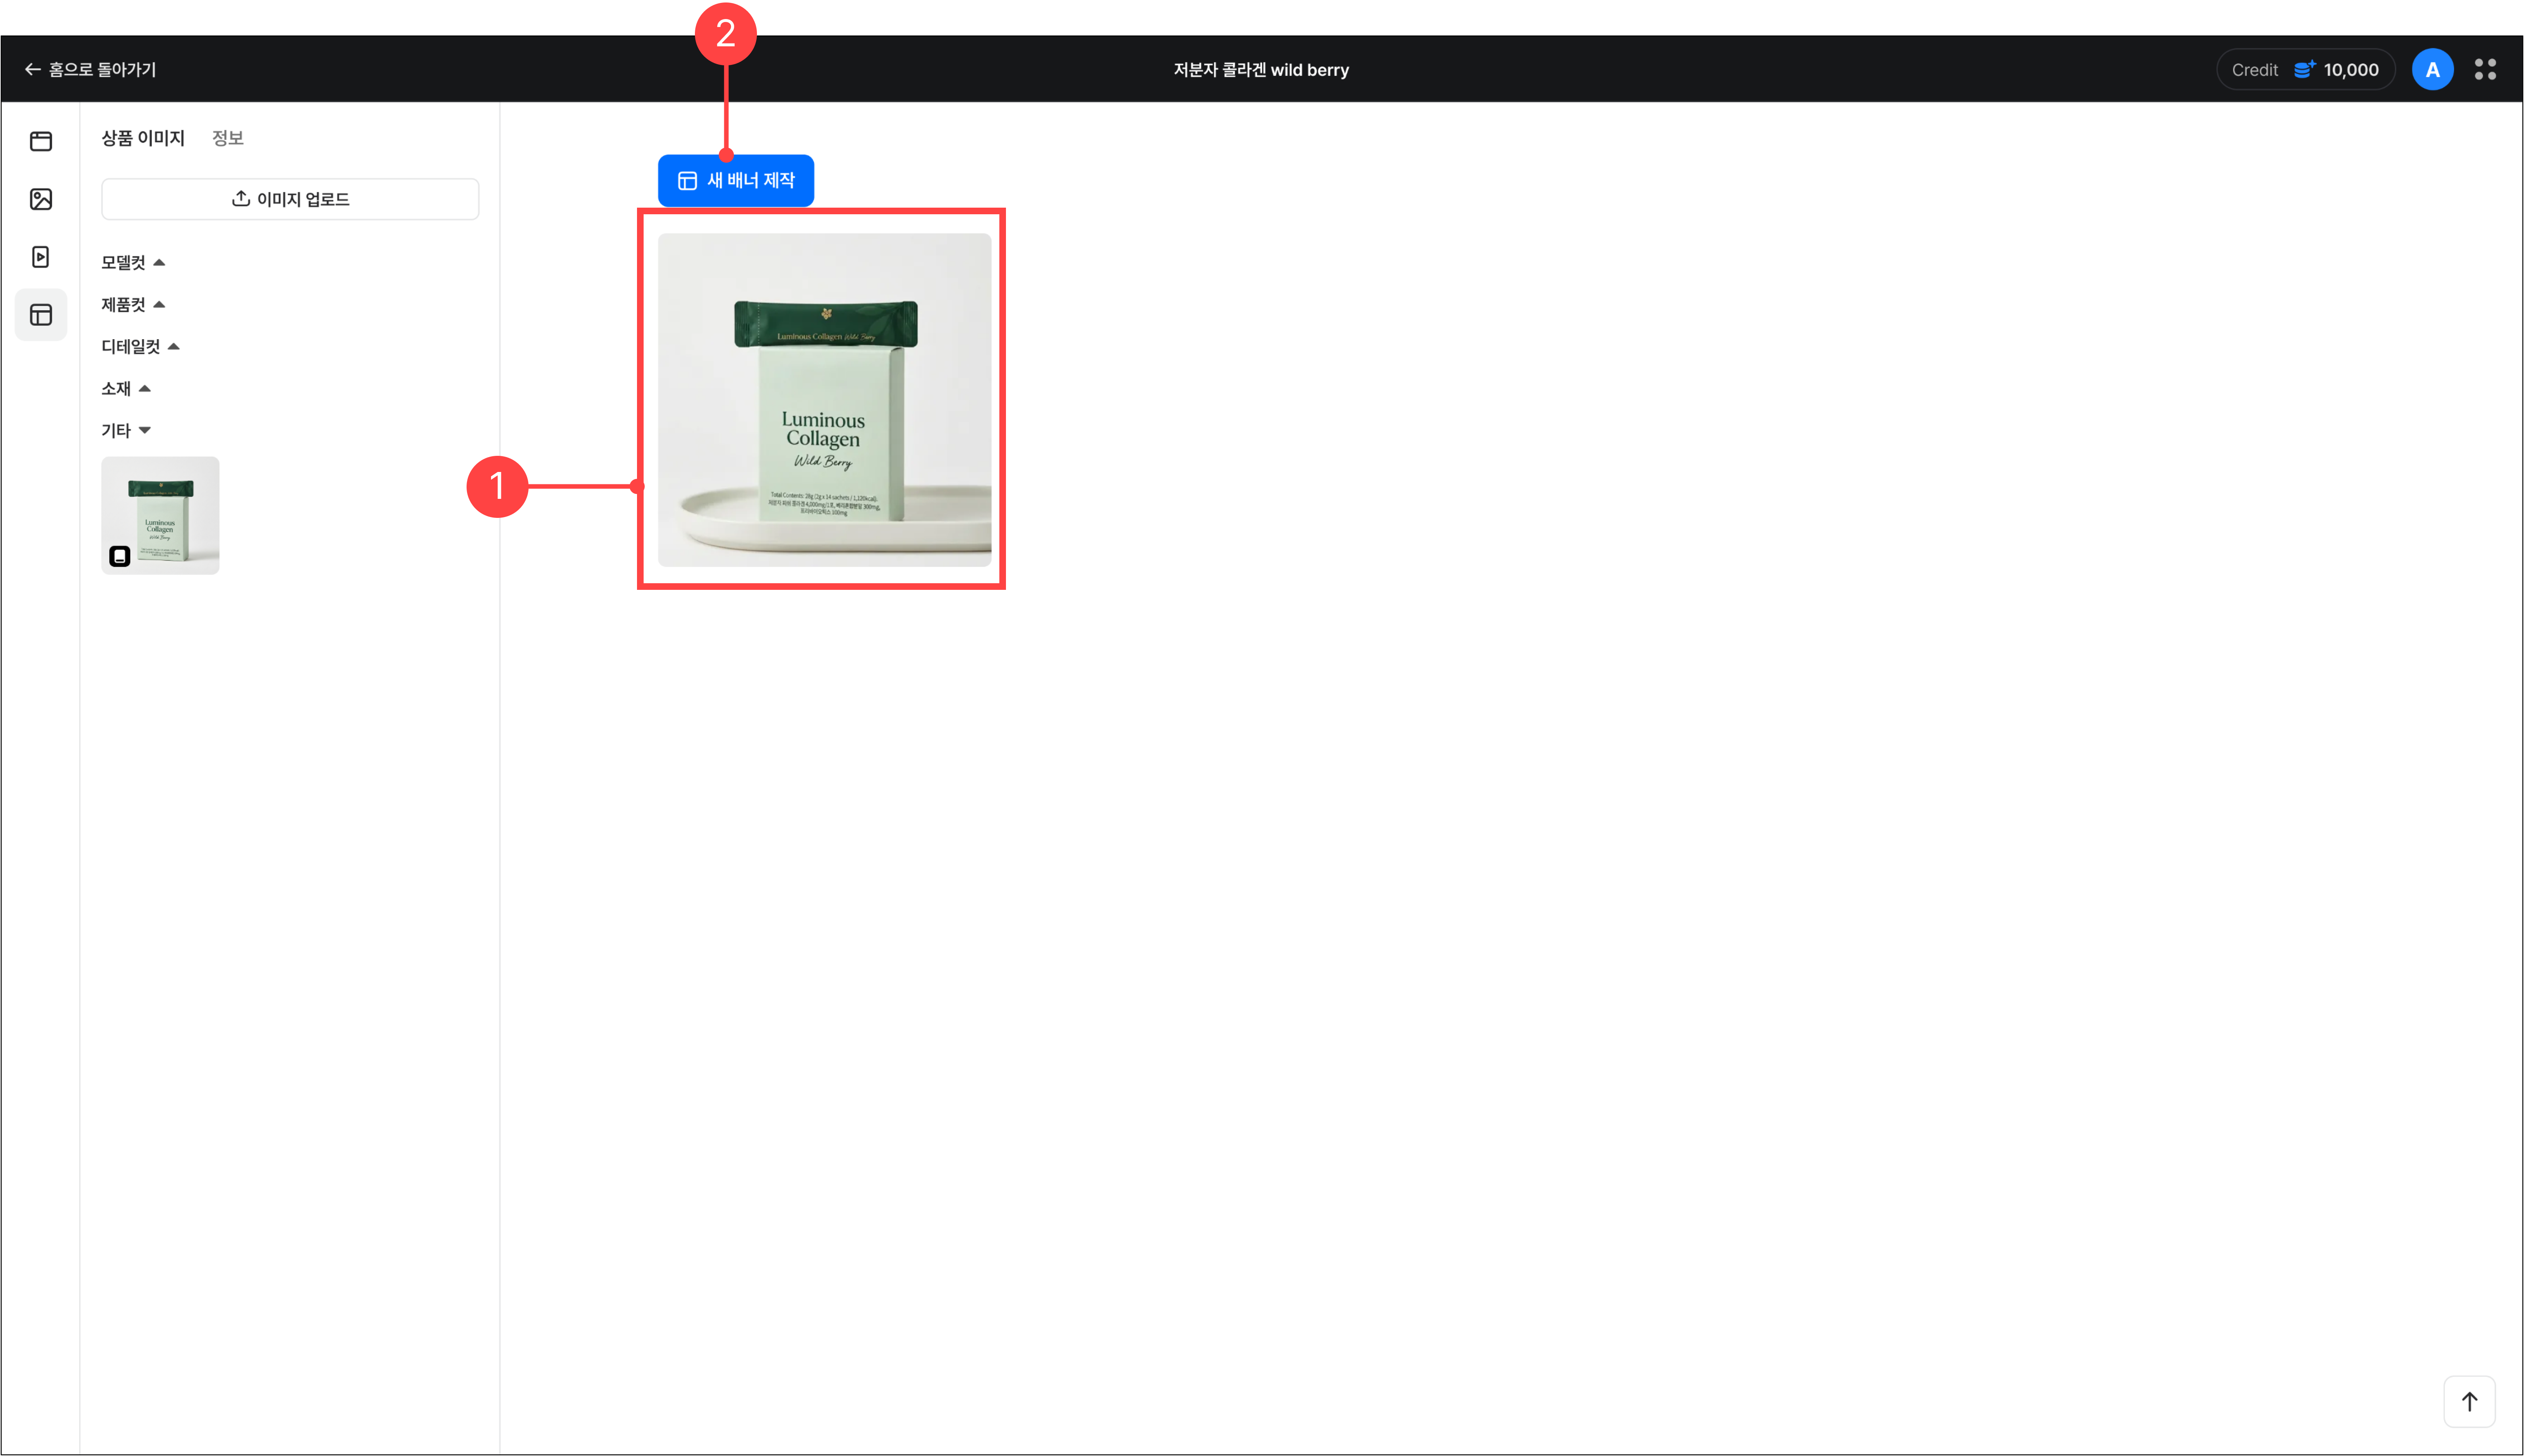
1.Once generation is complete, click the product to go to the banner creation menu, where you can view the generated banner. Clicking the generated banner thumbnail takes you to the editable canvas screen.
2.In the banner creation menu, you can create a new banner from the same product using the Create new banner button.
2.Editing a banner – Basic panel · Sticker presets · Size variation
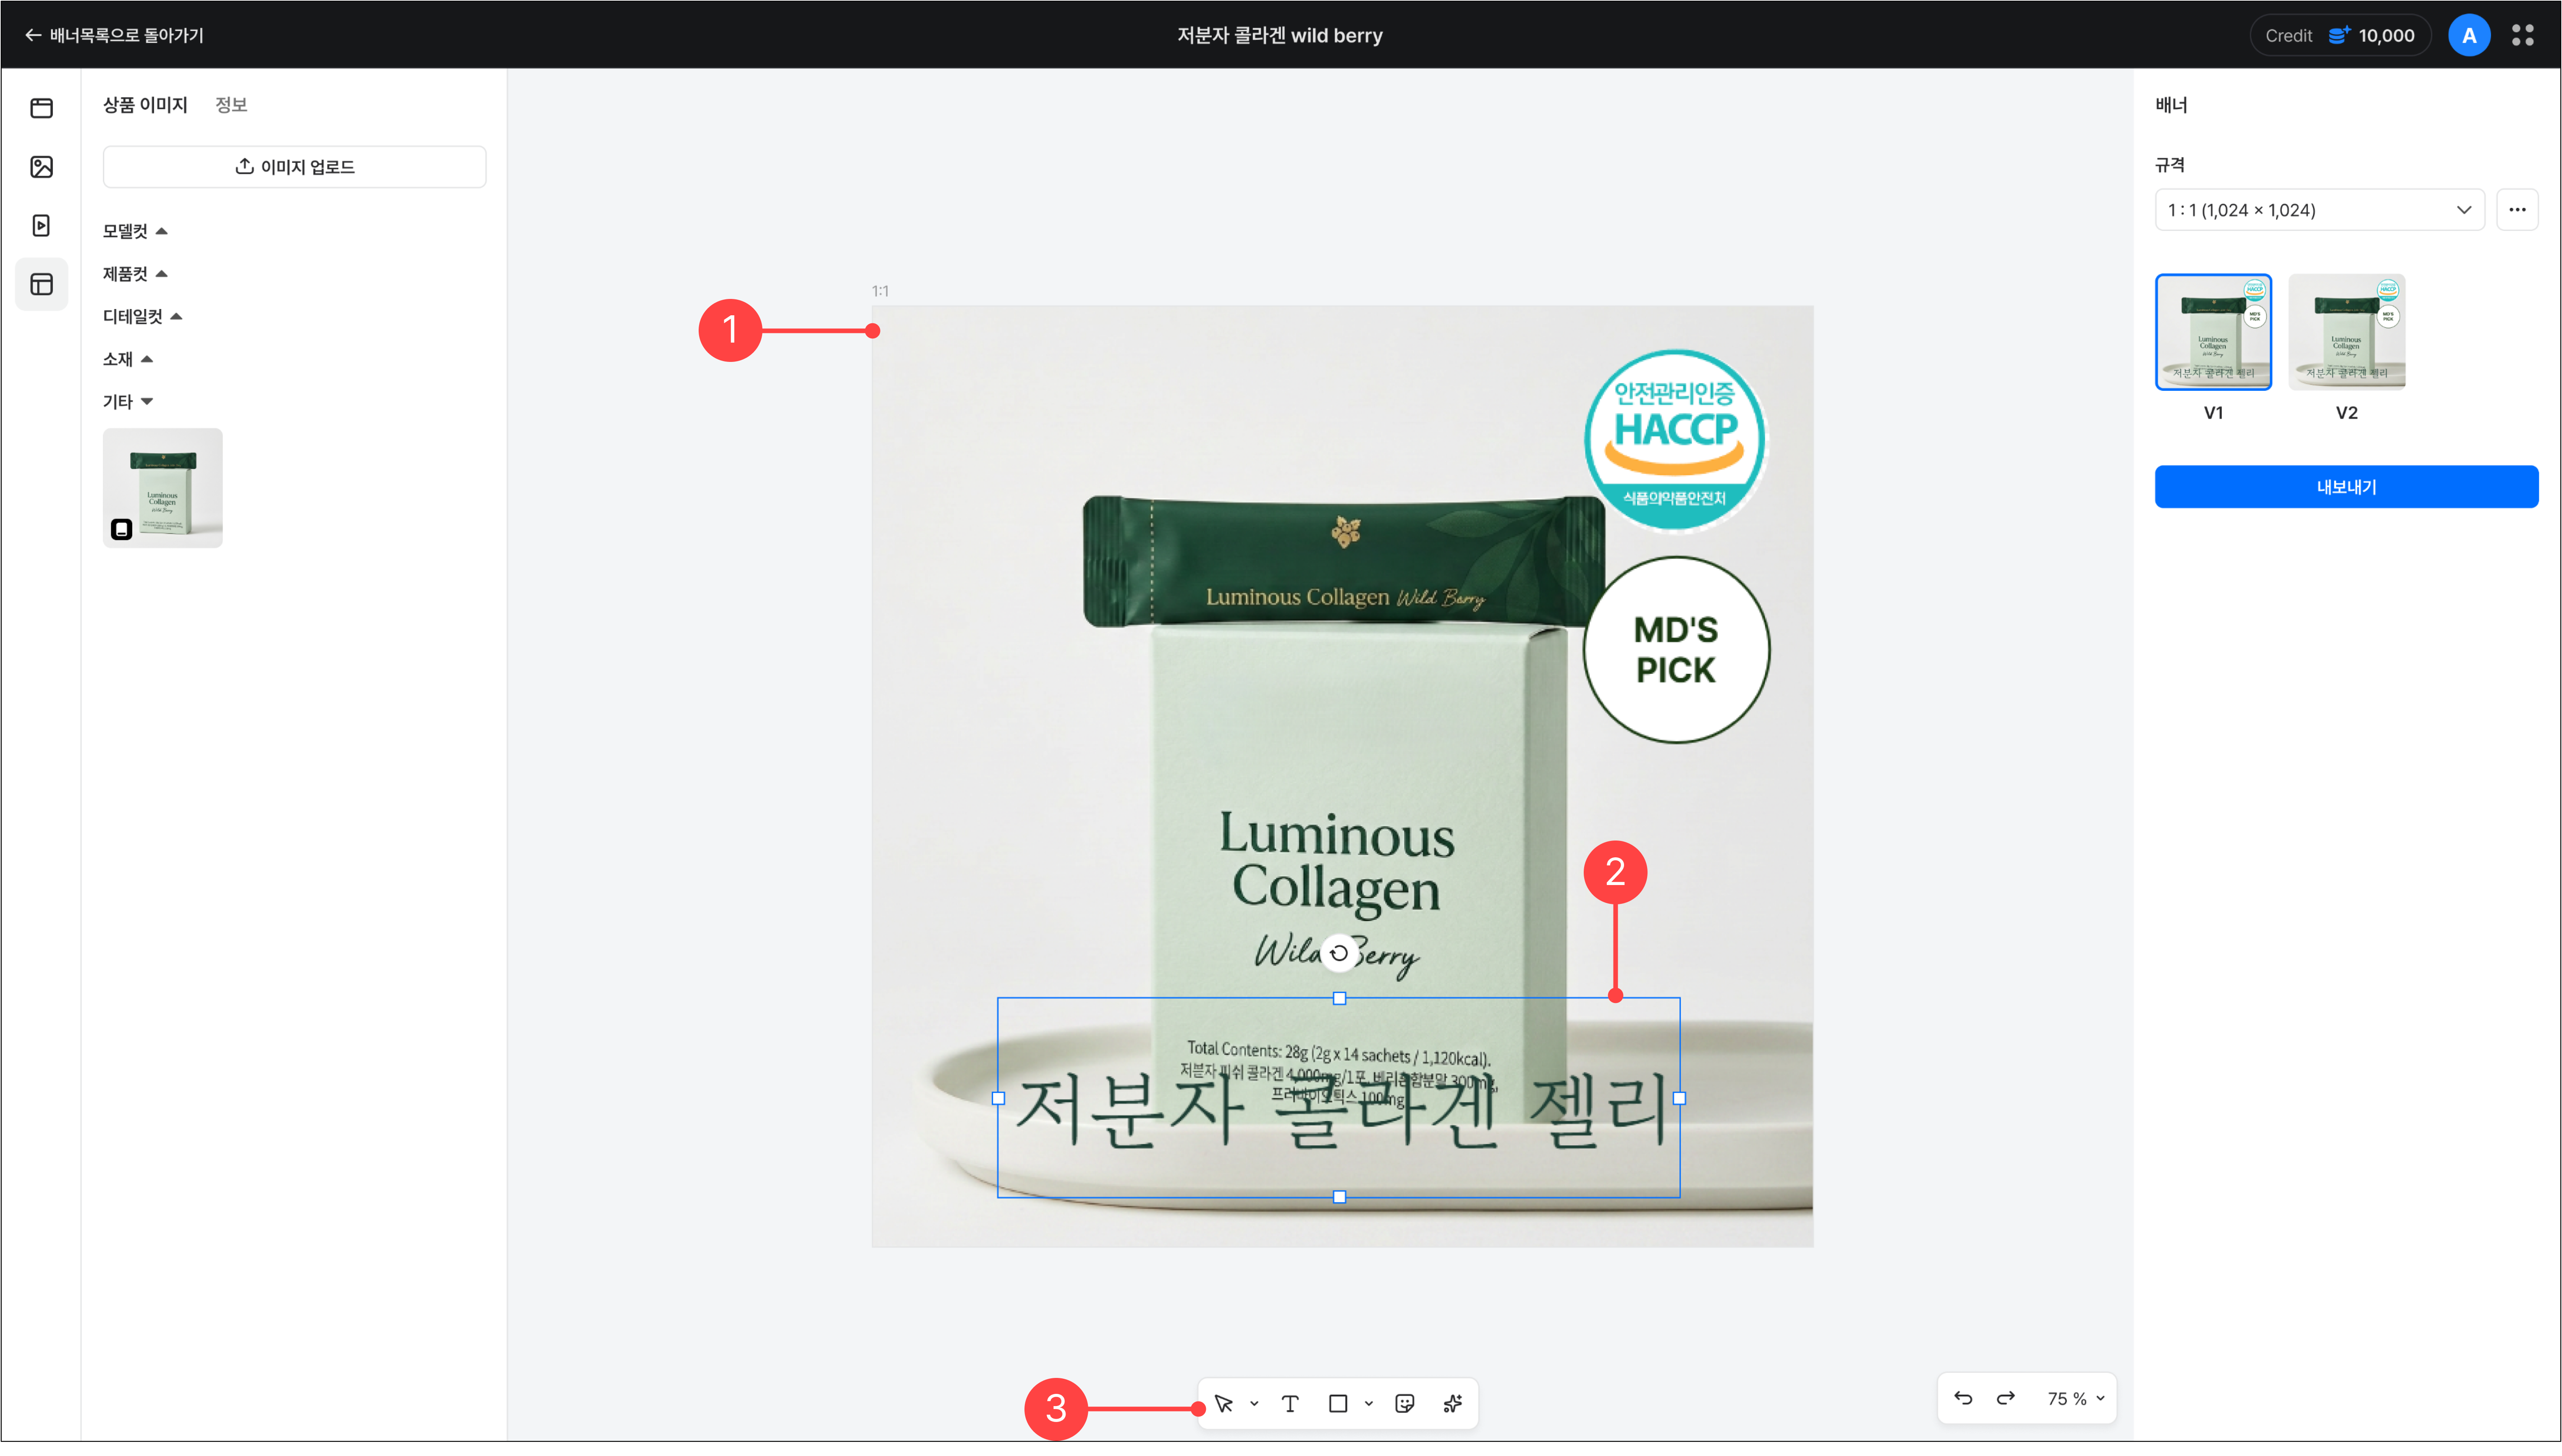
1.Clicking a banner in the banner creation menu takes you to the canvas screen, where you can view the generated banner.
2.Clicking the banner's text or a shape element within a sticker activates editing.
3.You can also add text, image, shape, and sticker elements from the bottom toolbar.
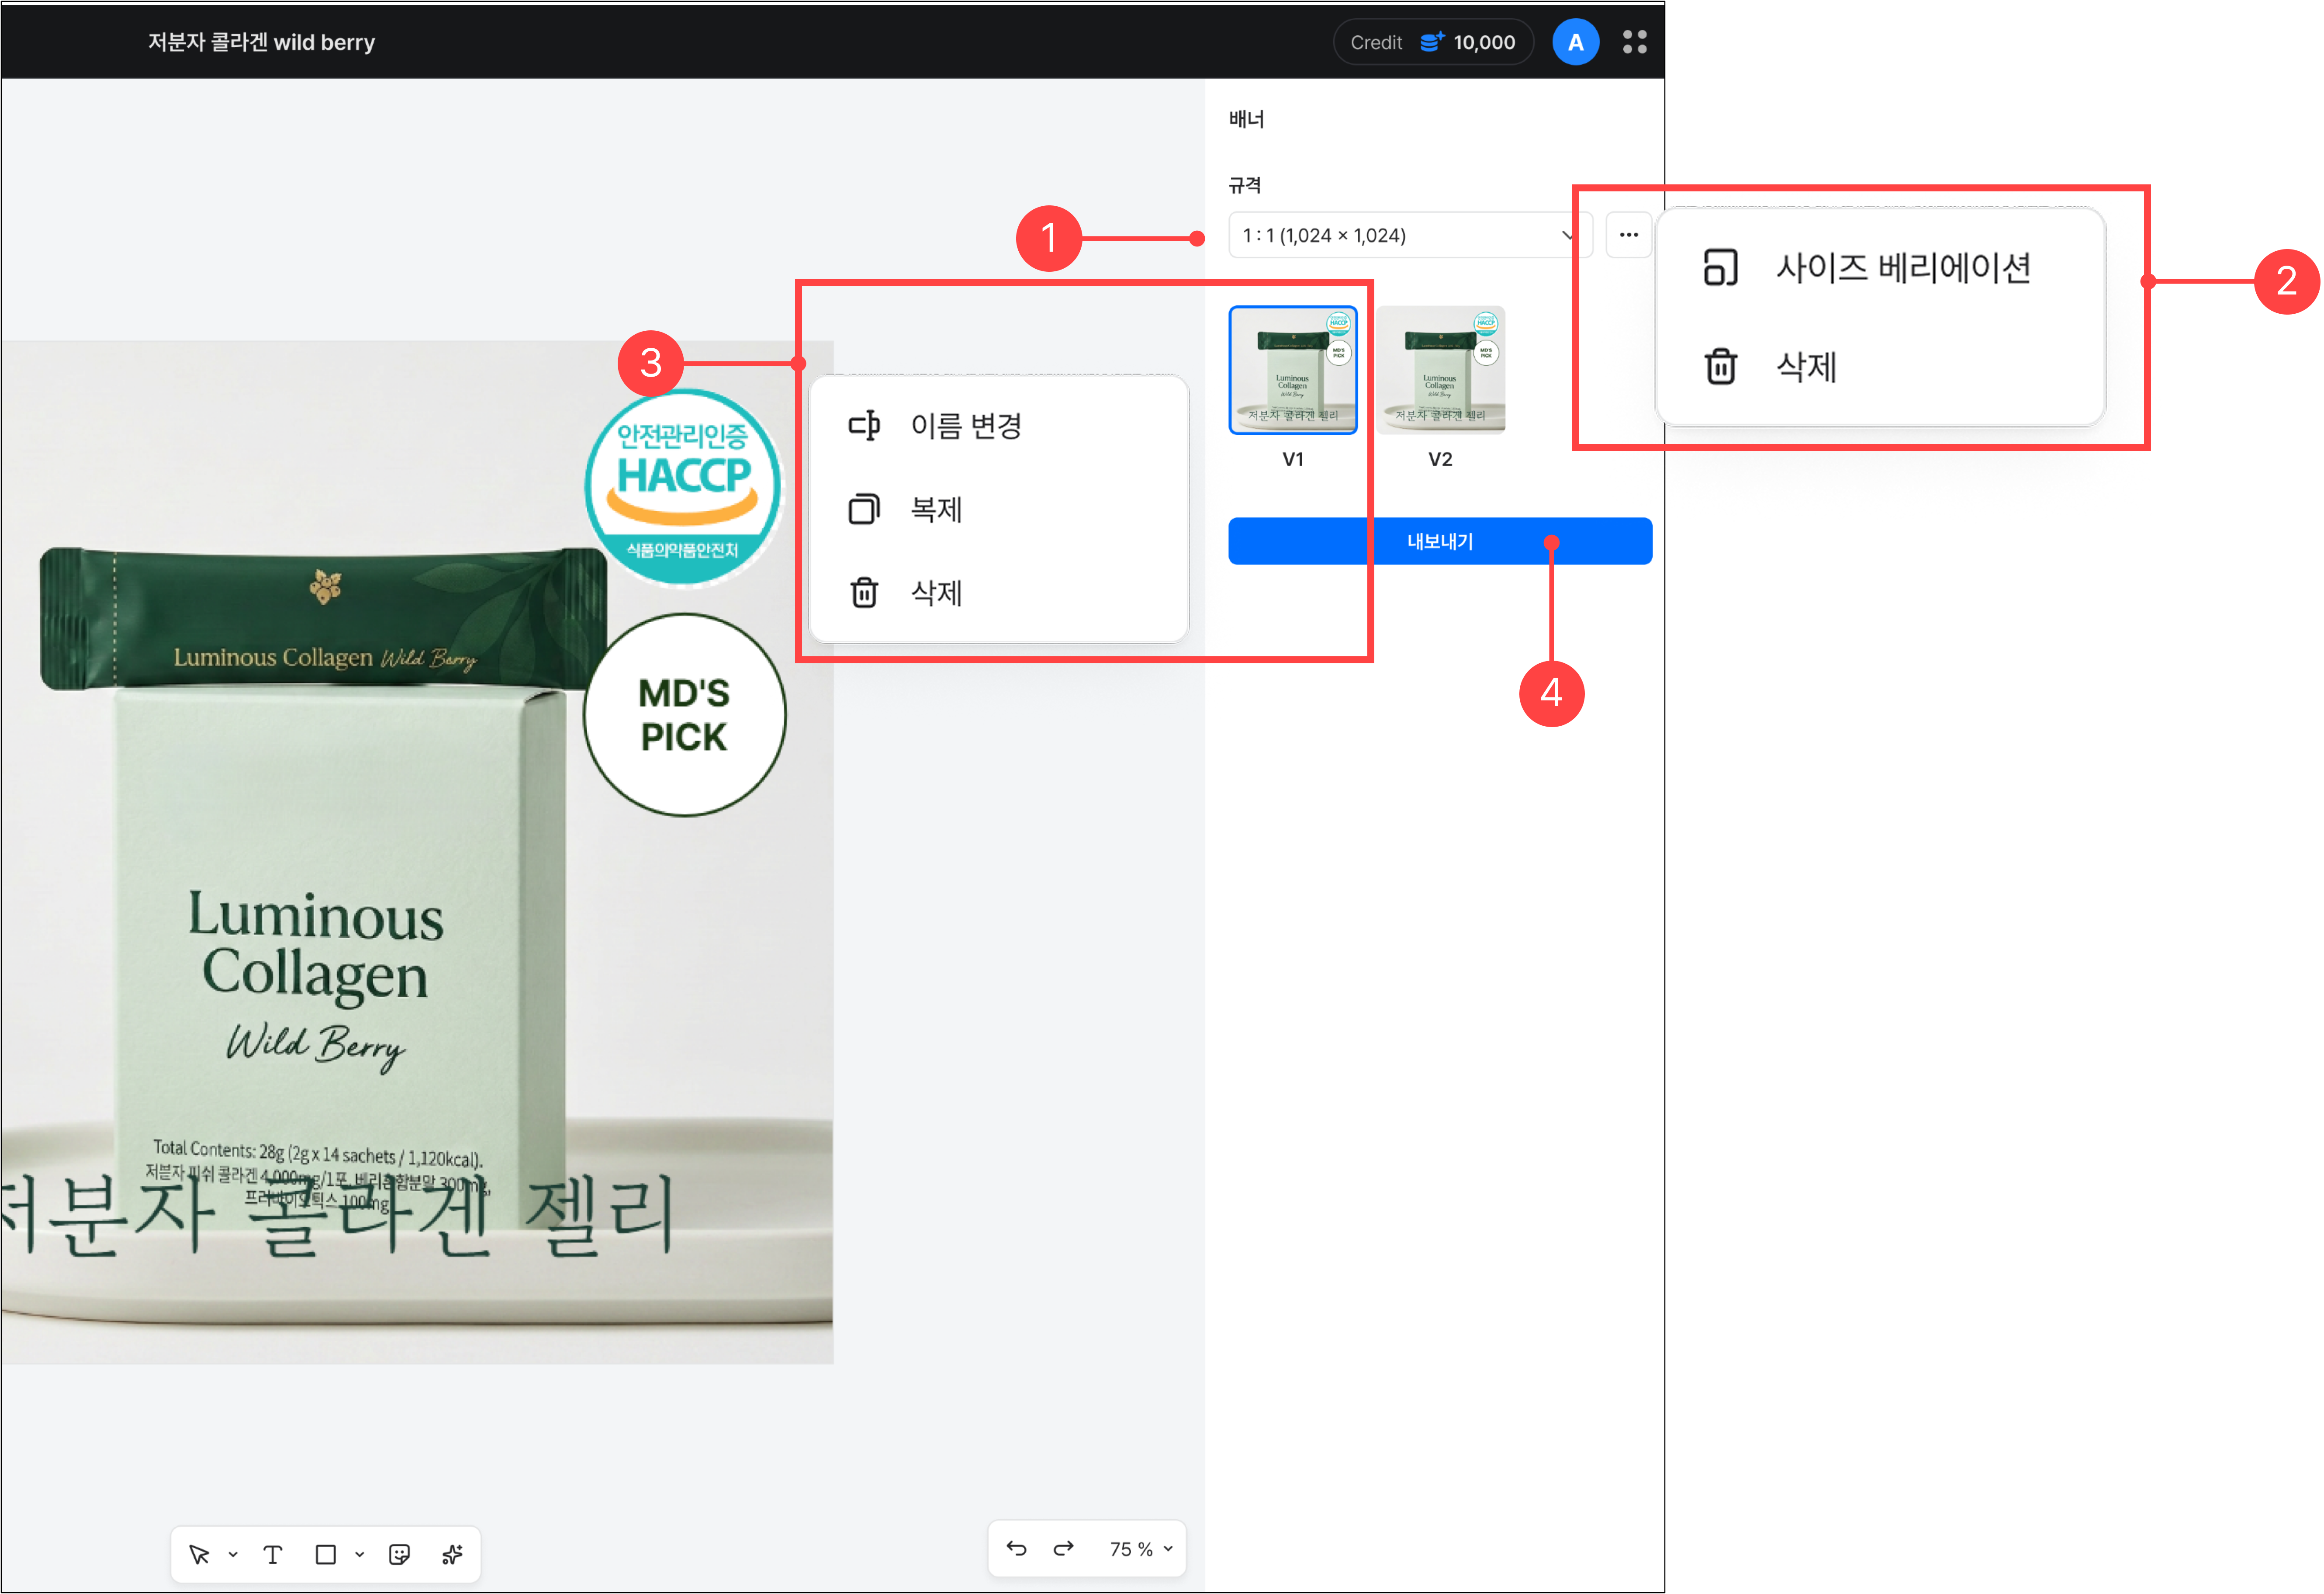
1.You can see the size of the banner you are currently working on and a list of banners created in other sizes.
2.Clicking the More button next to the size list lets you add a size variation or delete the banner of the current size. When you delete a banner, sub-banners duplicated within the same size are also deleted.
3.Right-clicking a banner thumbnail at the bottom of the size list lets you rename, duplicate, or delete it. You can also duplicate the banner of the size you are working on and edit it further. The delete function in this menu applies only to the currently selected banner.
4.Use the Export button to preview and download the edited banner.
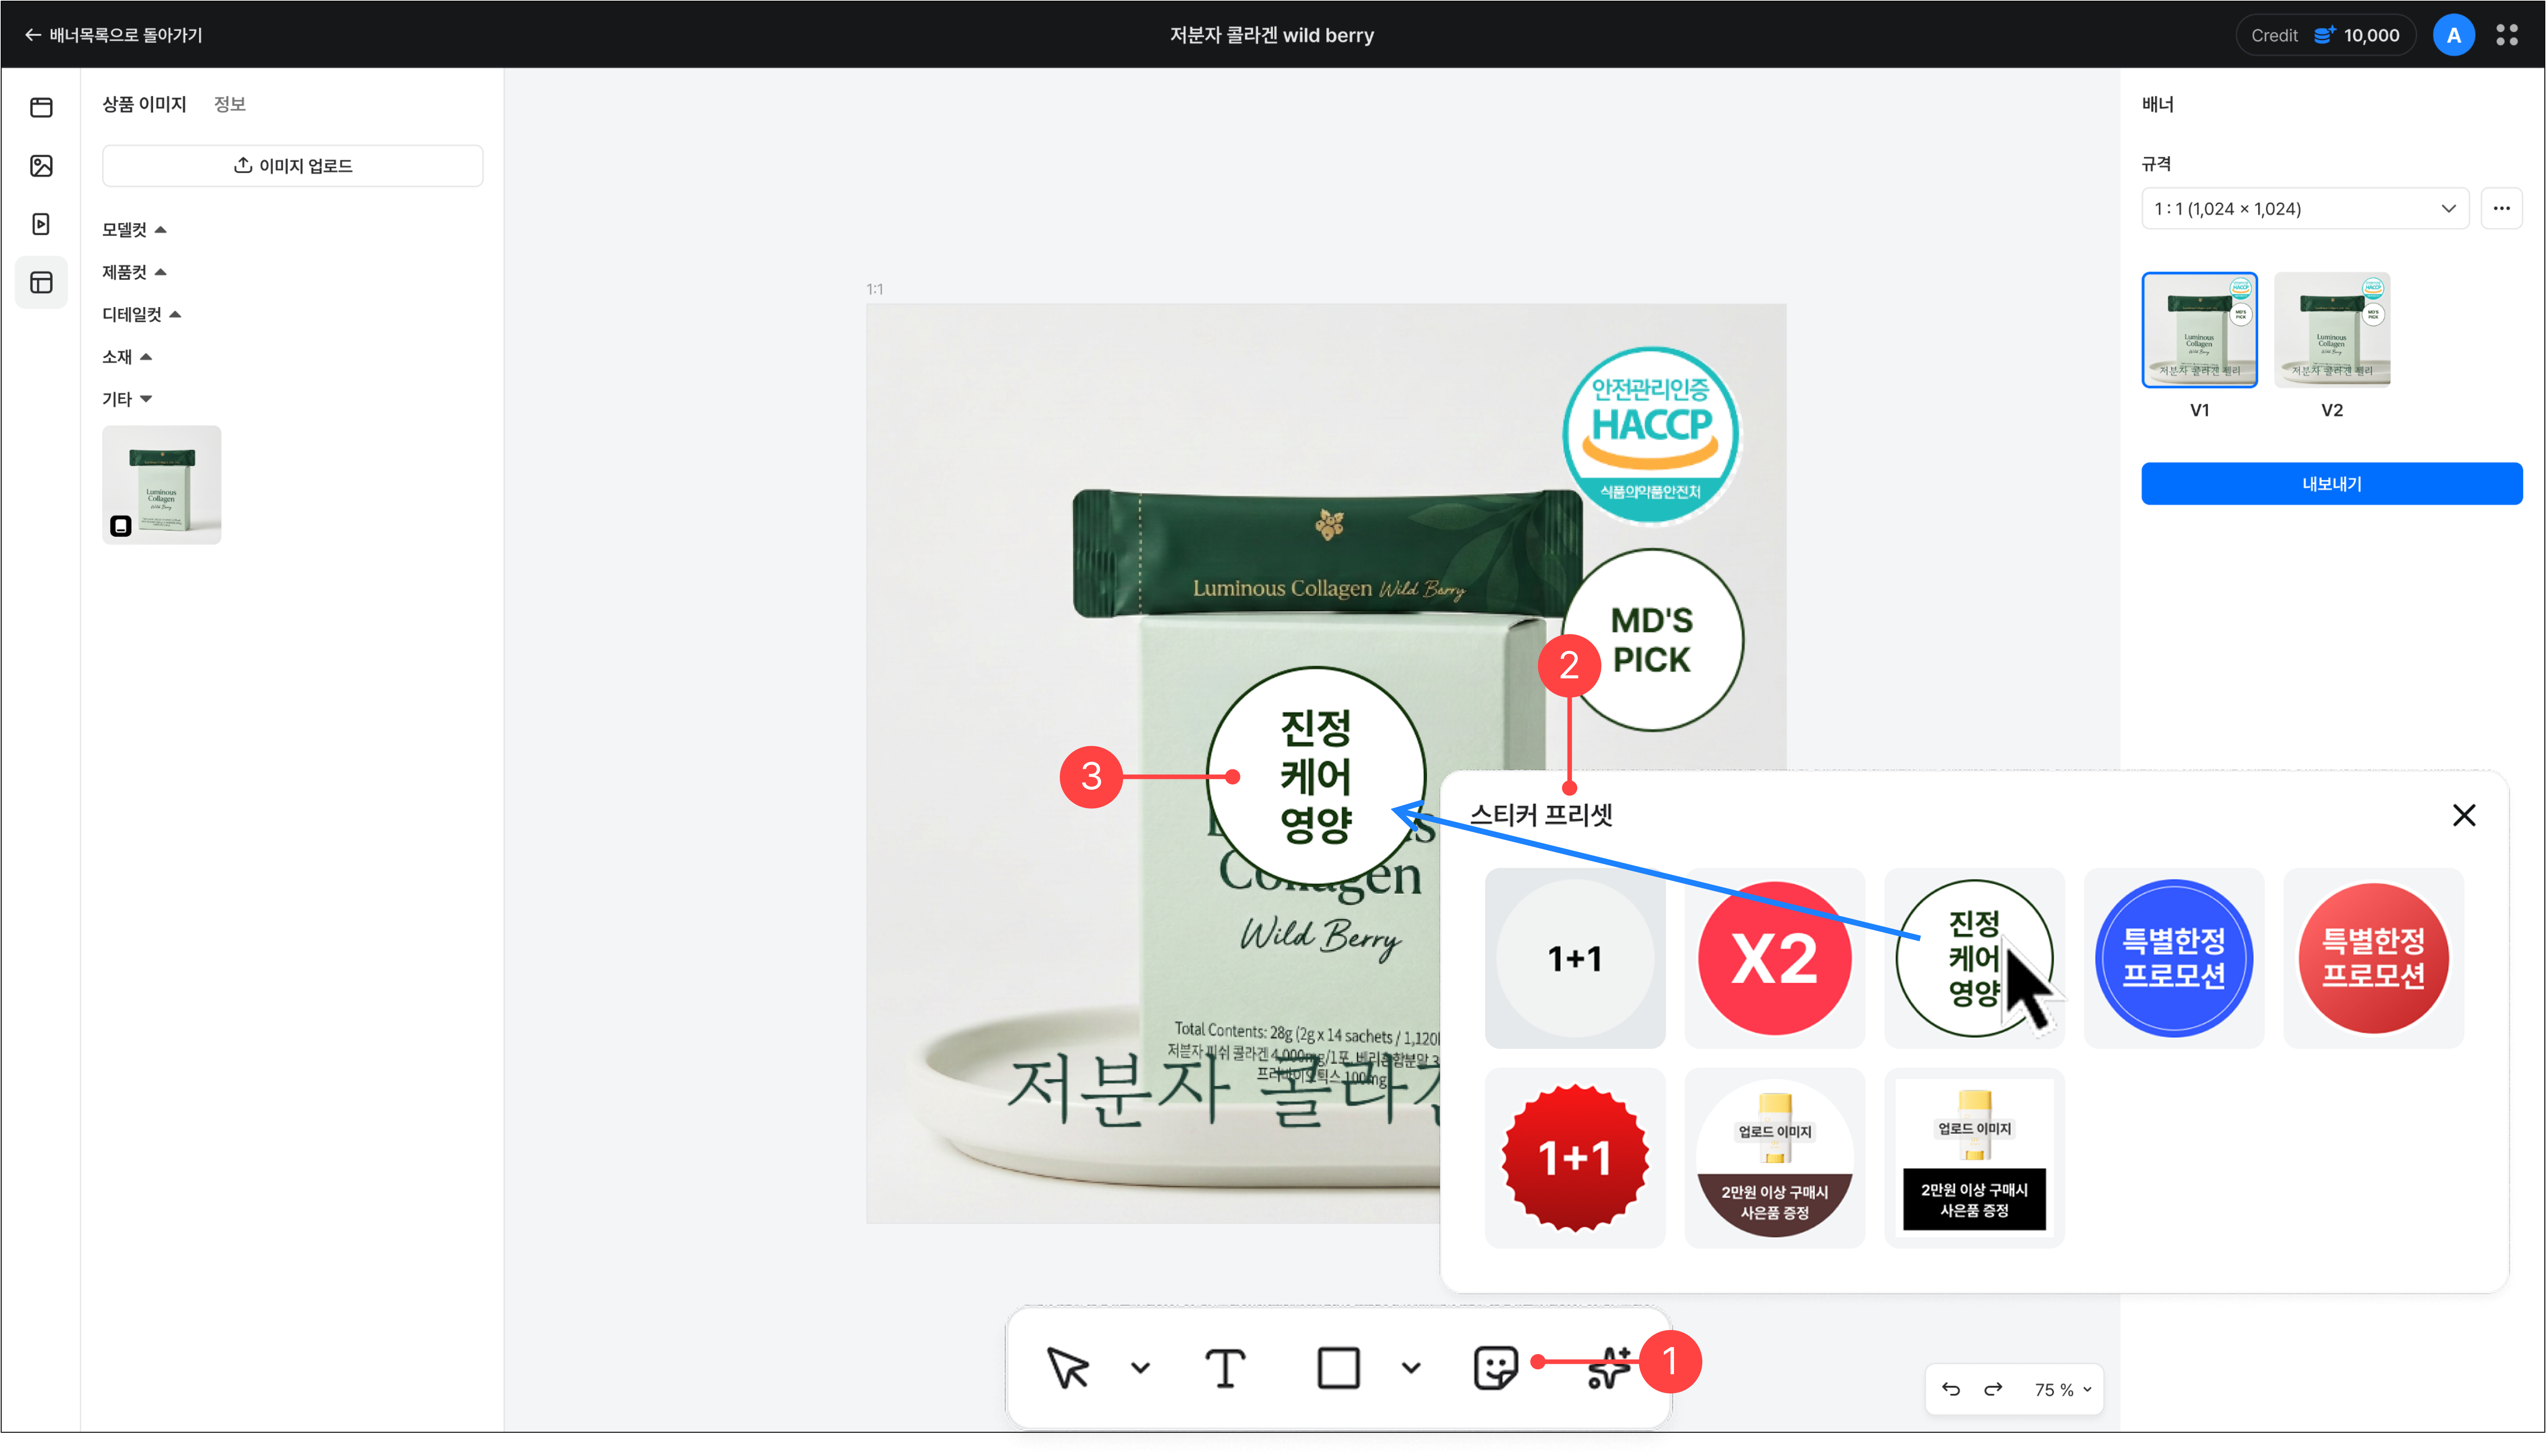
1.Click the Sticker presets button in the canvas's bottom toolbar.
2.In the Sticker presets screen, you can select a pre-made sticker.
3.The selected sticker is automatically placed on the banner, and you can edit its position, size, and more.
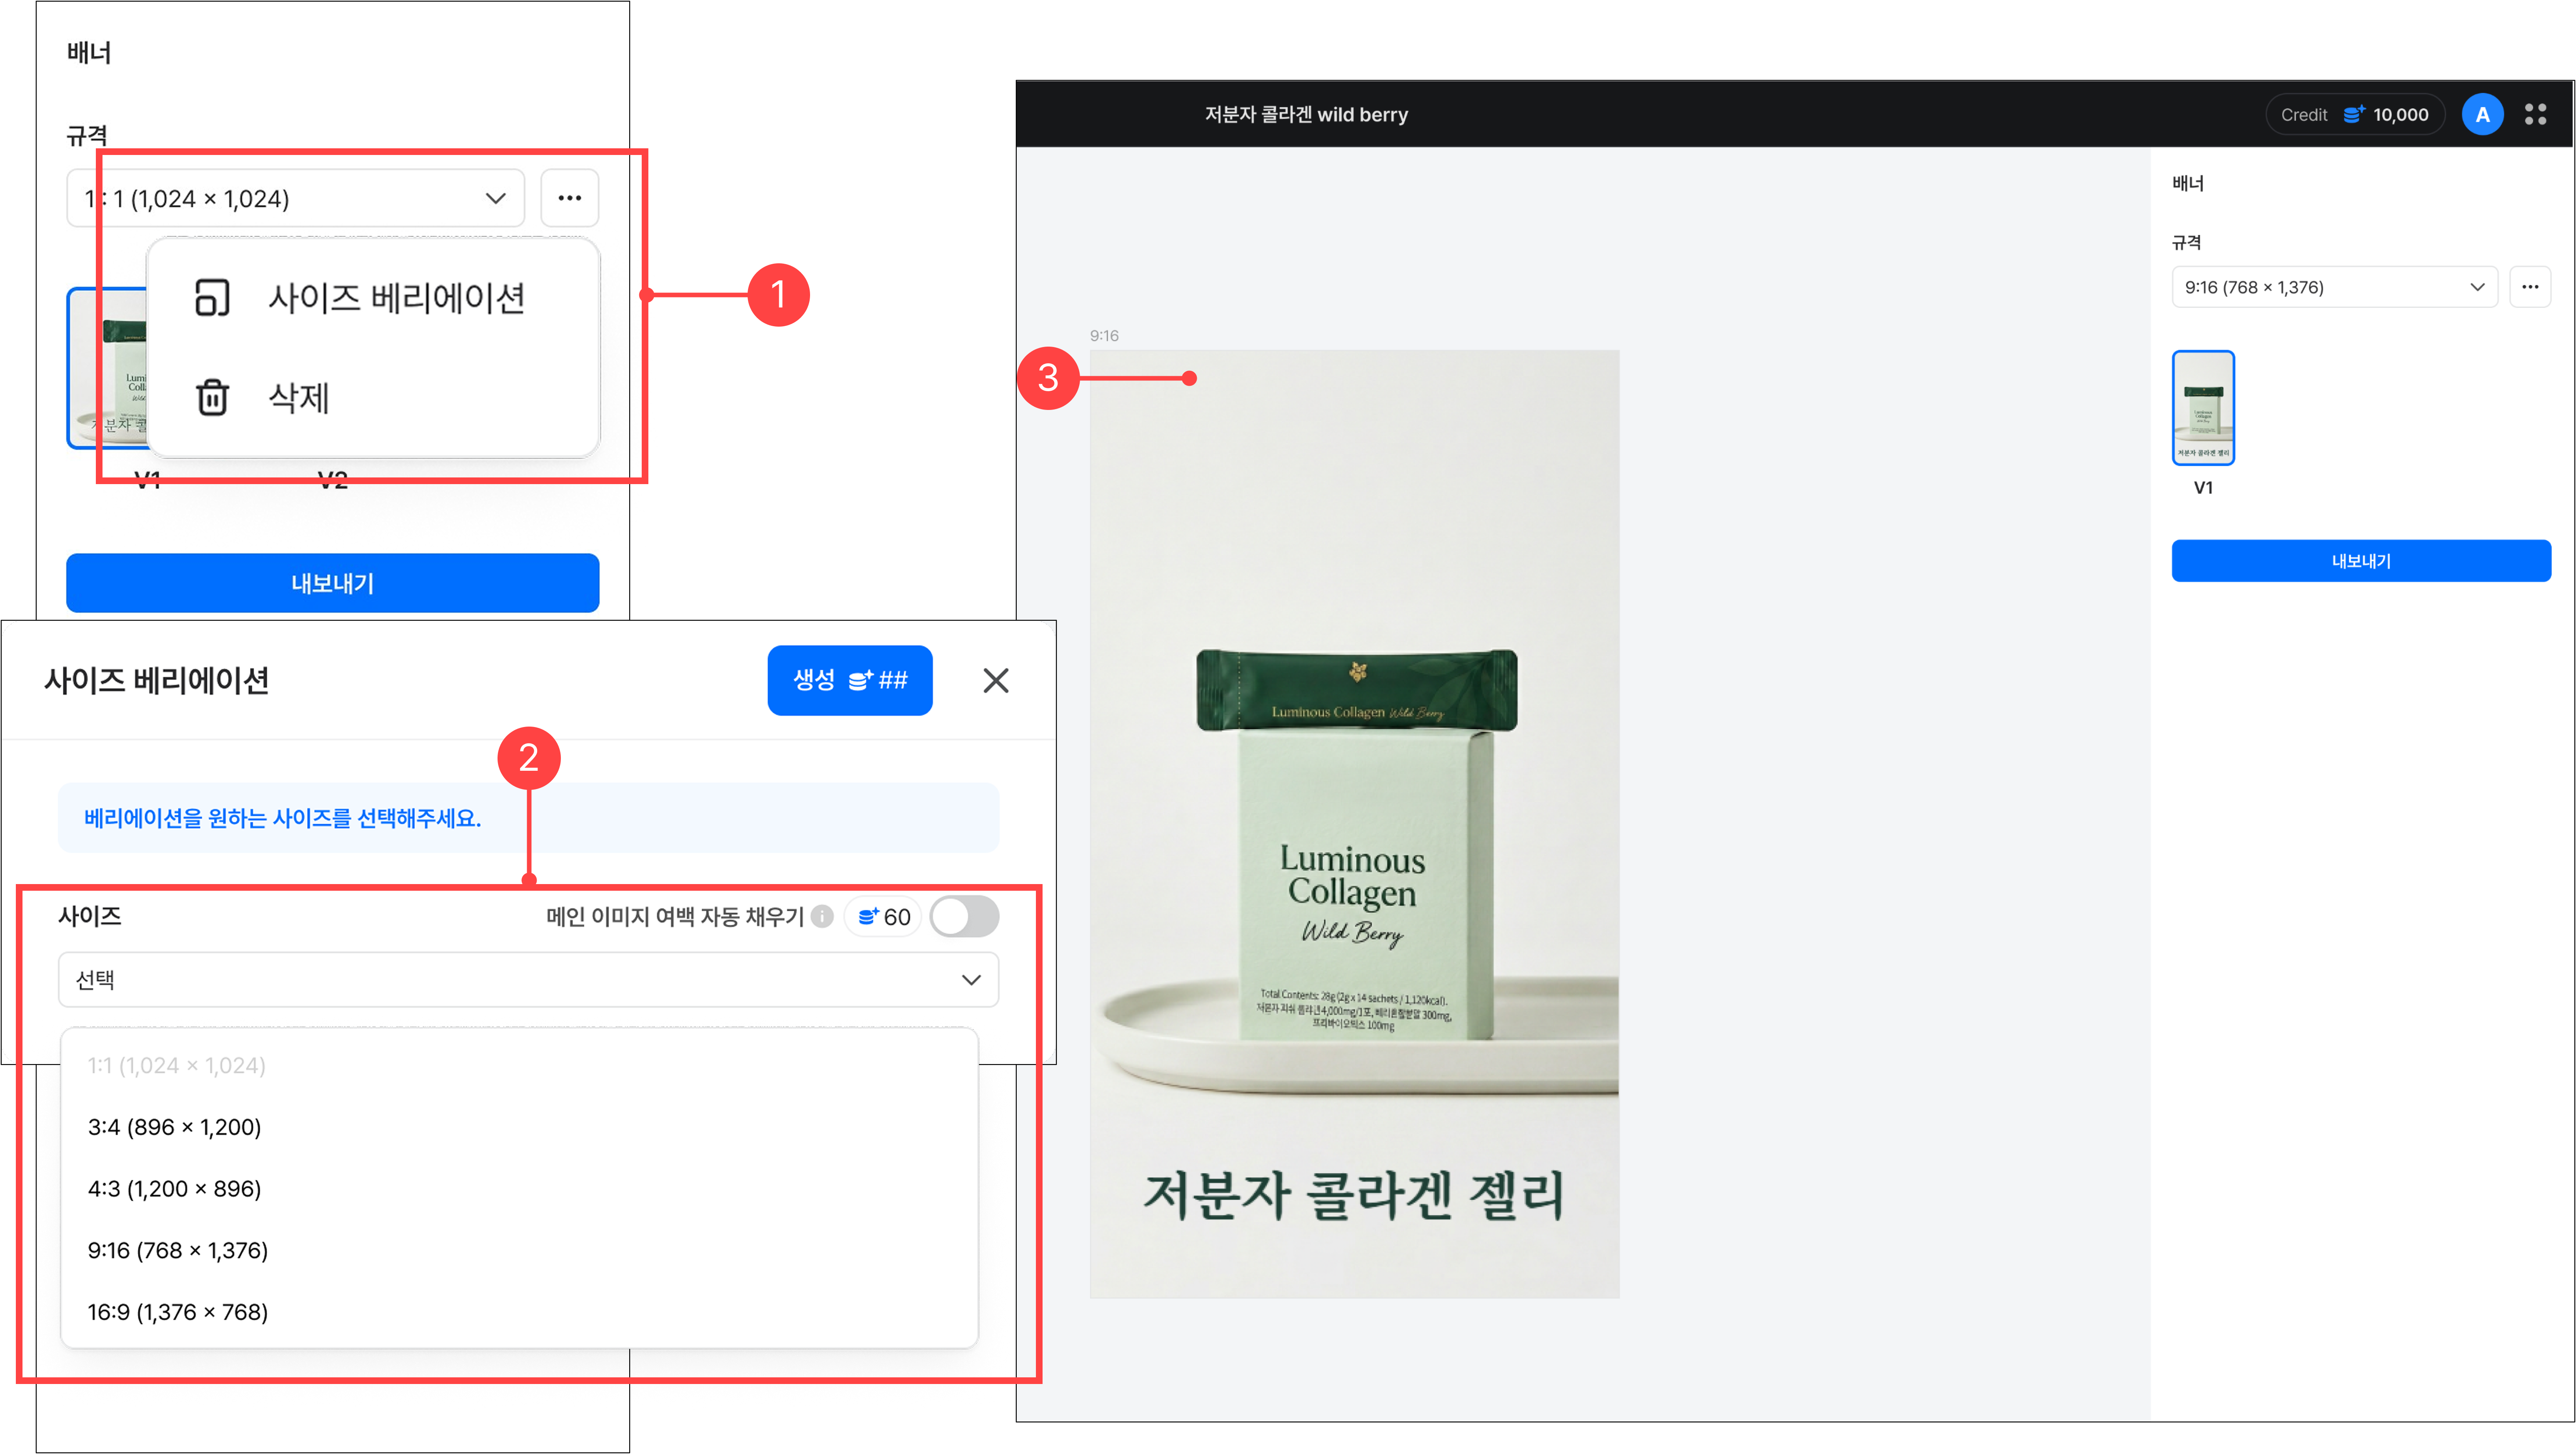
1.You can generate an existing banner in a different size. Click the More button in the banner's right panel, then select the Size variation menu.
2.You can select the size you want, excluding sizes already created, and fill any insufficient areas using the automatic margin generation feature.
3.Clicking Generate starts banner generation. The banner generated in the other size can be found in the size list in the right panel.
3.Exporting a banner
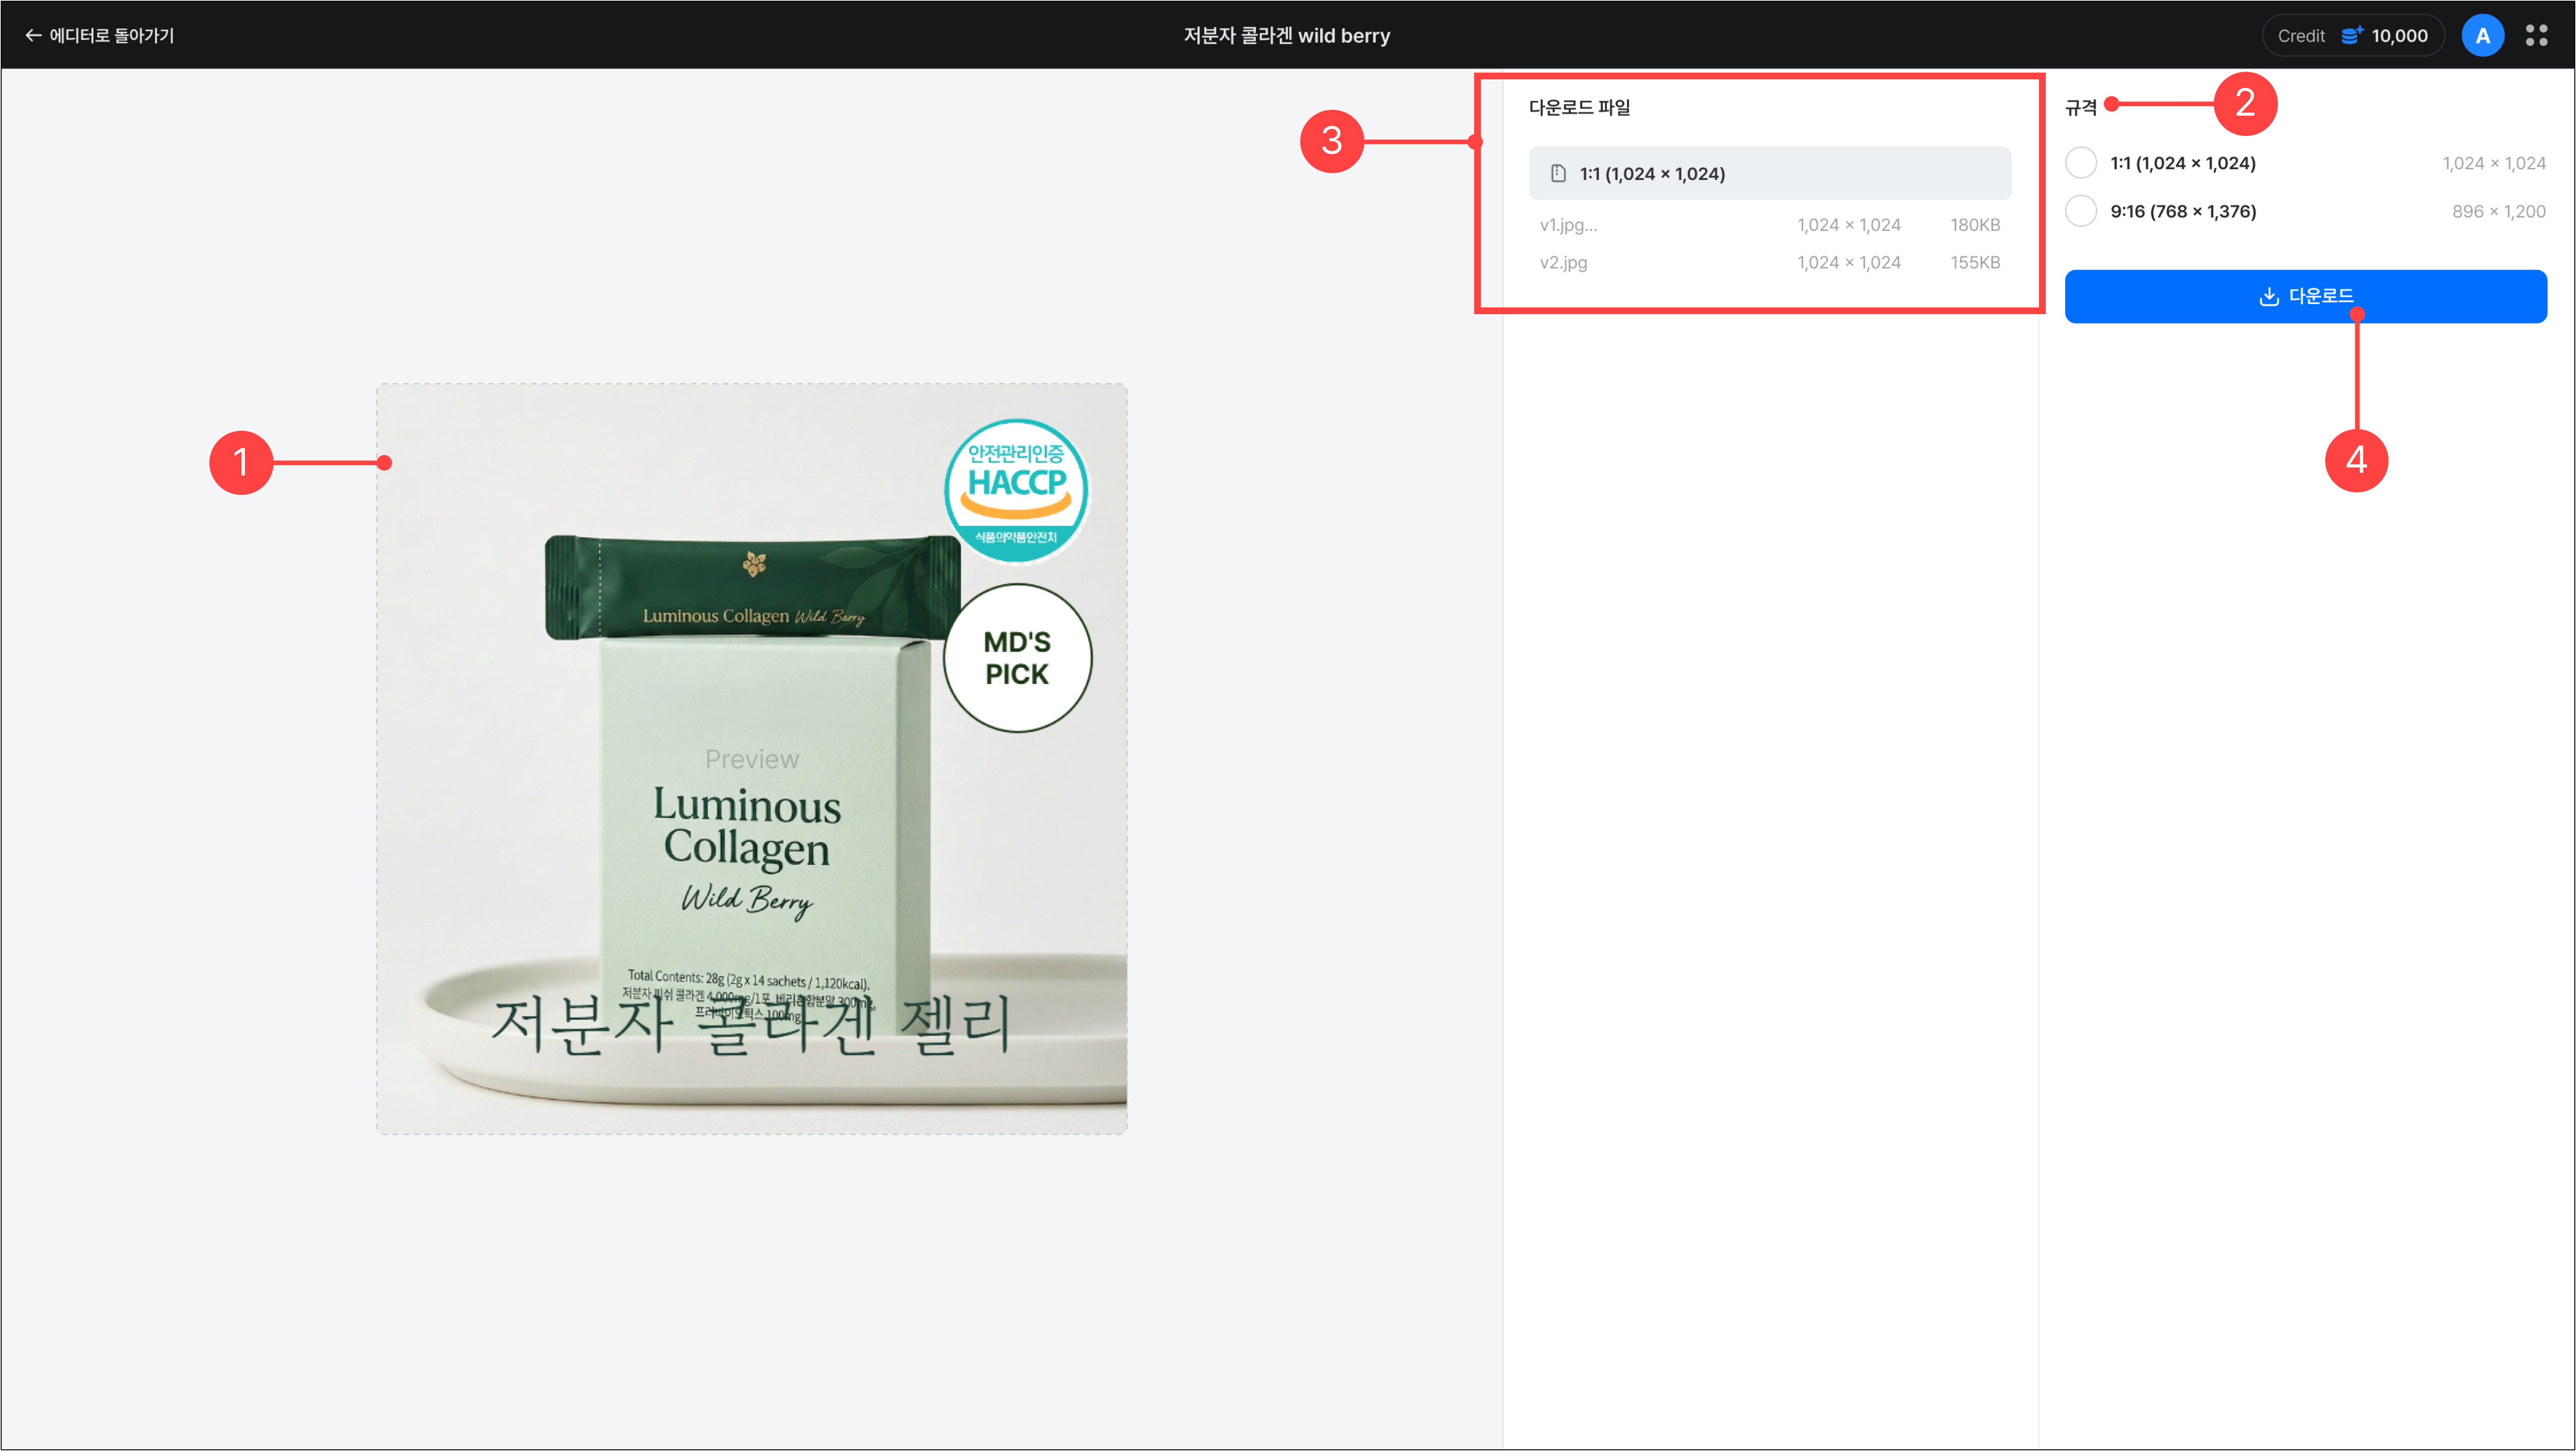
1.Using the Export button in the banner's basic panel, you can download the generated banner by size. Clicking Export takes you to the preview screen.
2.You can select the created banner by size.
3.After selecting a size, click a file name in the download files area to see a preview.
4.After checking the preview, click Download to download it as a zip file.
Previous
Product page creation guide