Creating a product page
A guide to the entire product page creation process, from entering product information to editing, AI edits, and exporting.
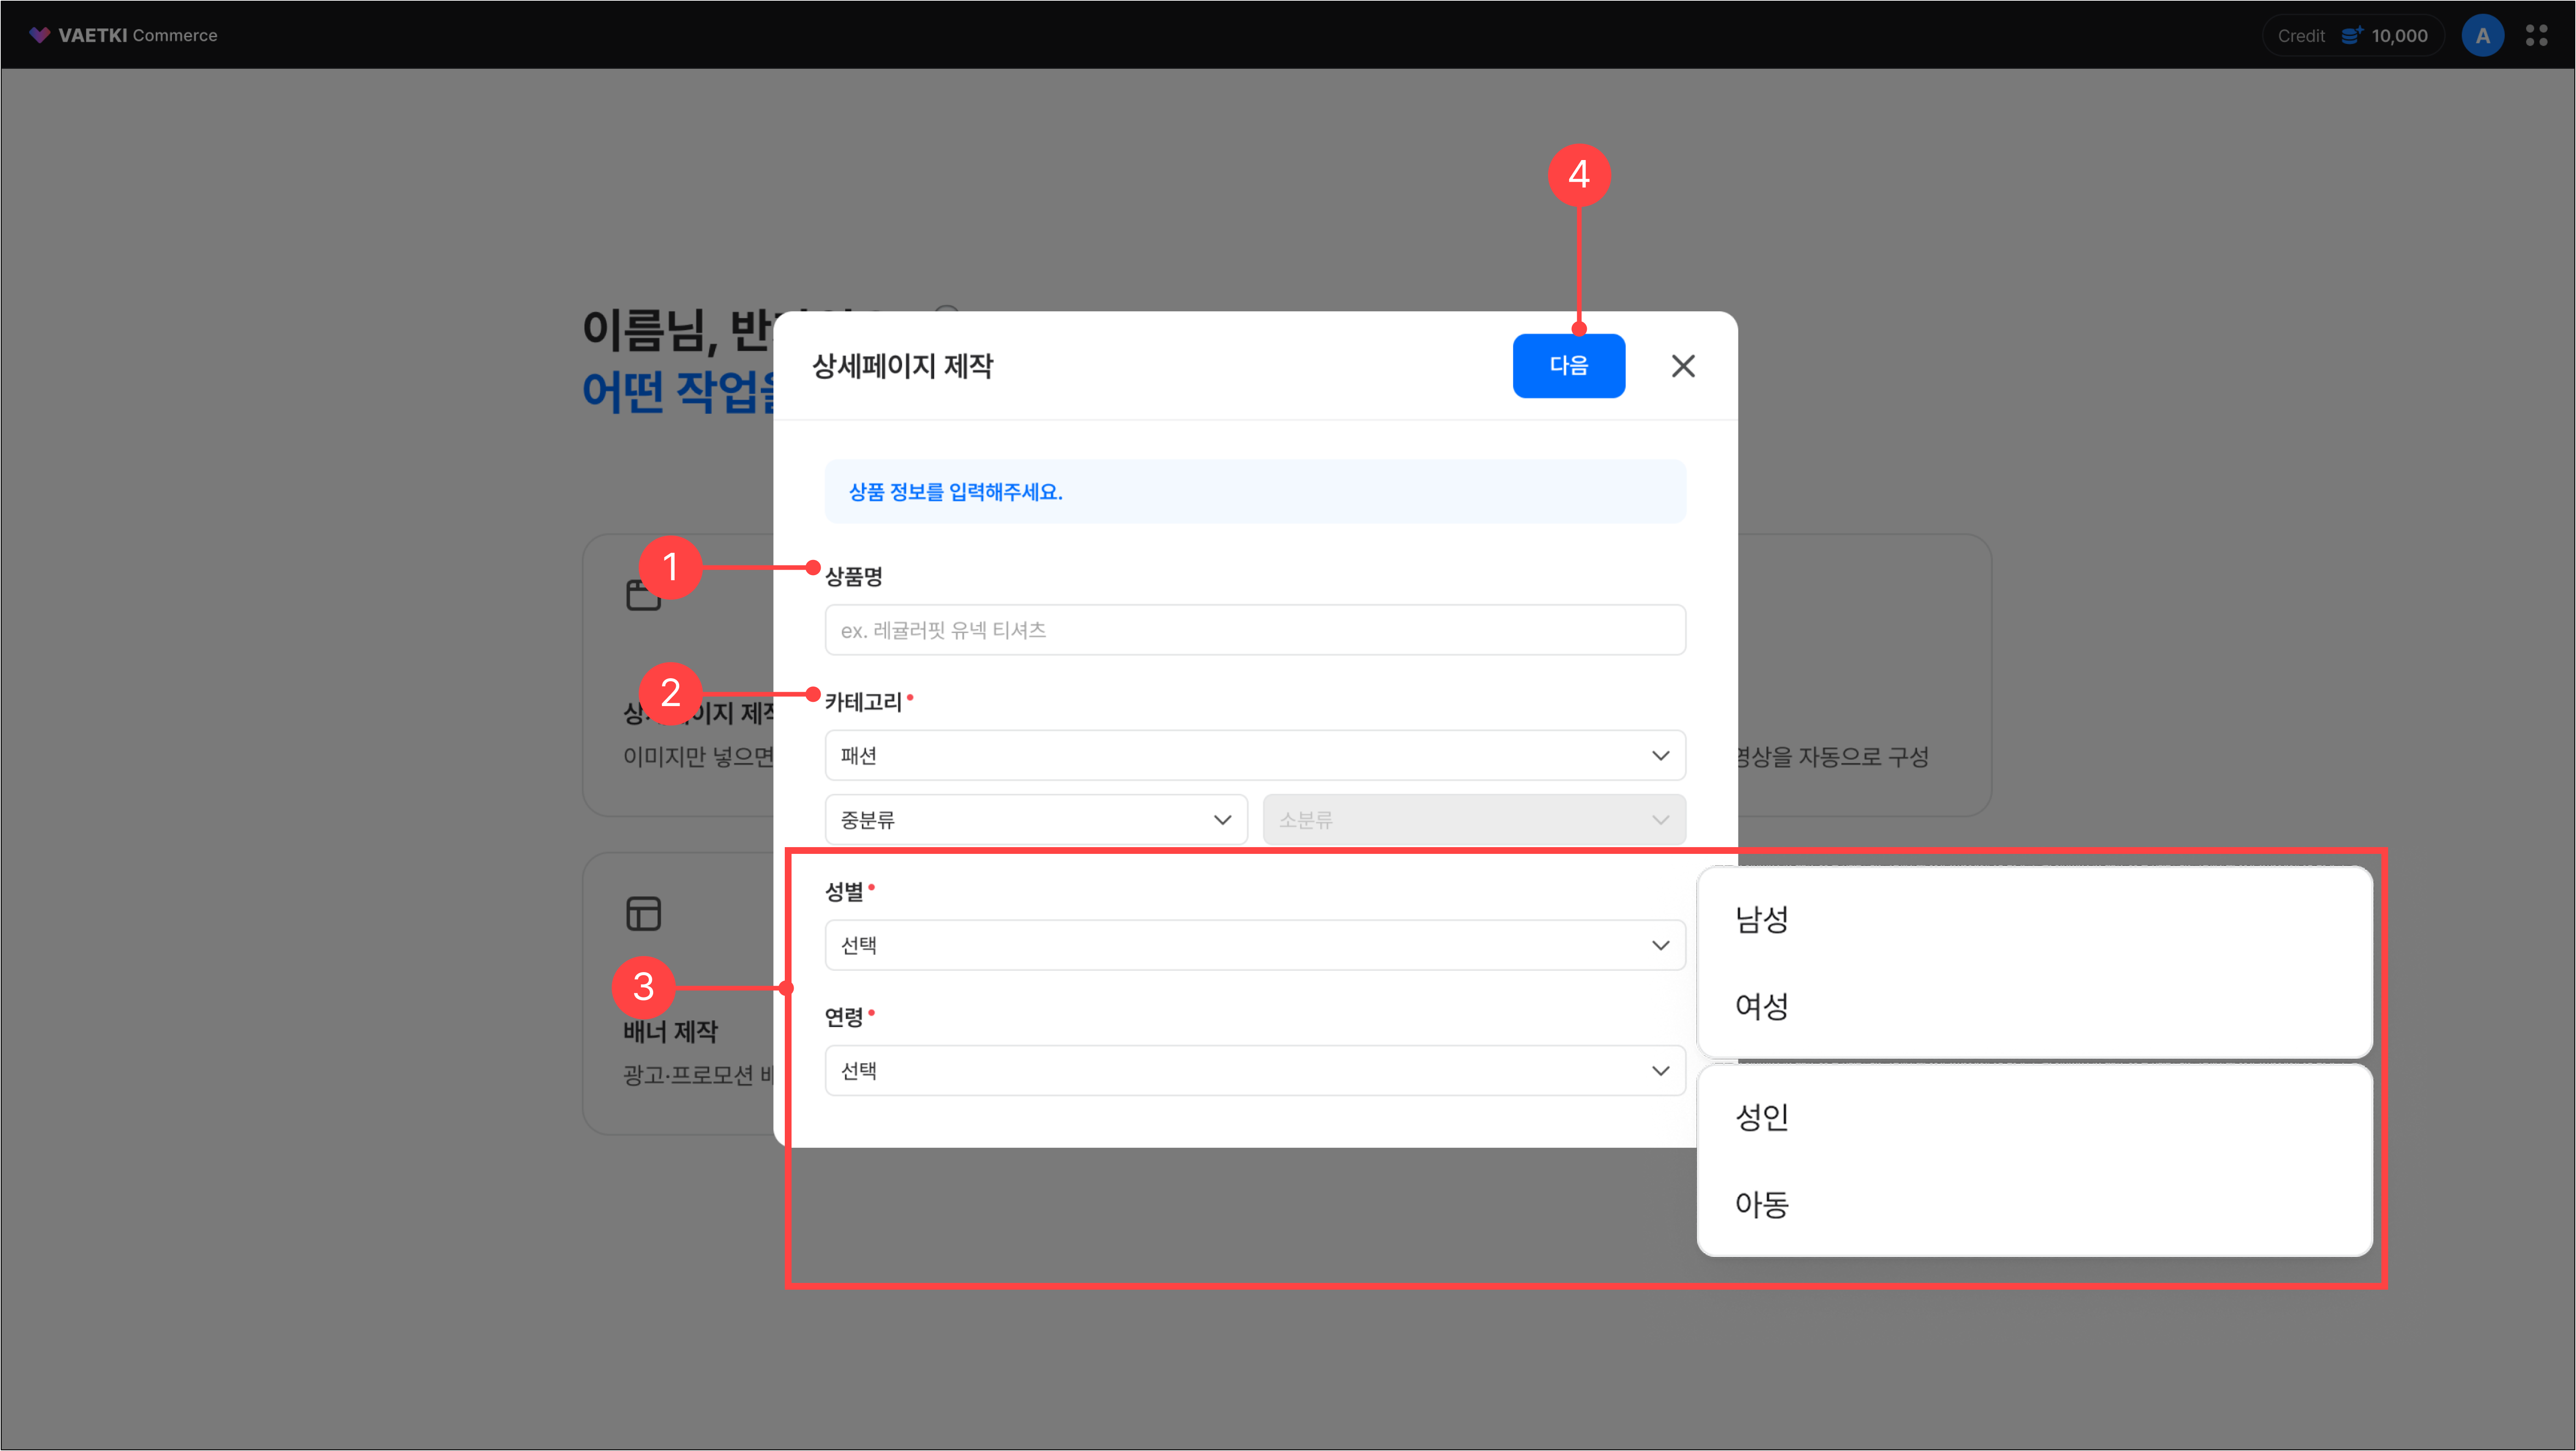
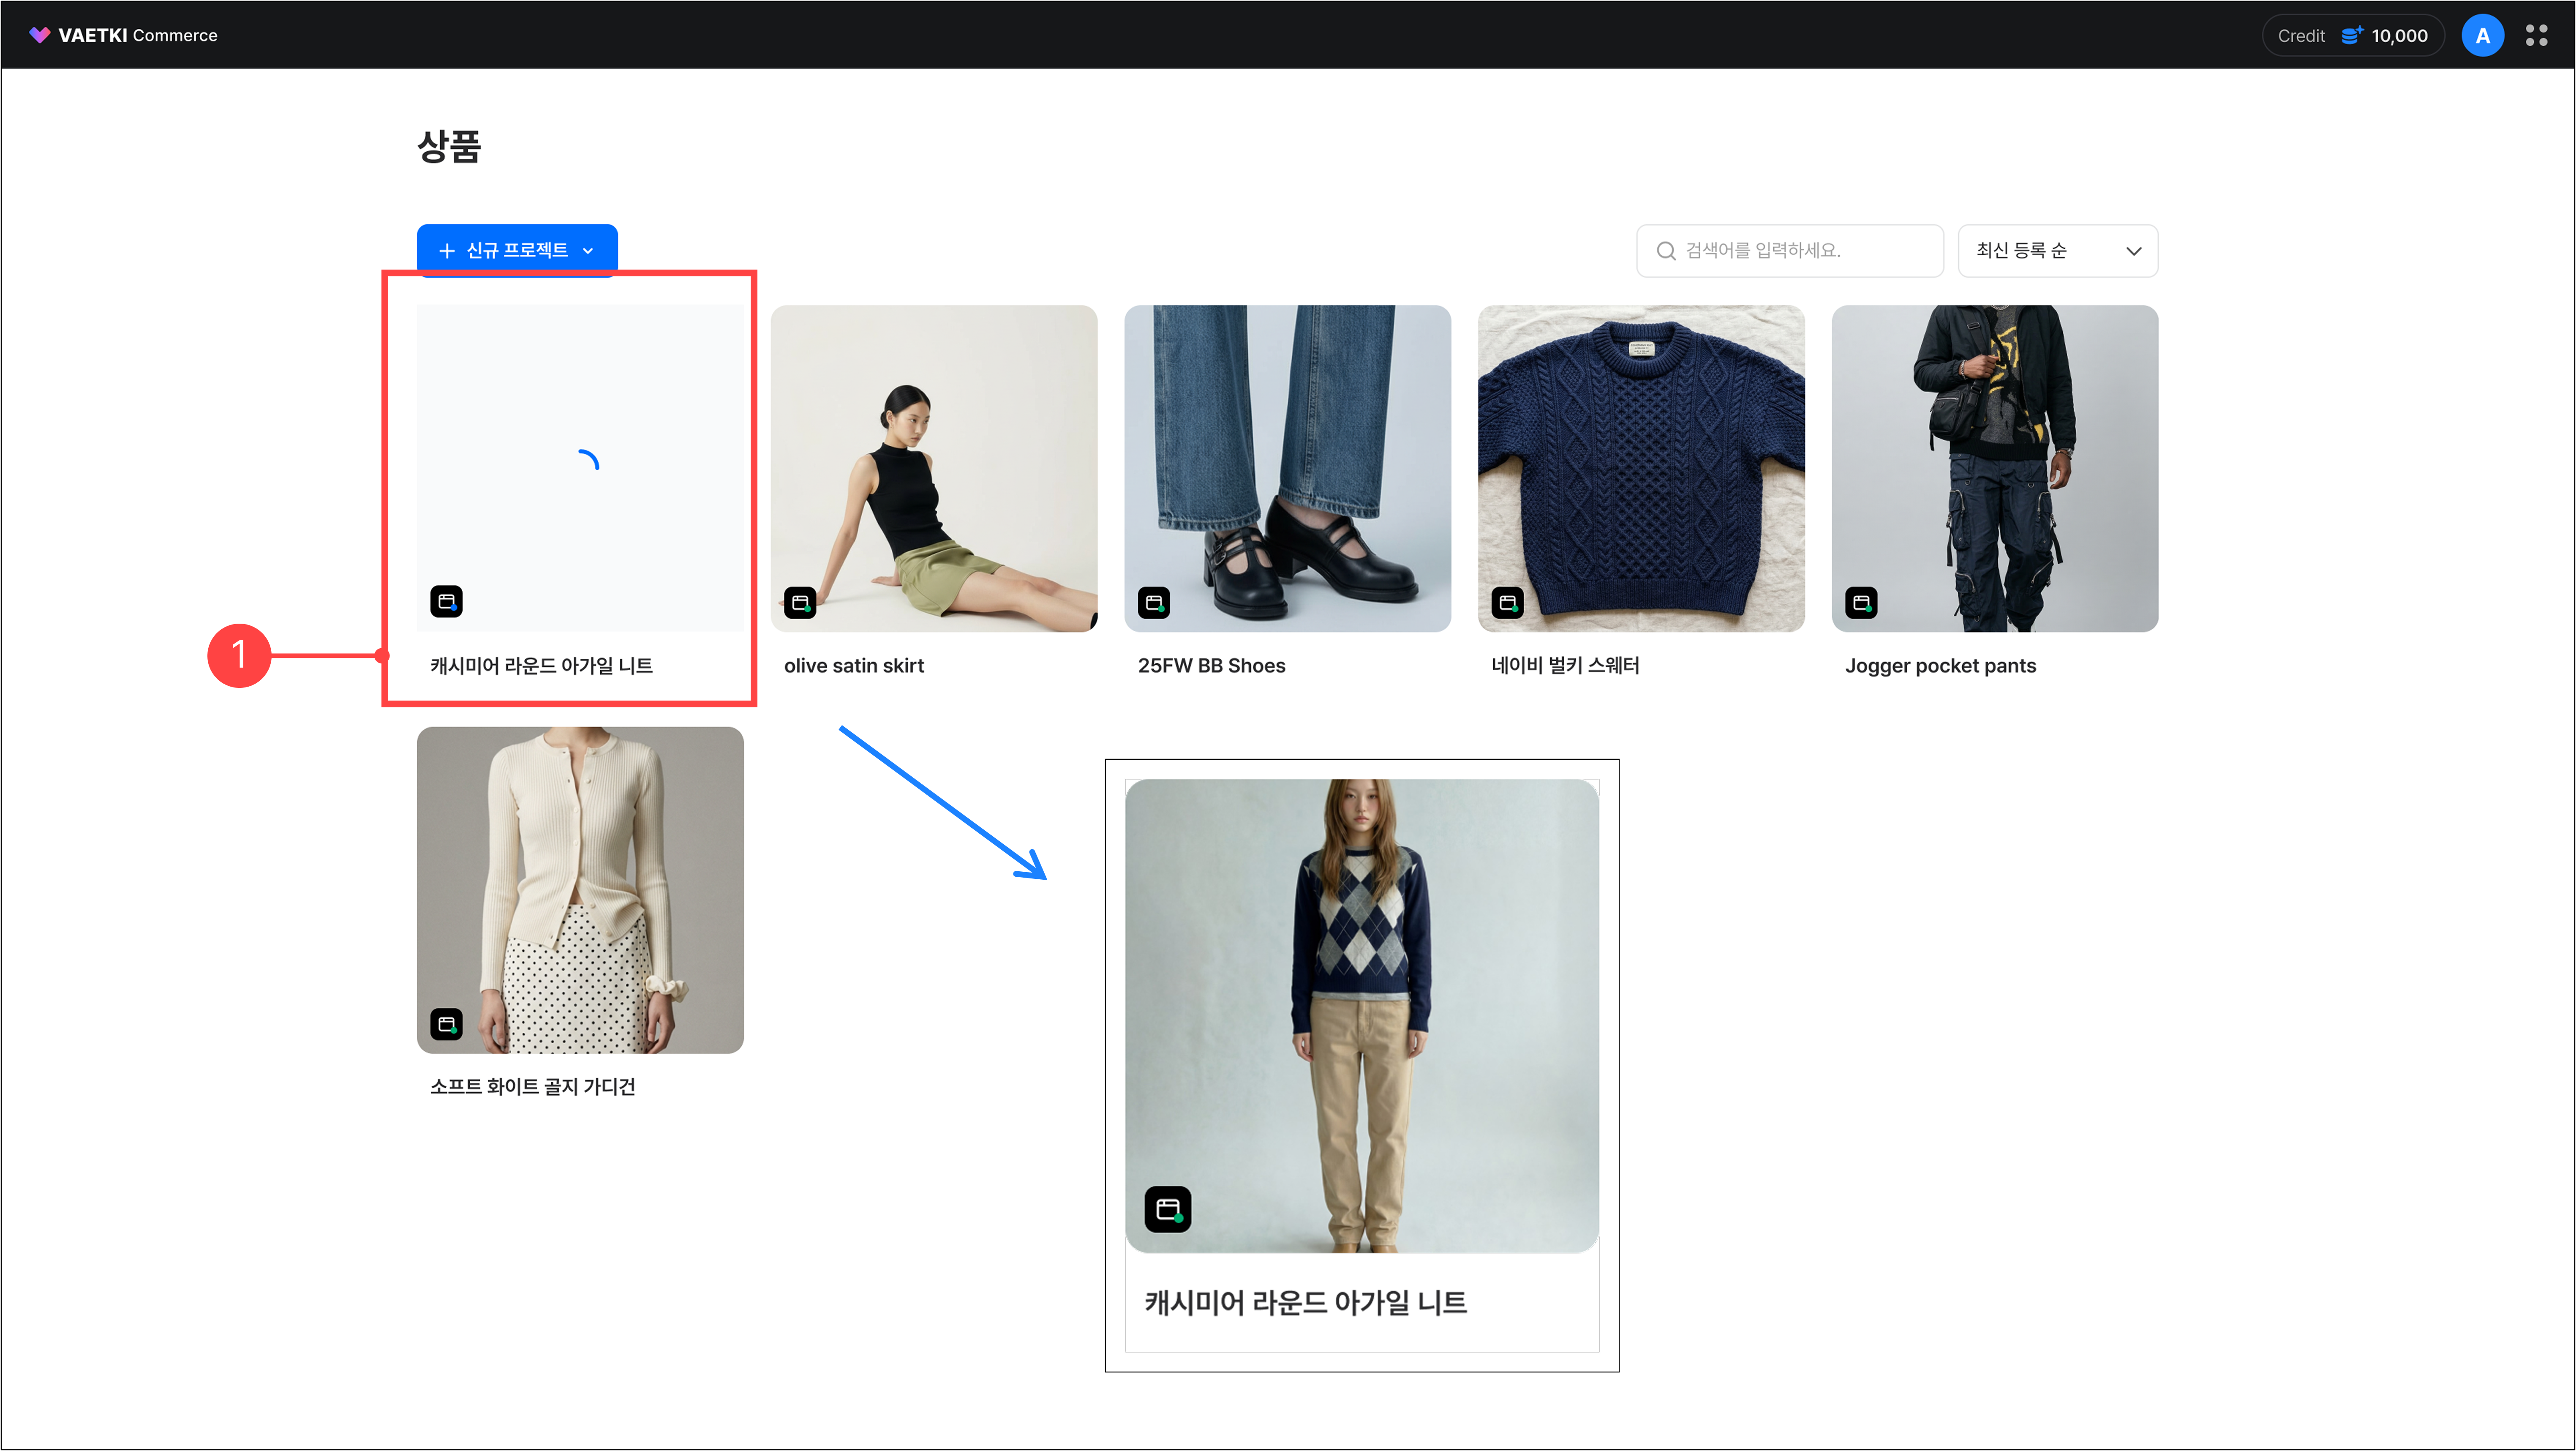
Creating a product page follows the steps below. Once you enter the product information and upload the product images, AI generates the product page. The generated product page can be edited and downloaded to match the platform specification you want.

1.1.Creating a product page – Entering product info & generating
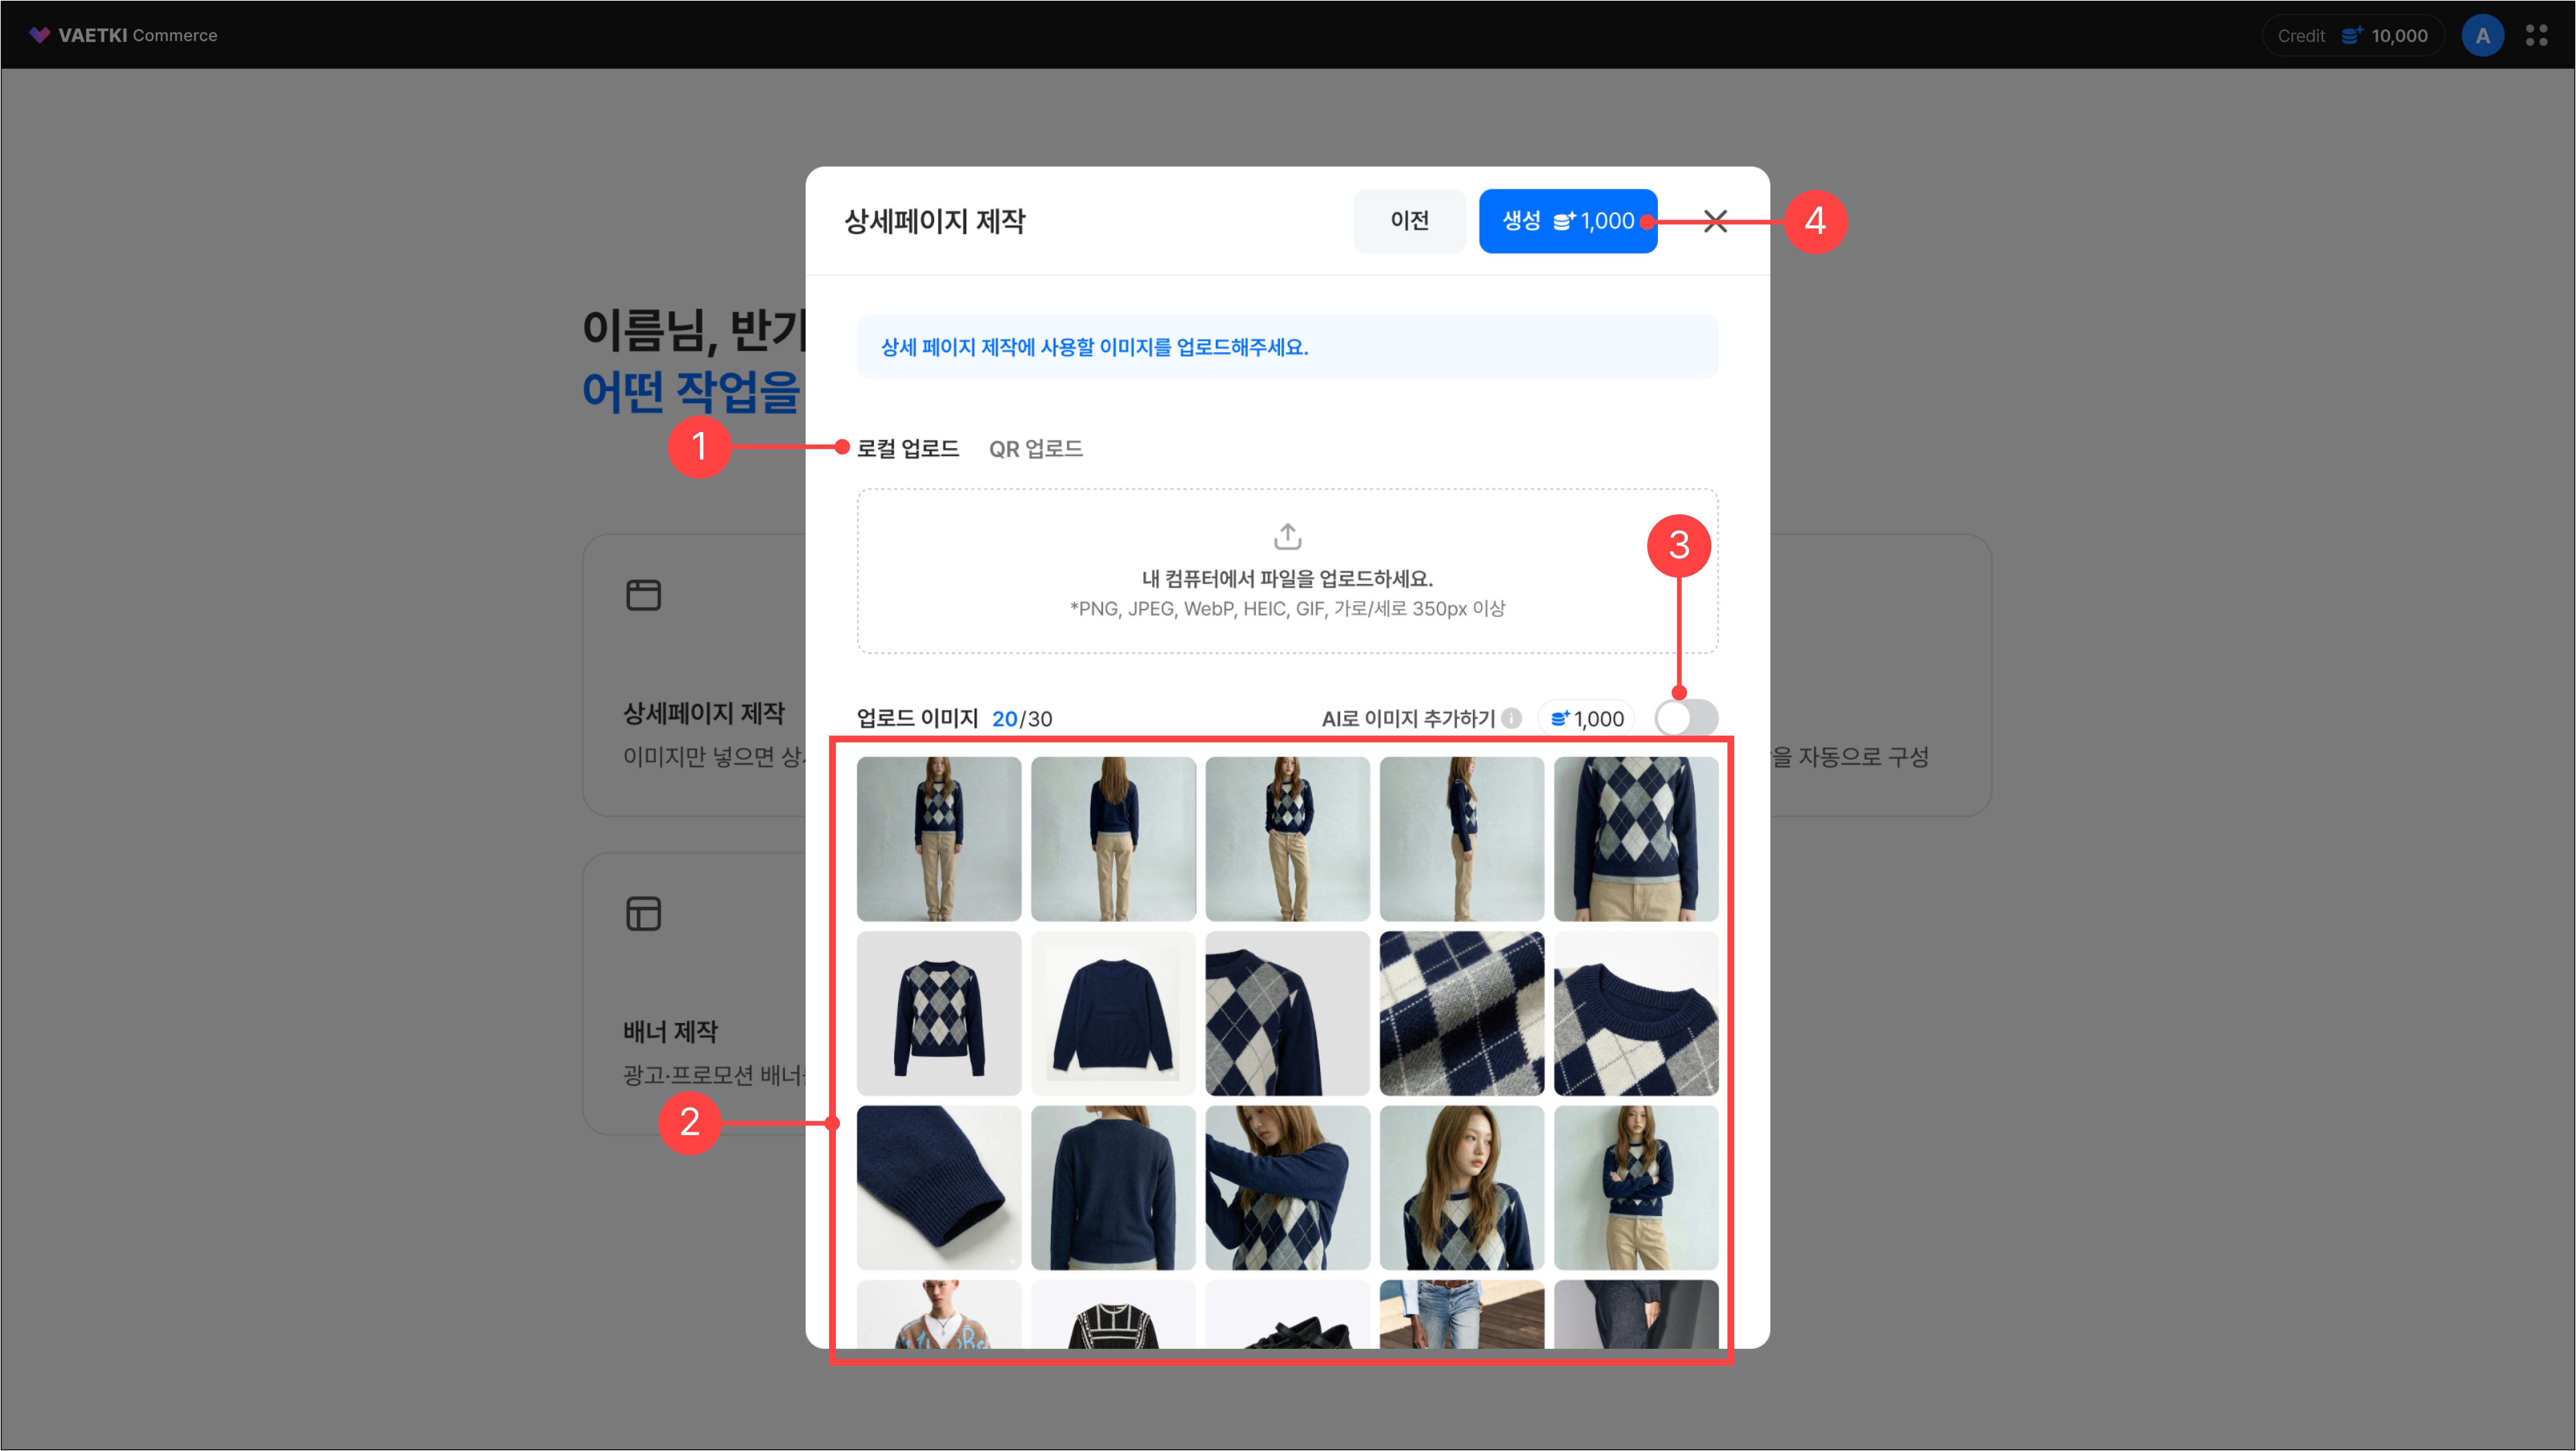
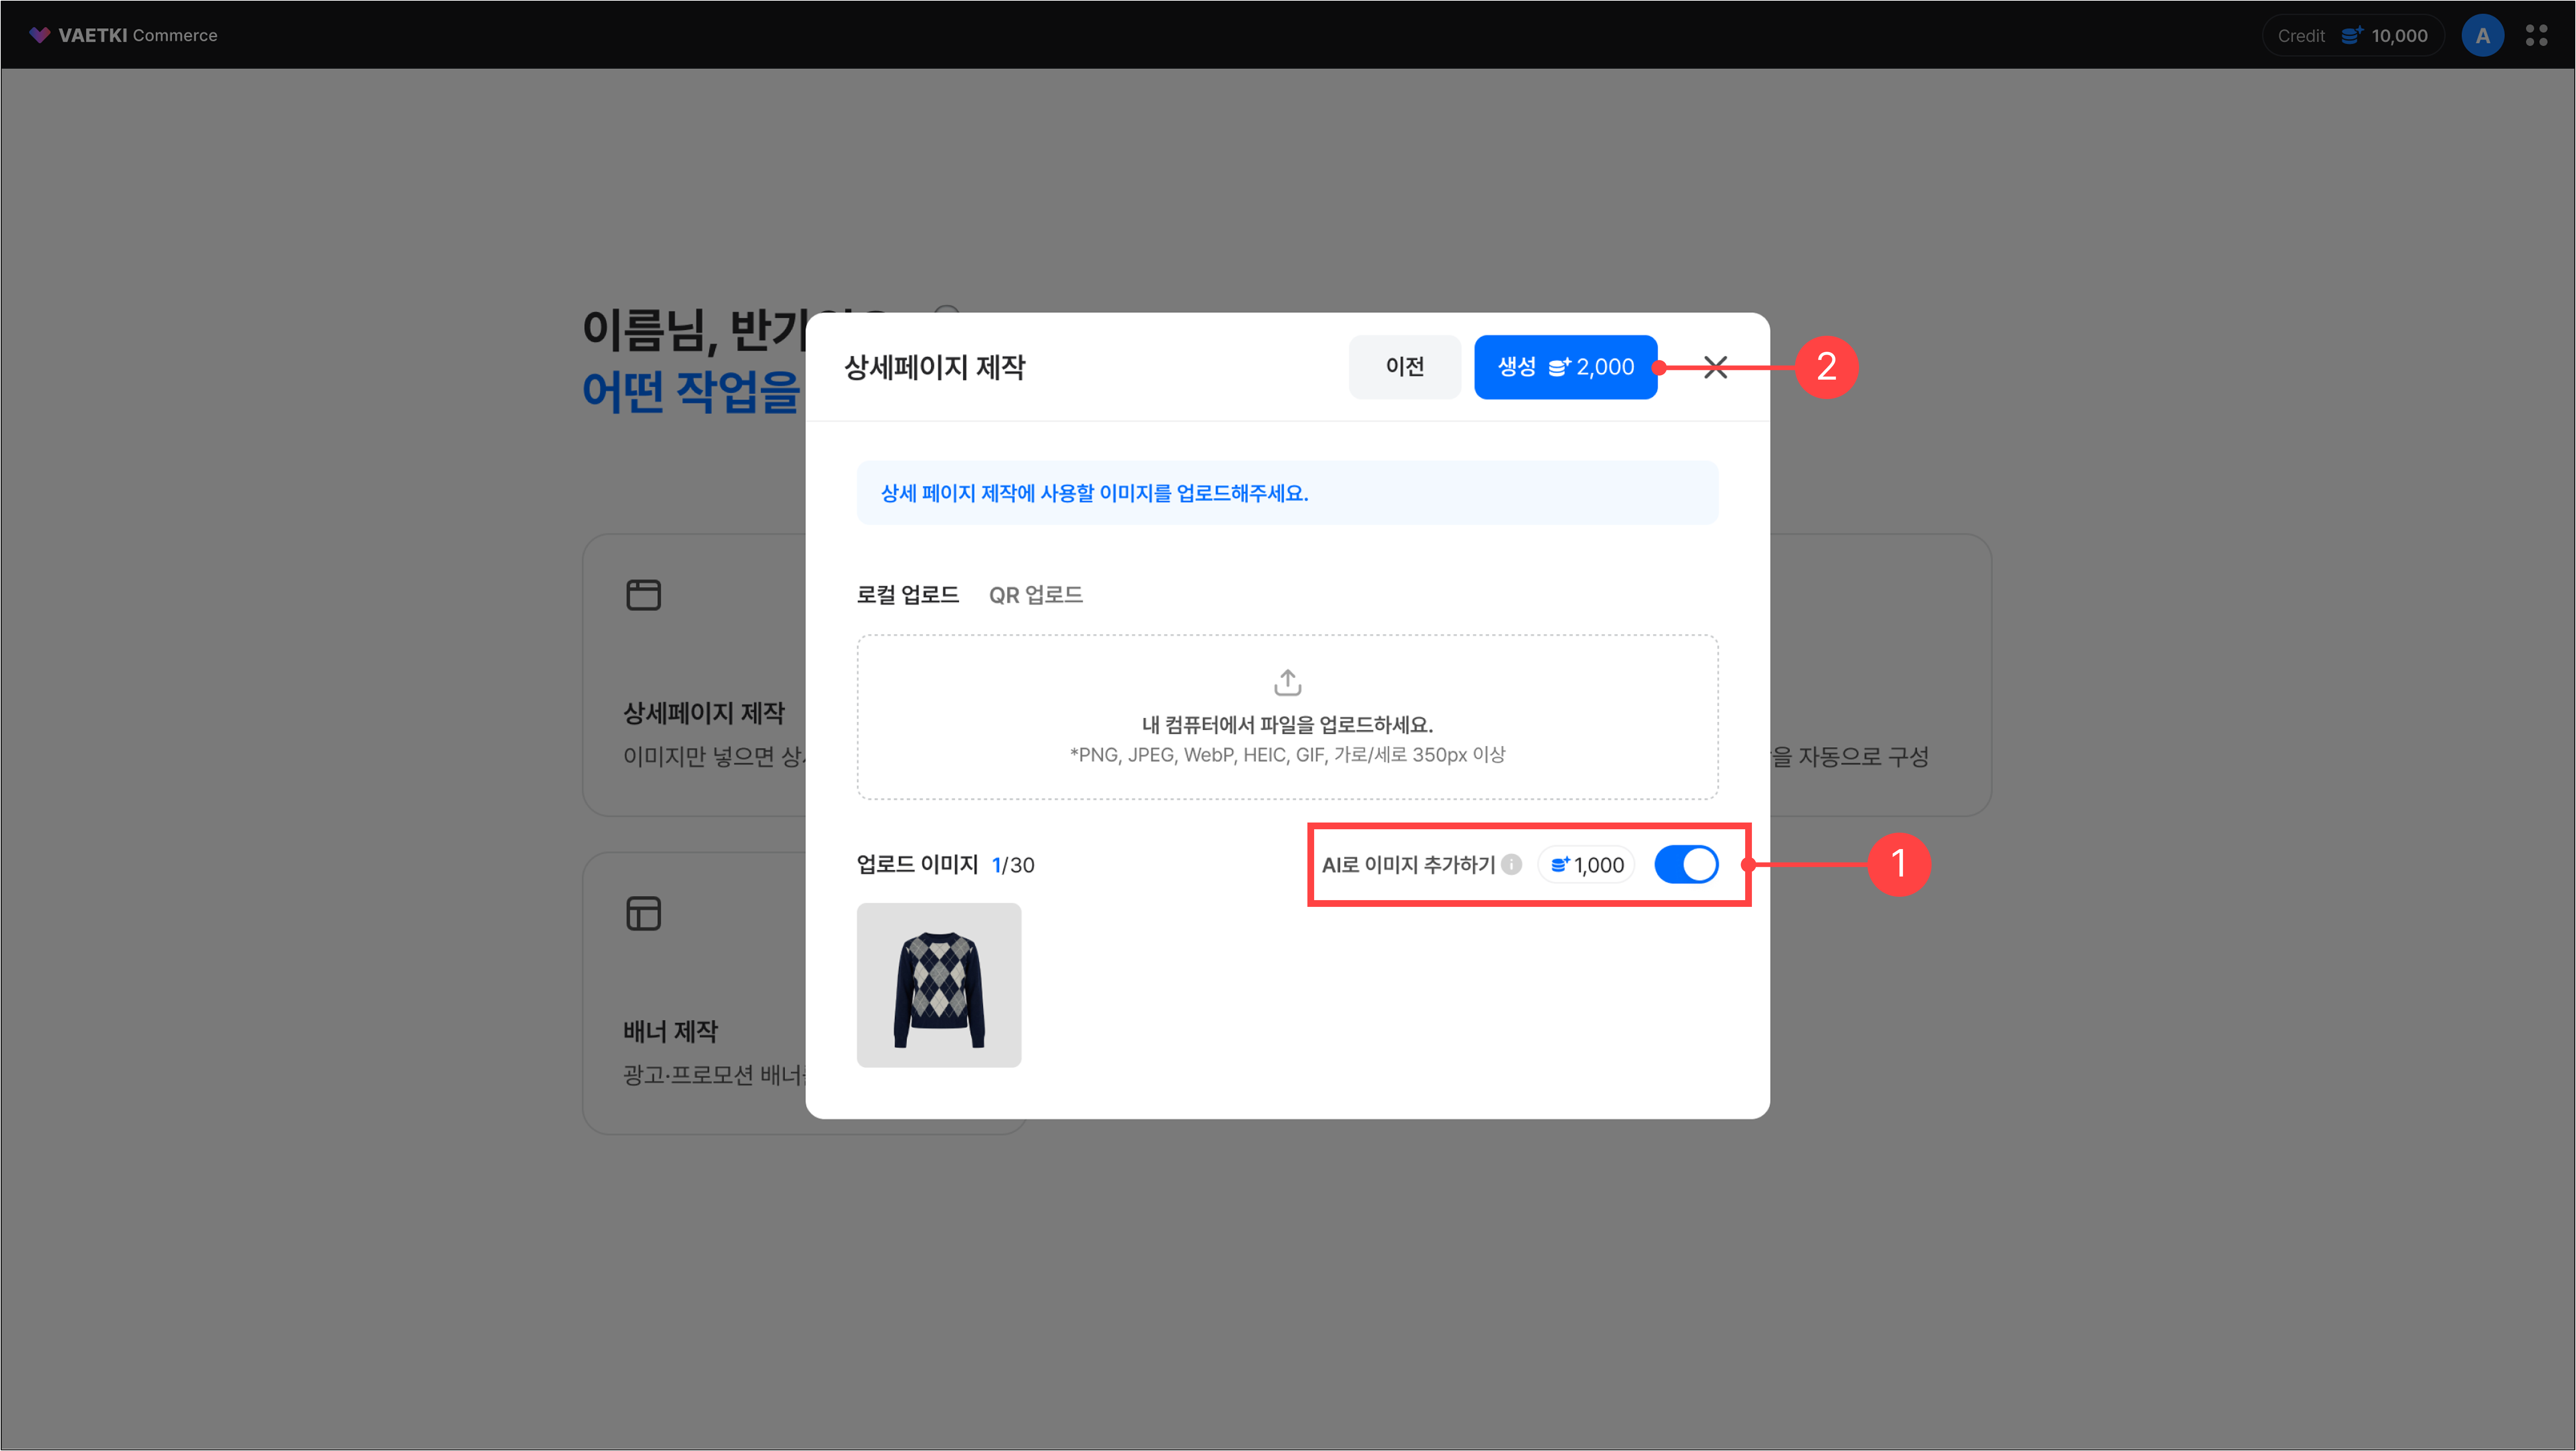
1.2.Creating a product page – Adding AI images
You can generate model shots based on a fashion product’s category, gender, and age, and add them to the product page. 10 model shots are generated and placed together when the product page is created.
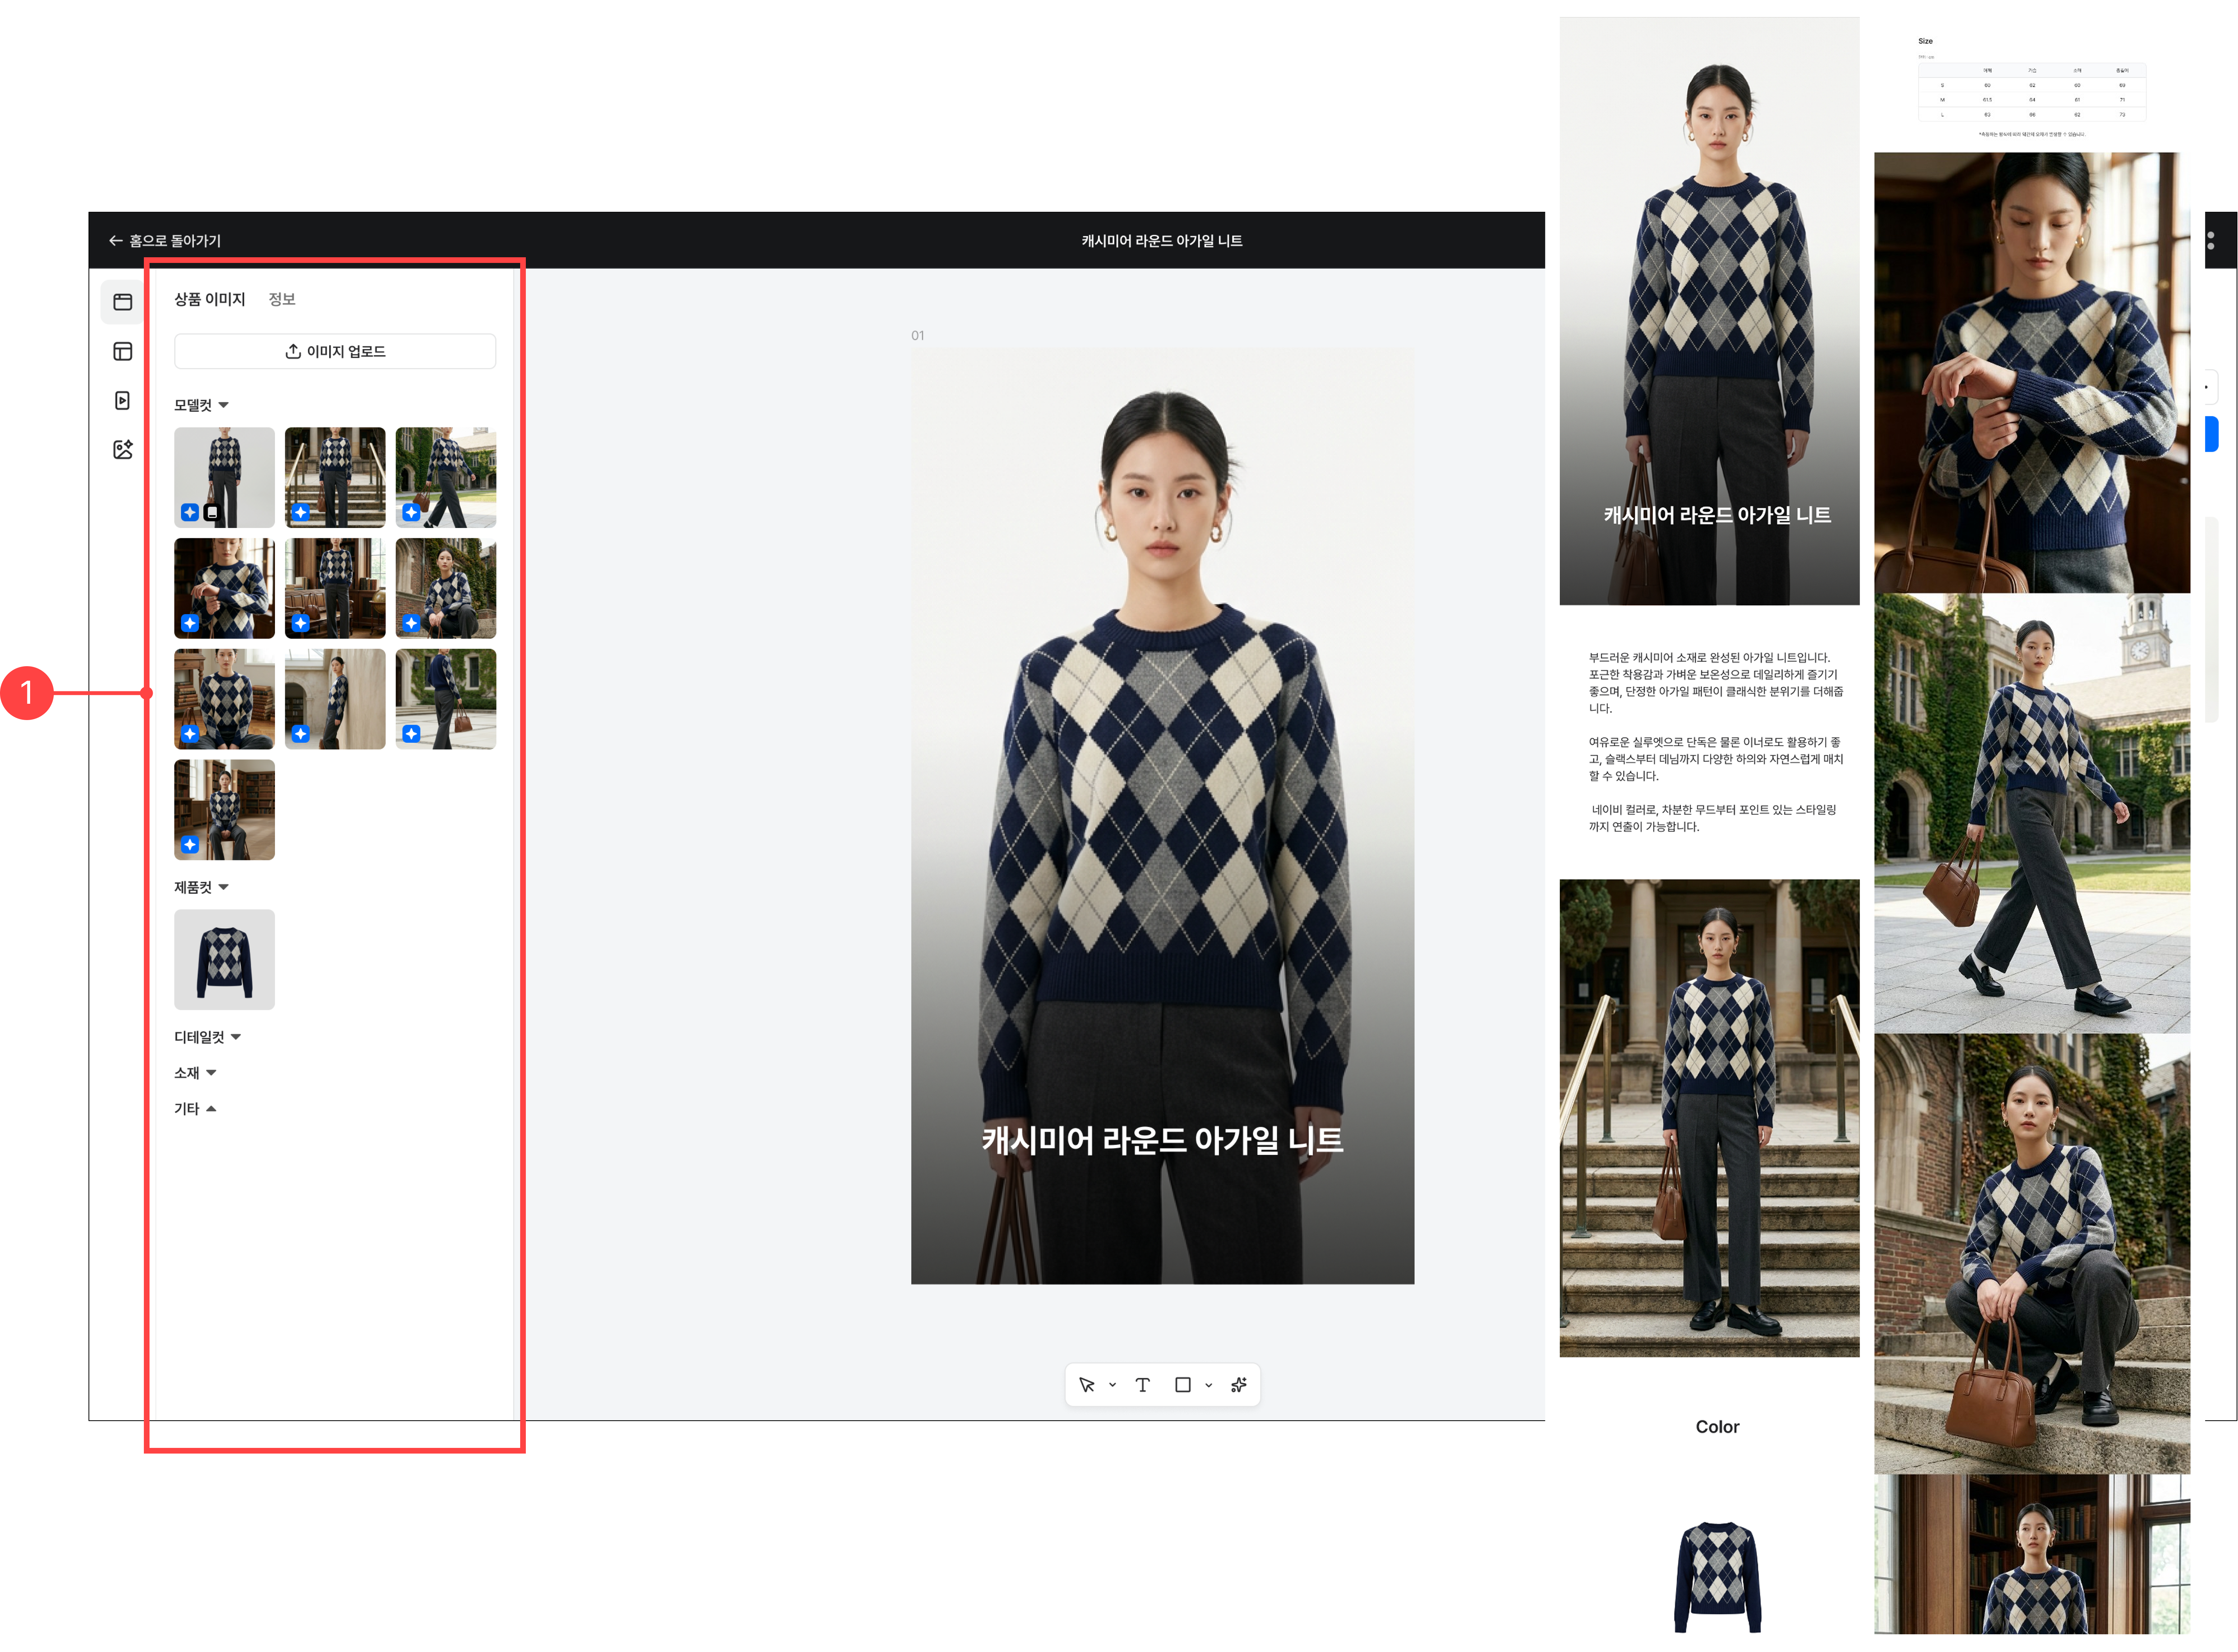
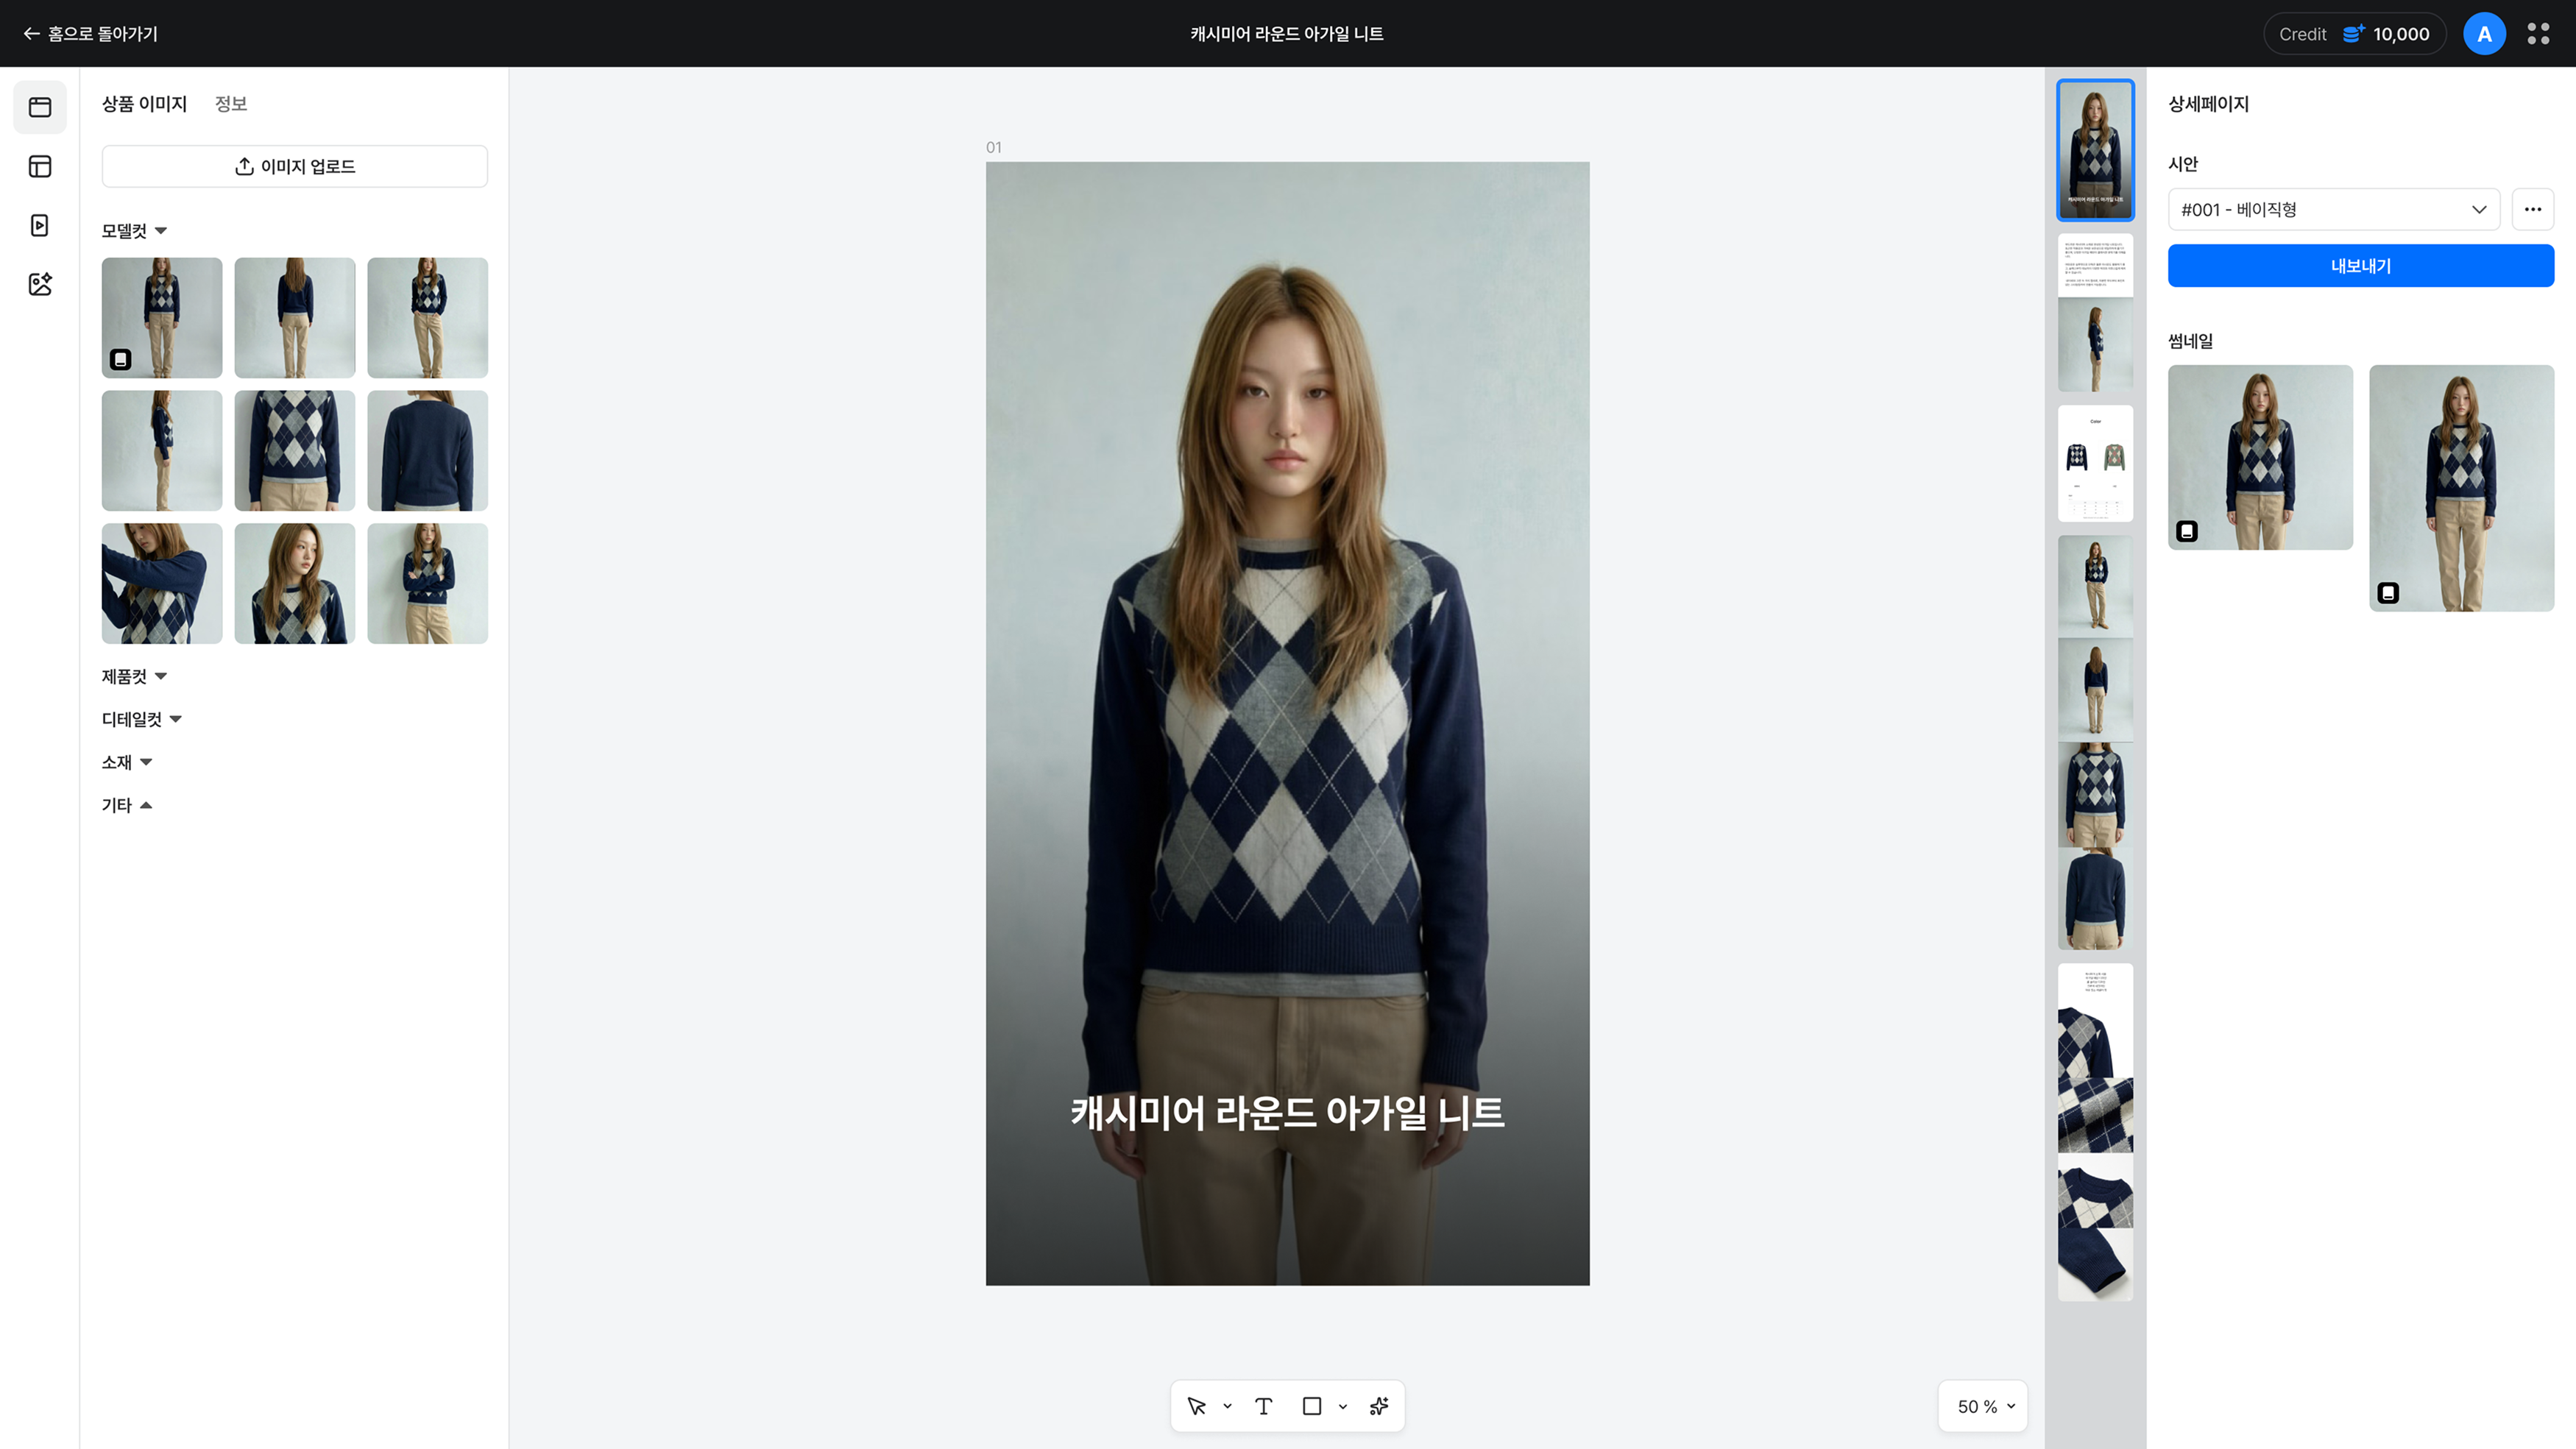
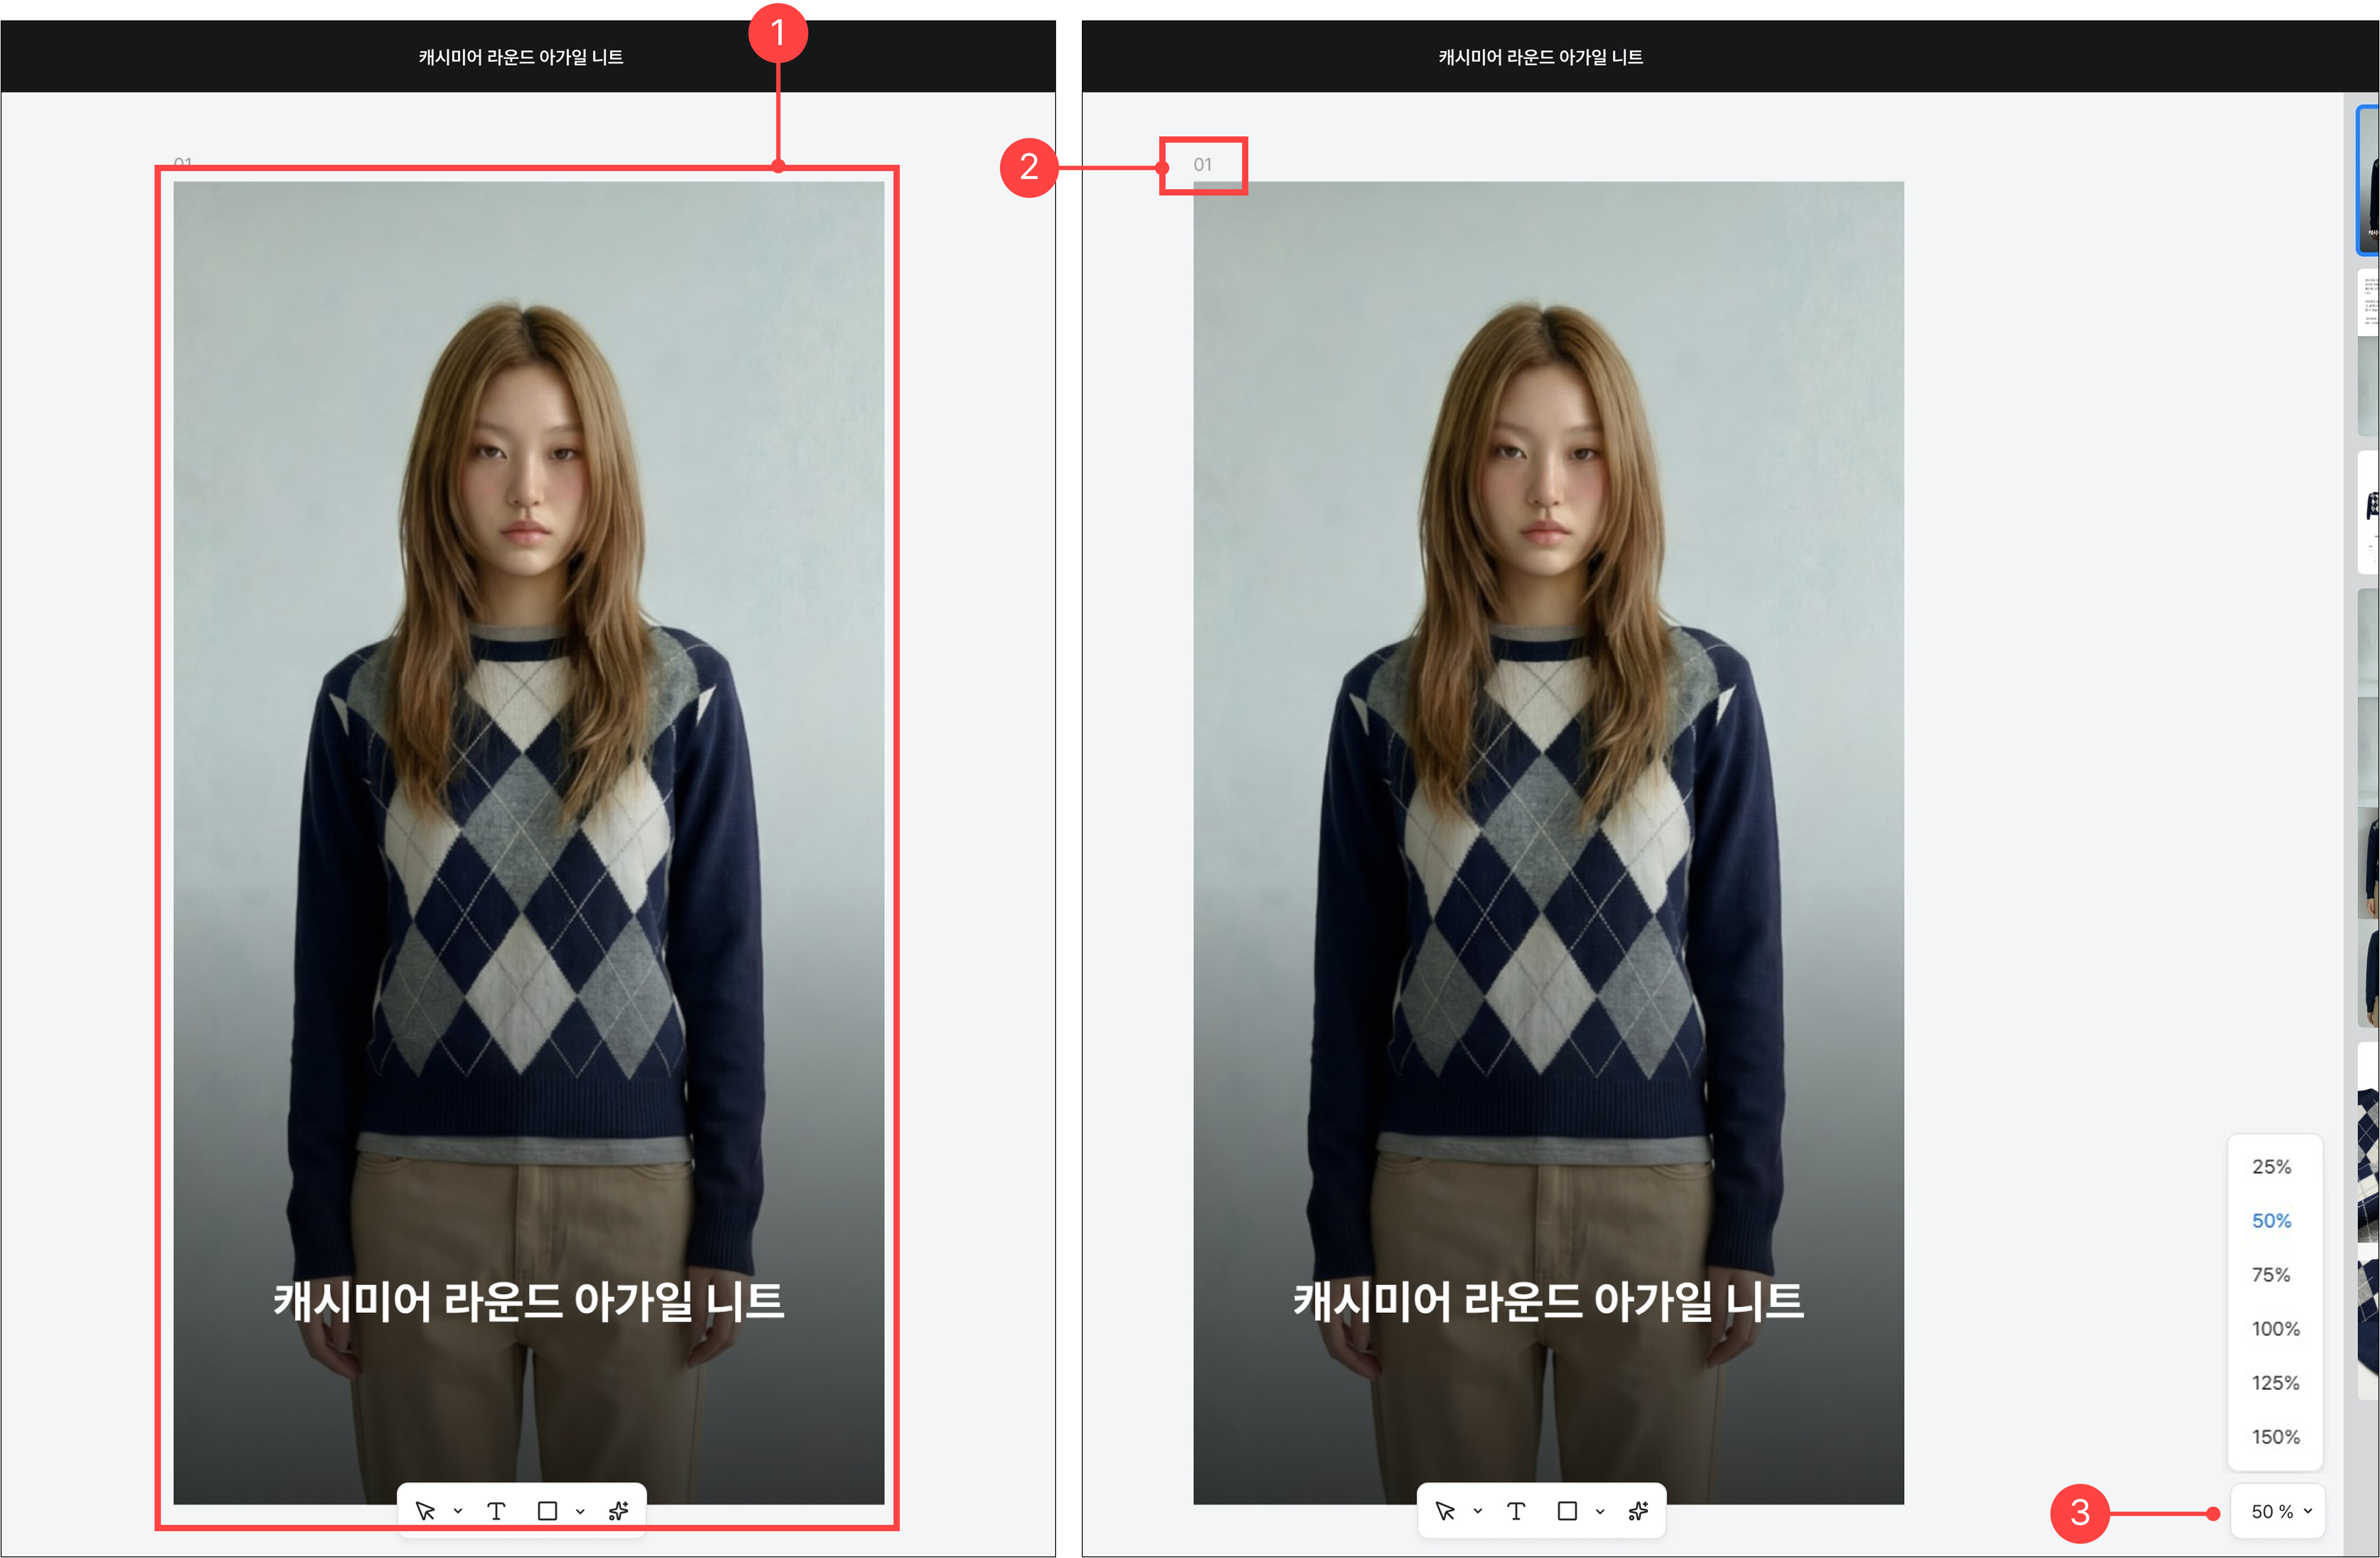
2.1.Editing a product page – Canvas overview
You can edit the generated product page on the canvas. Edit text and images or rearrange the module order to build the product page you want.
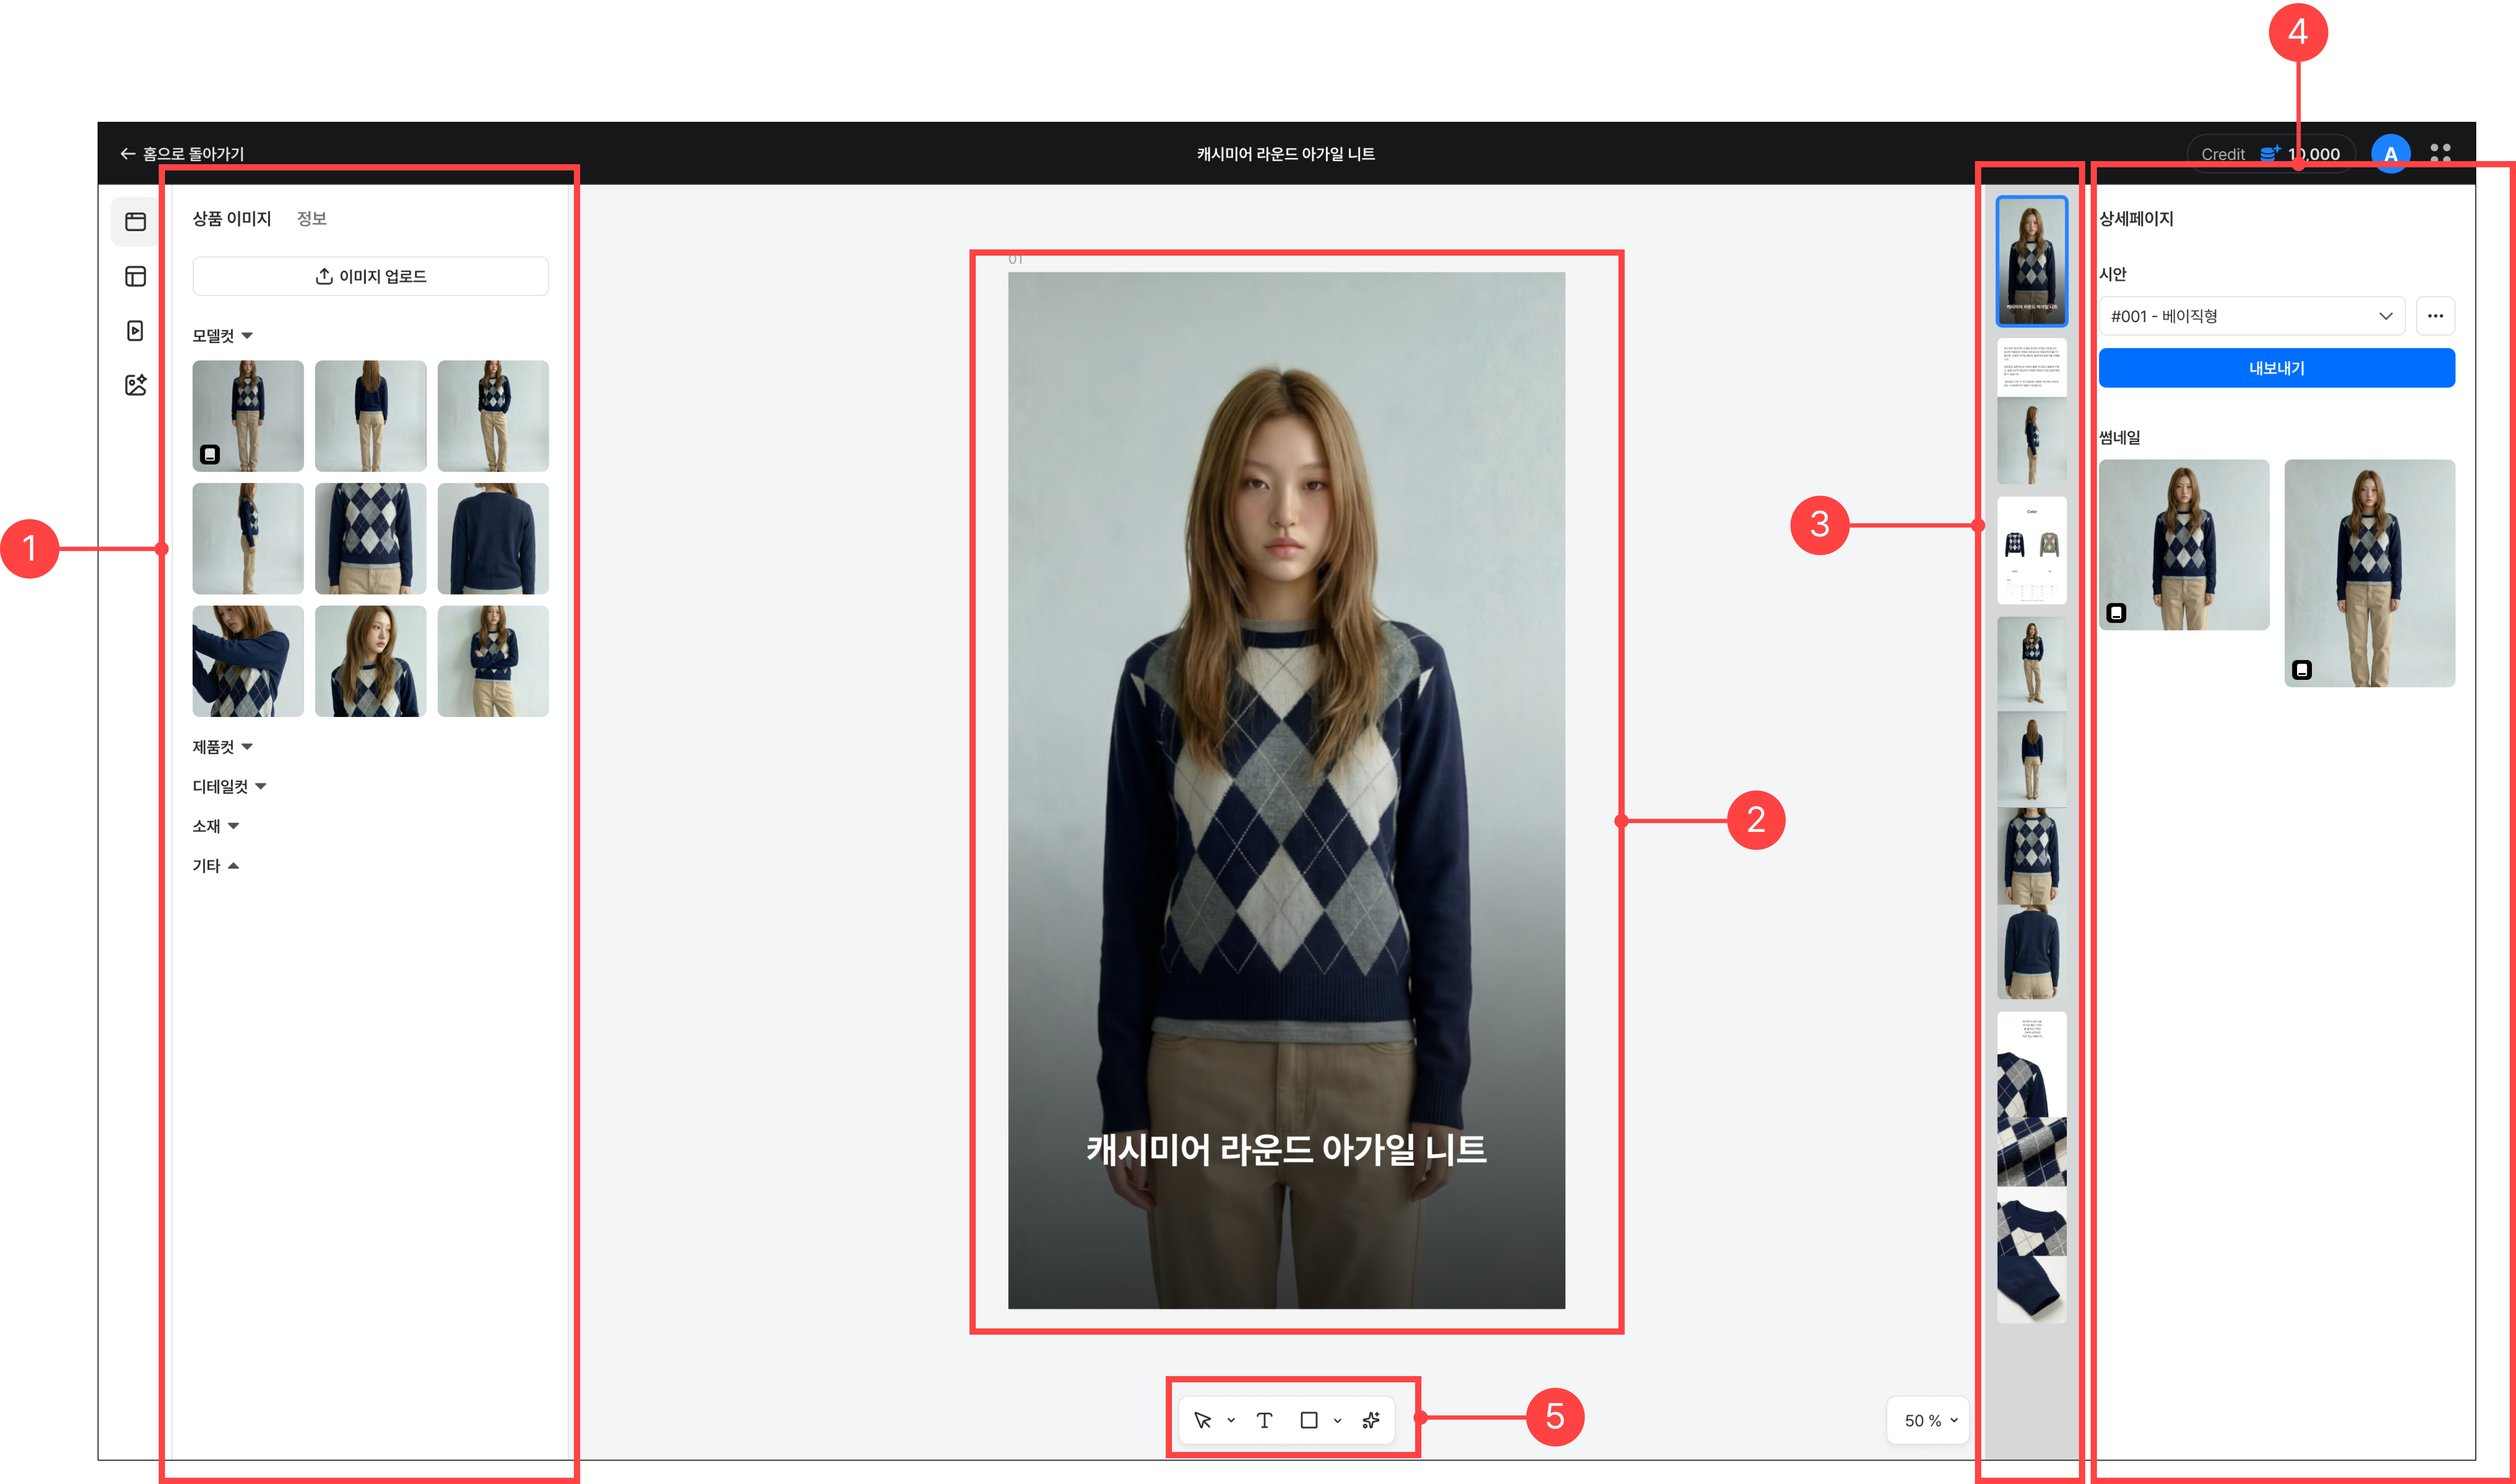
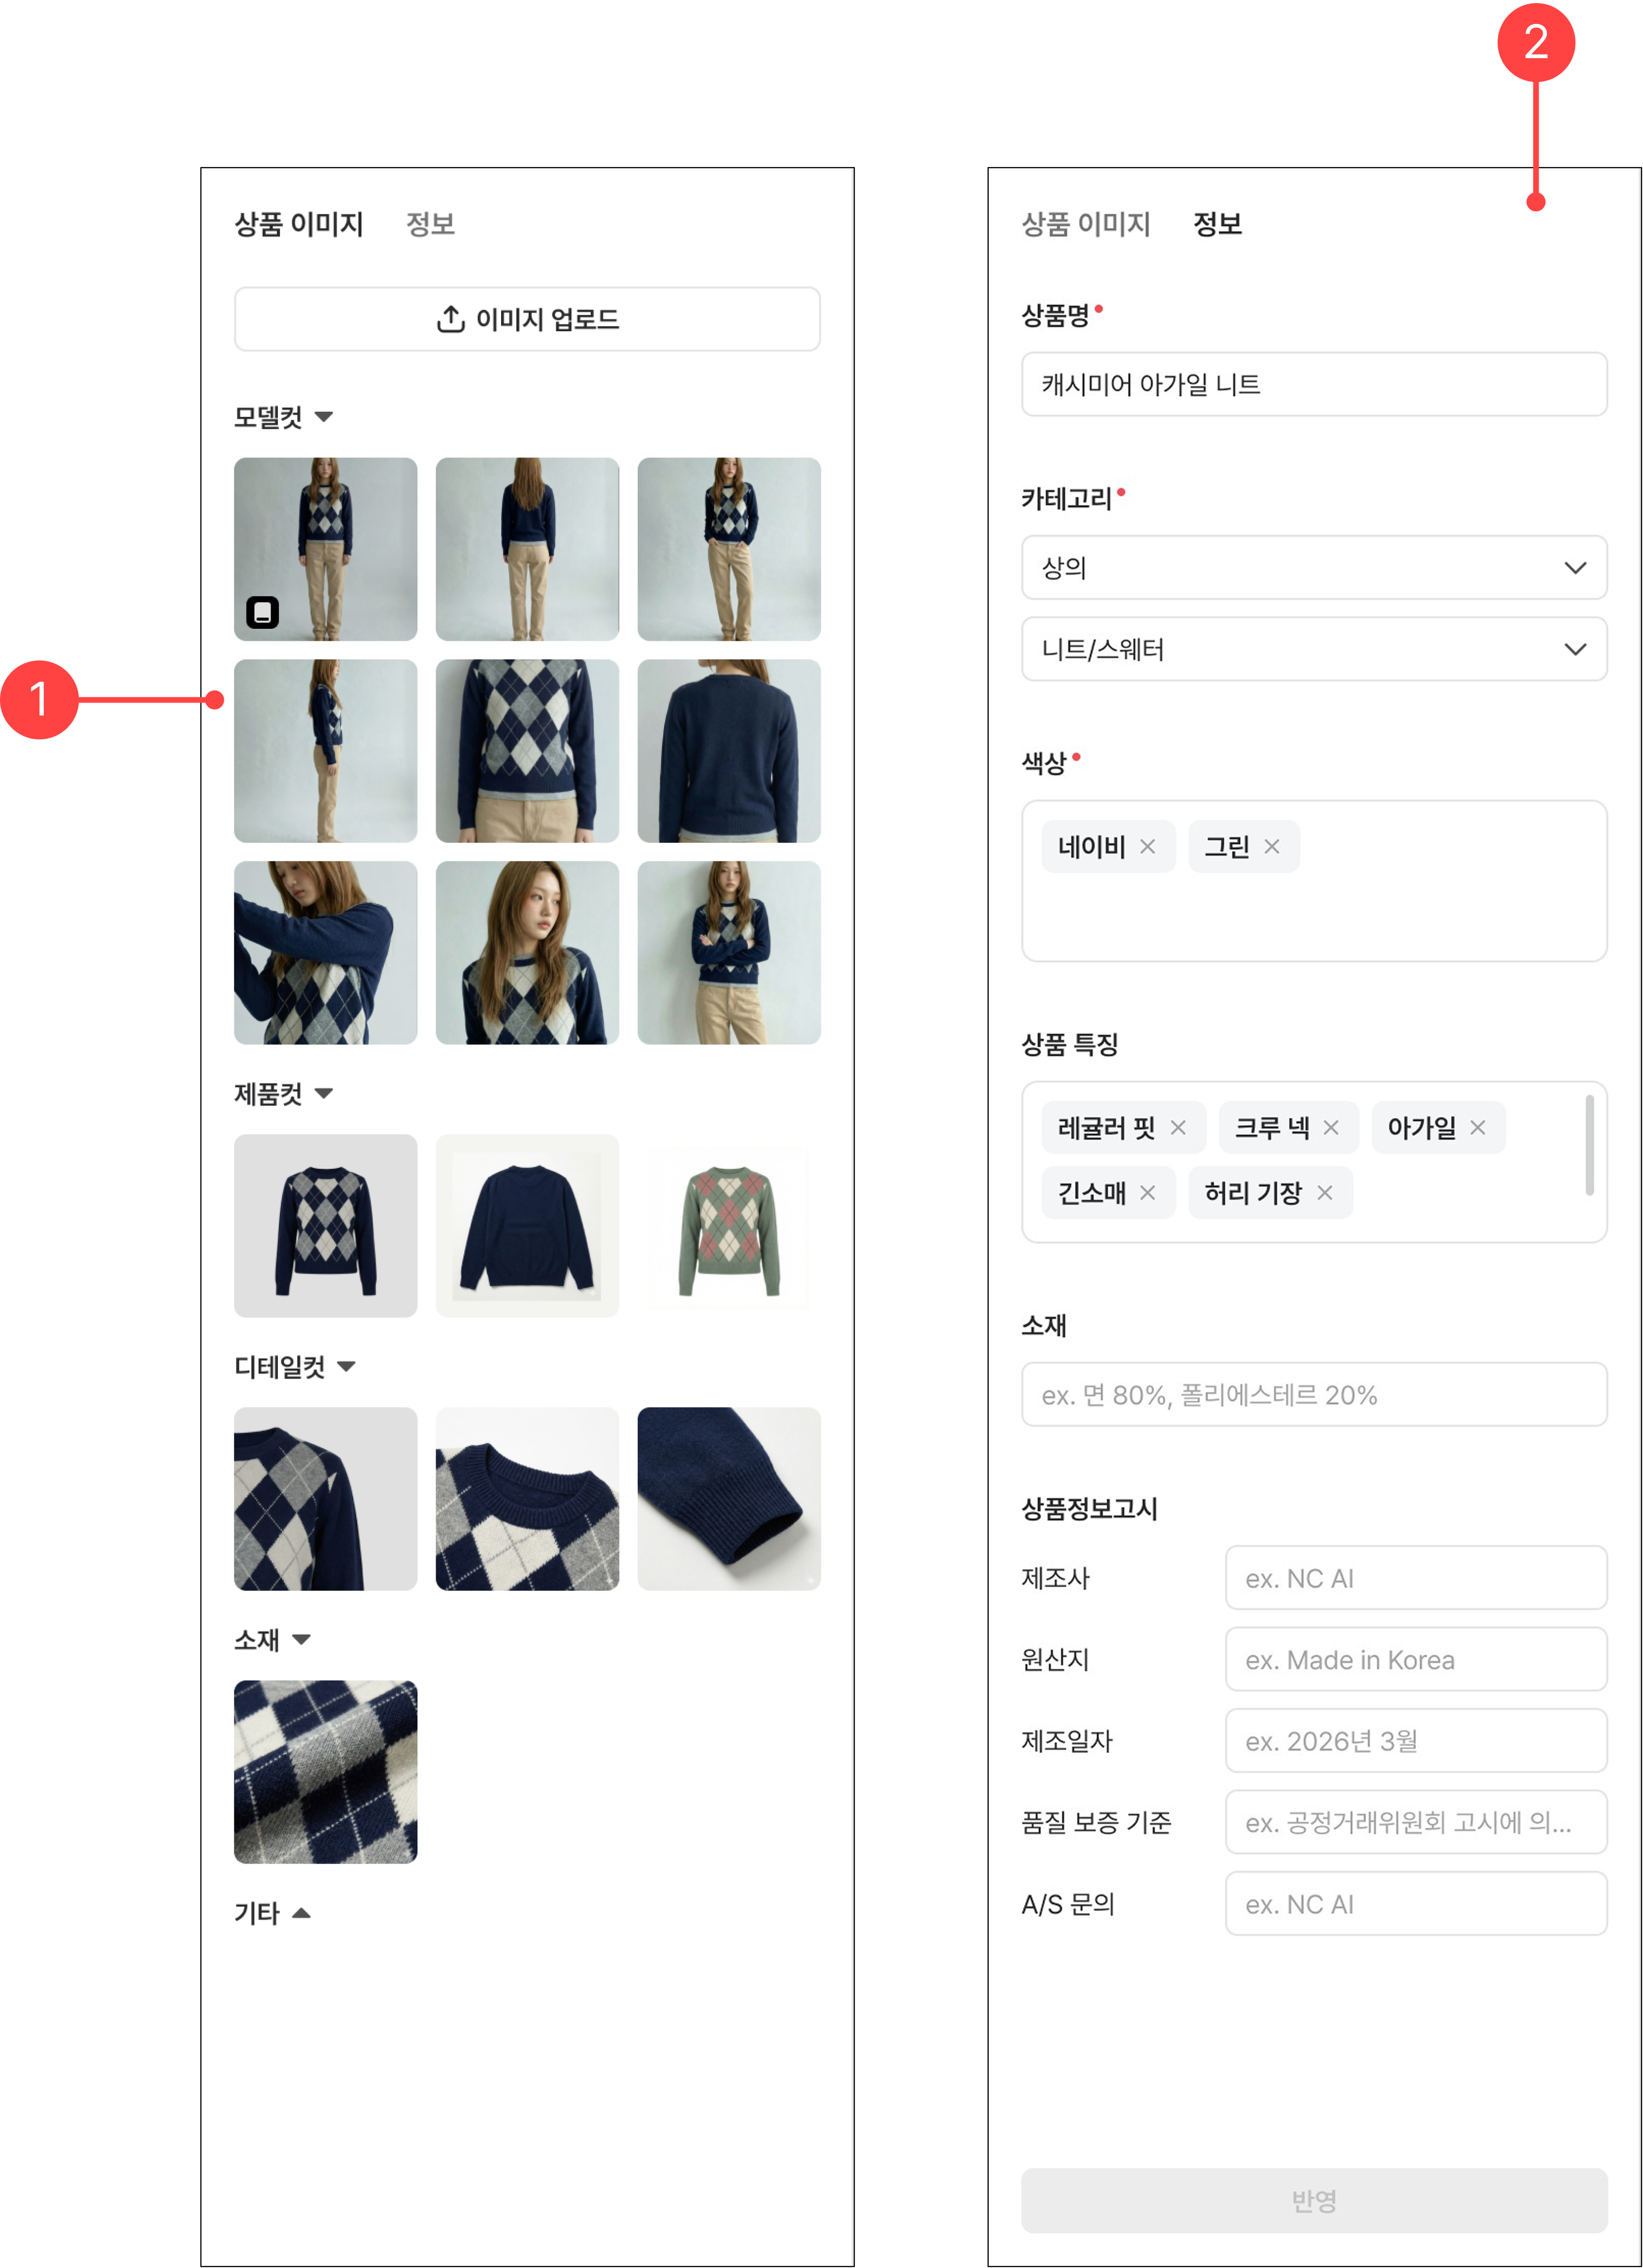
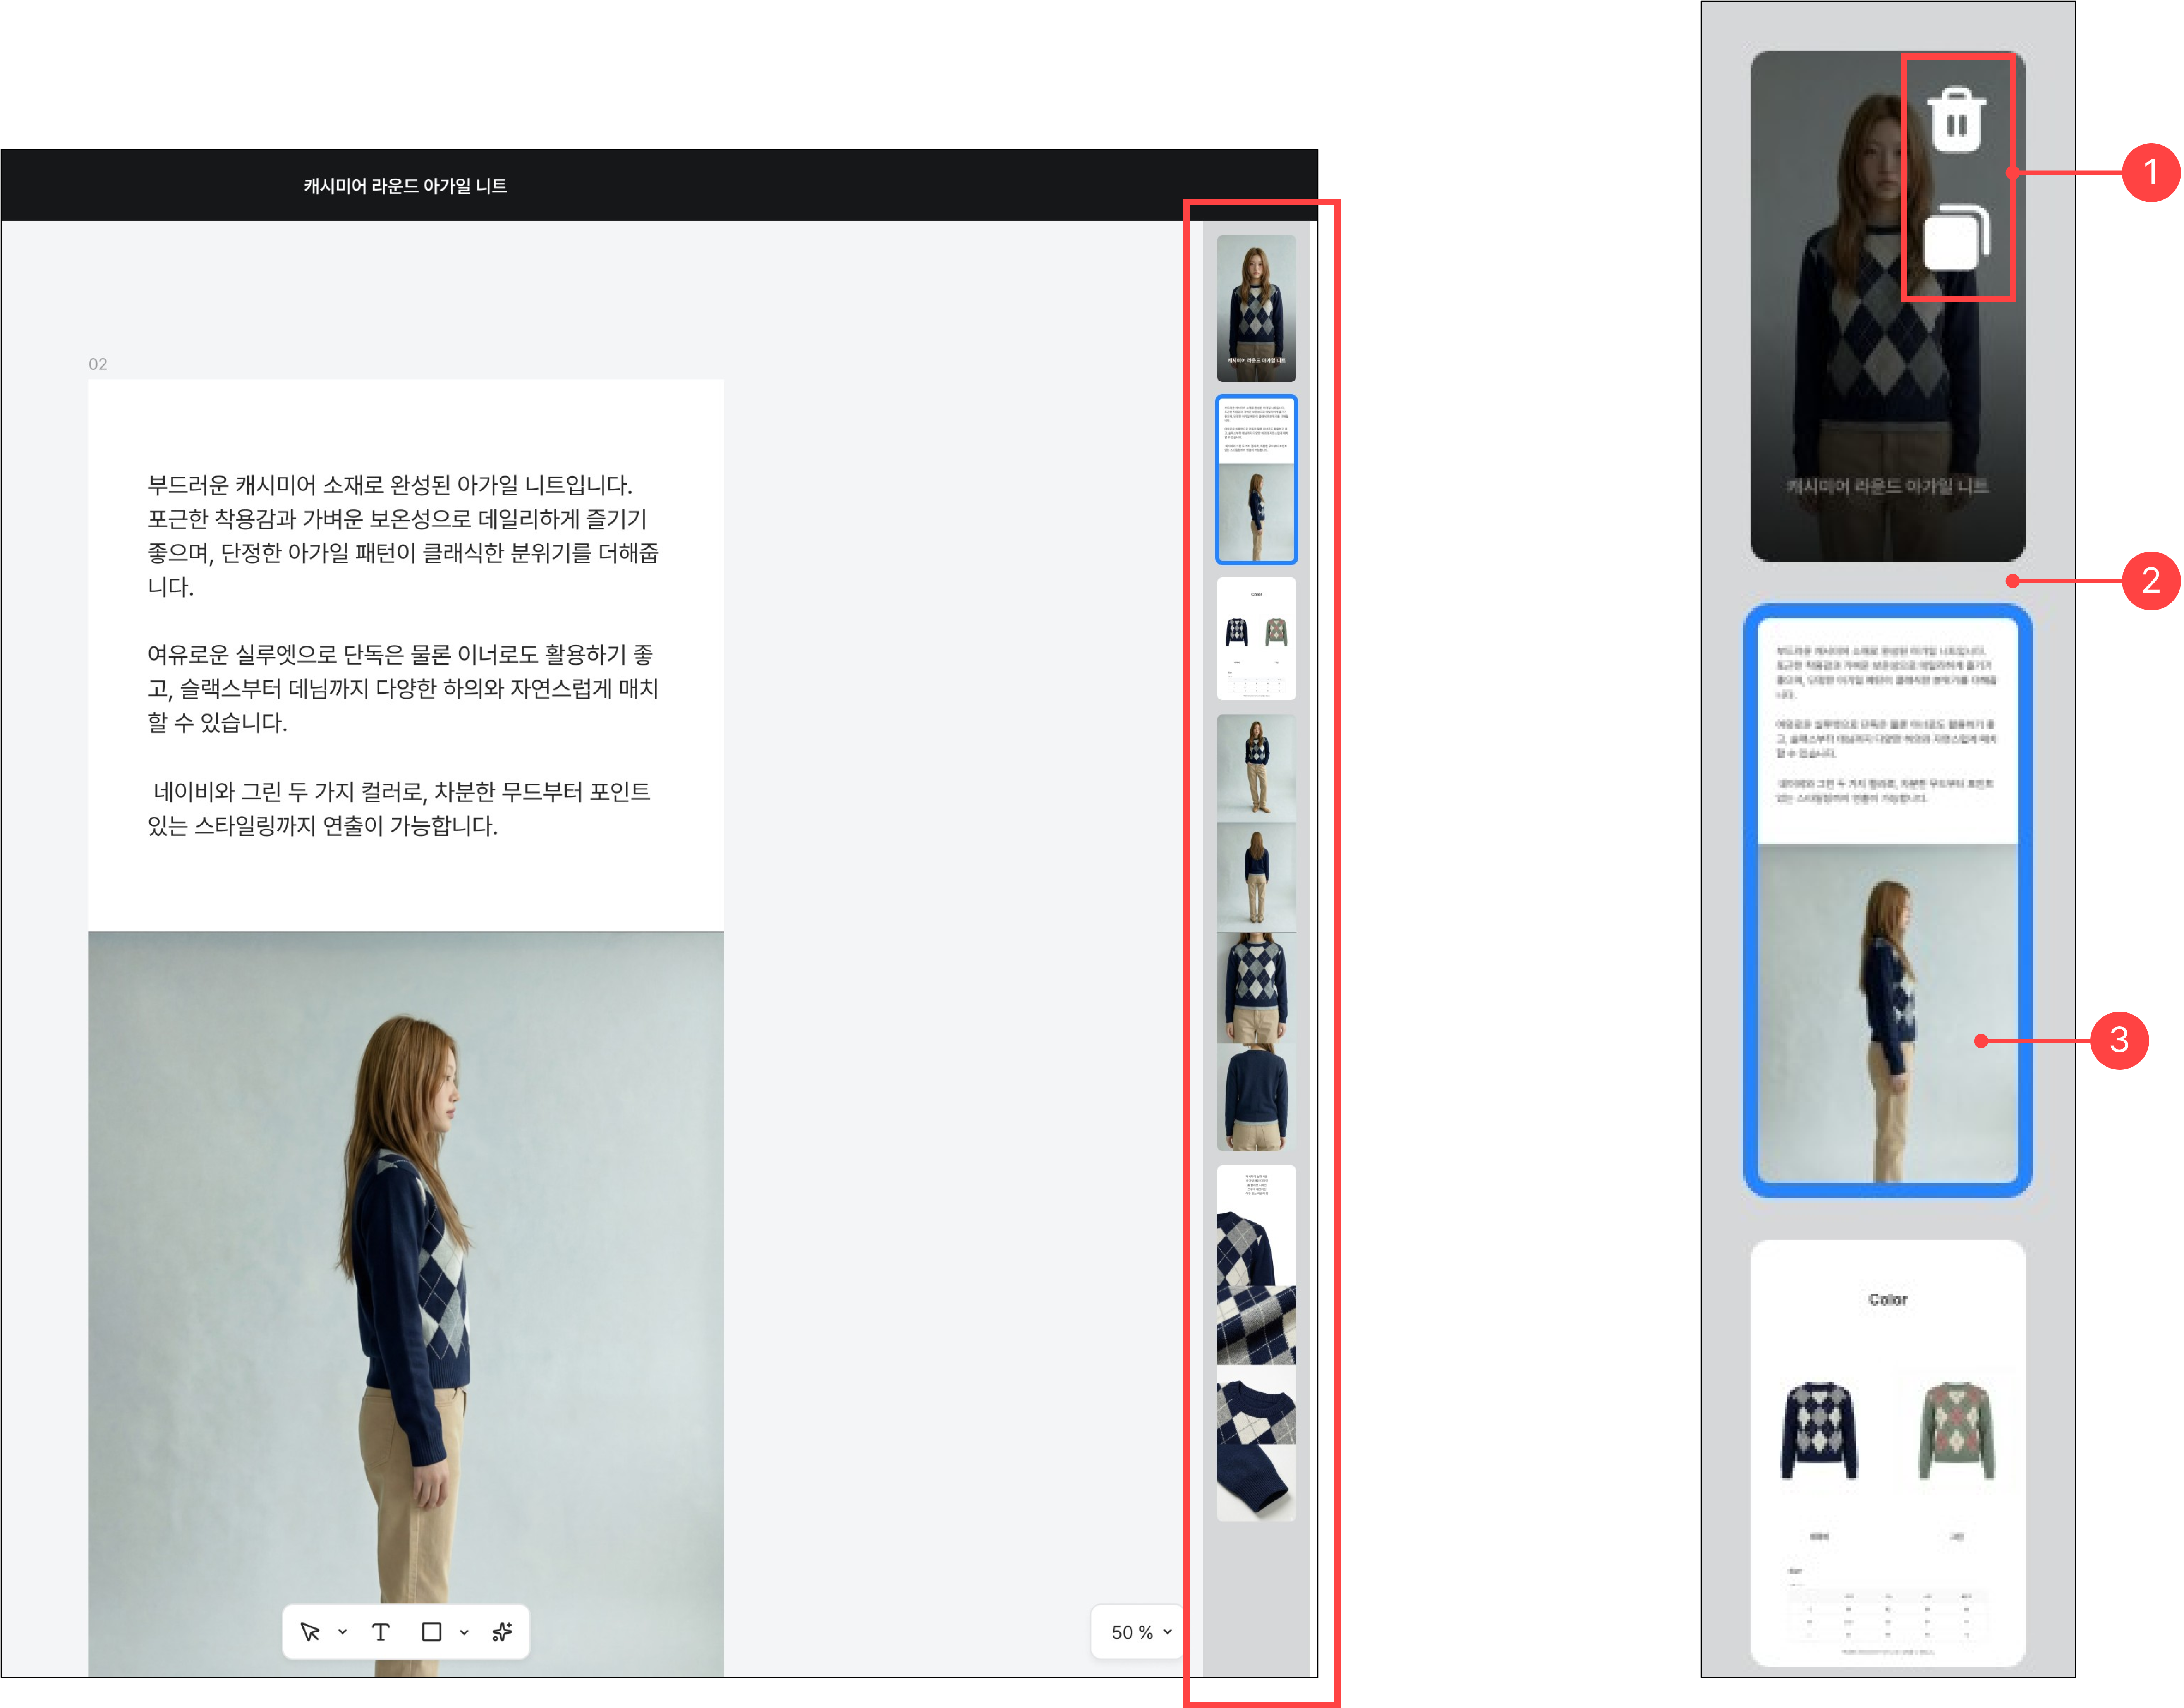
2.2.Editing a product page – Asset panel
2.3.Editing a product page – Modules
2.4.Editing a product page – Minimap
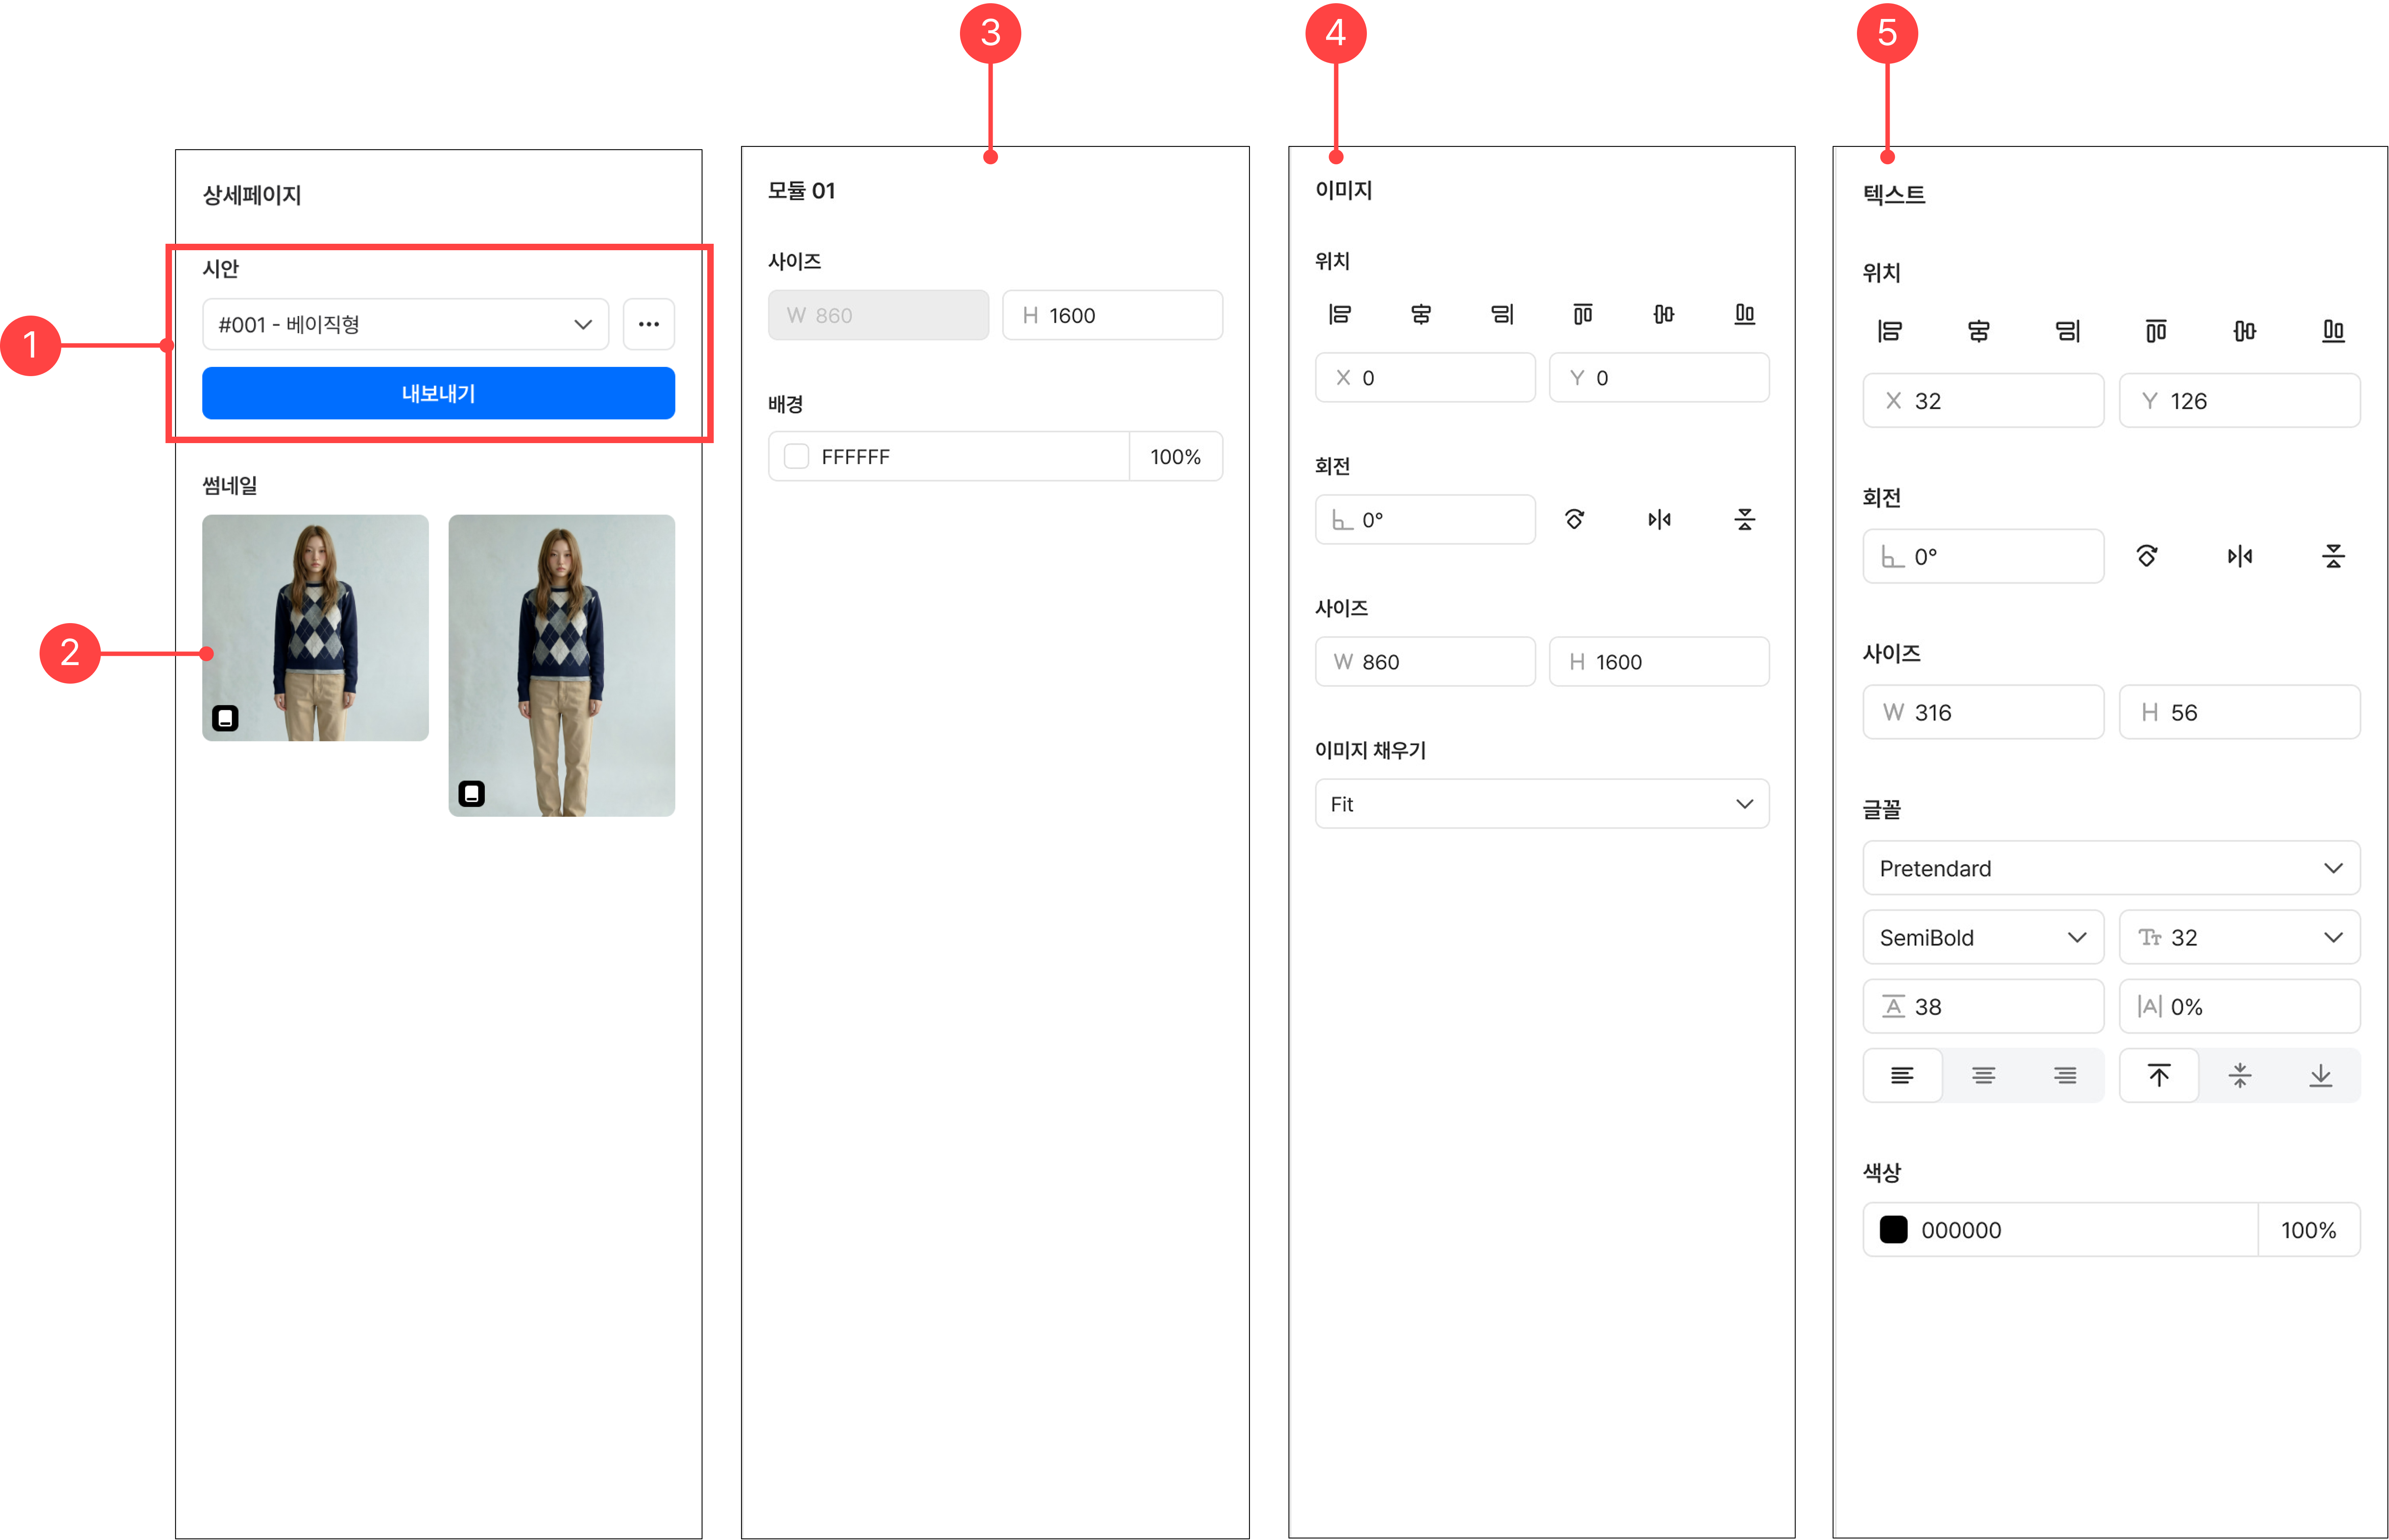
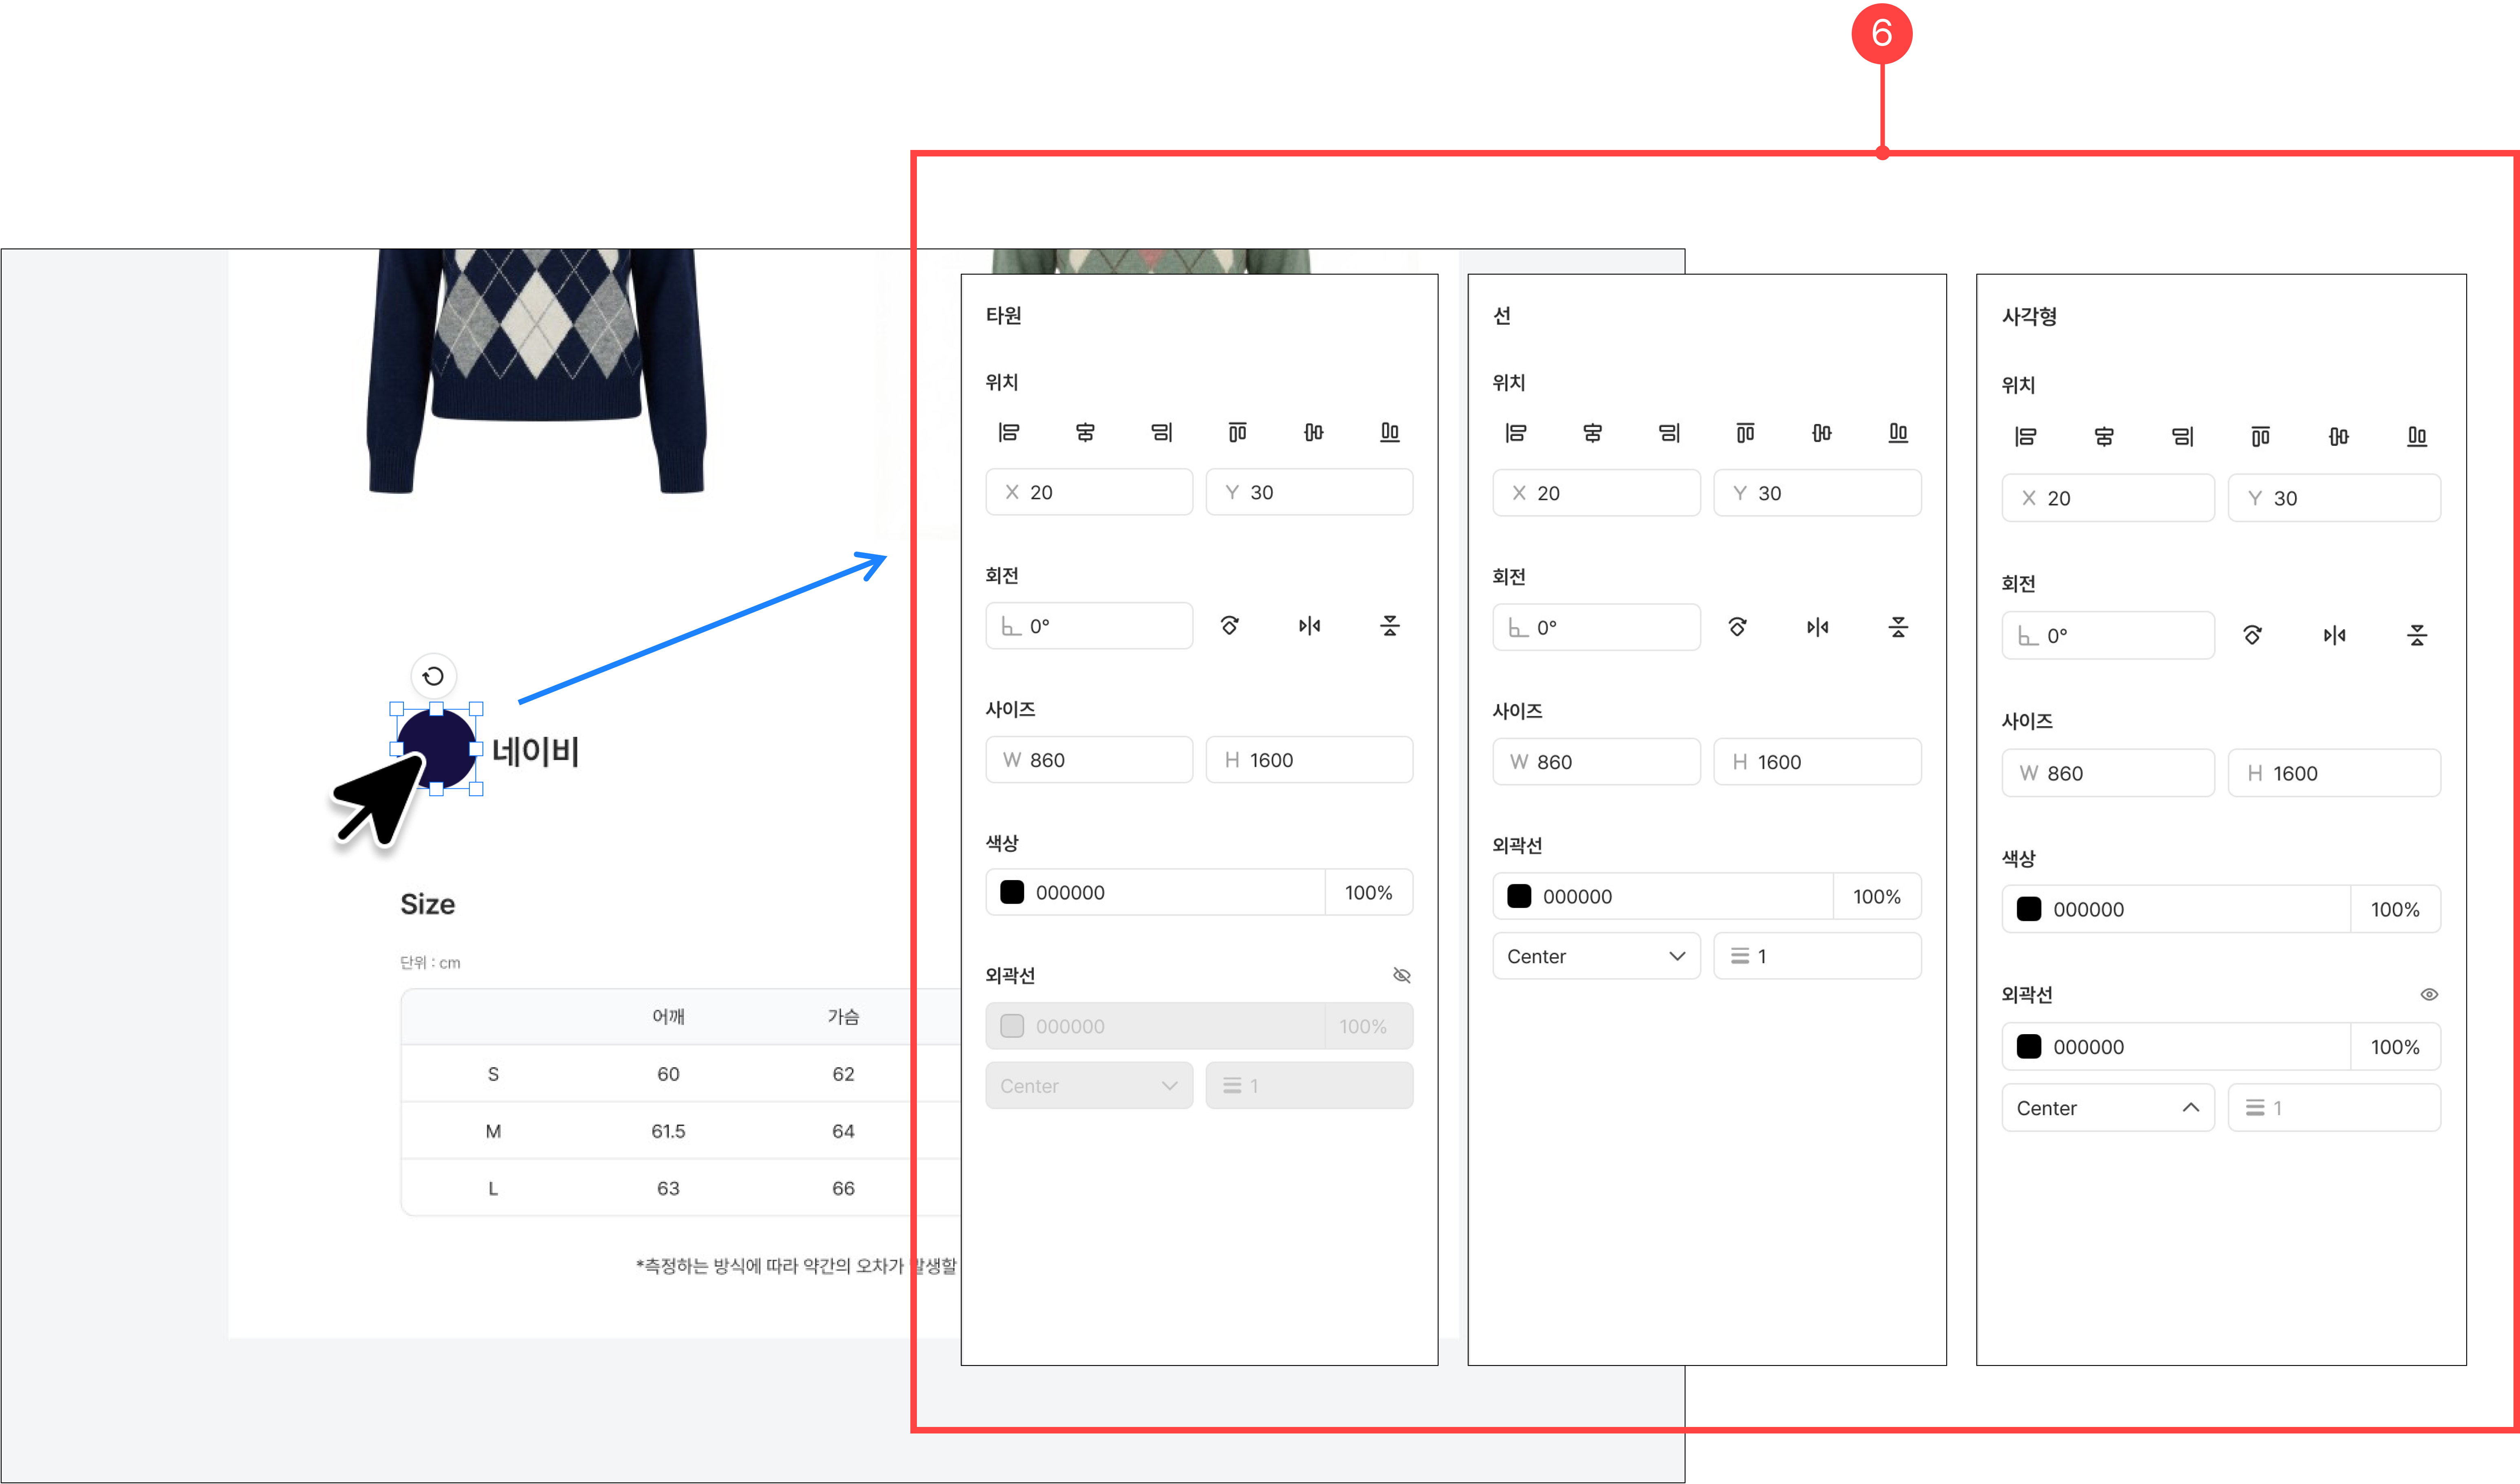
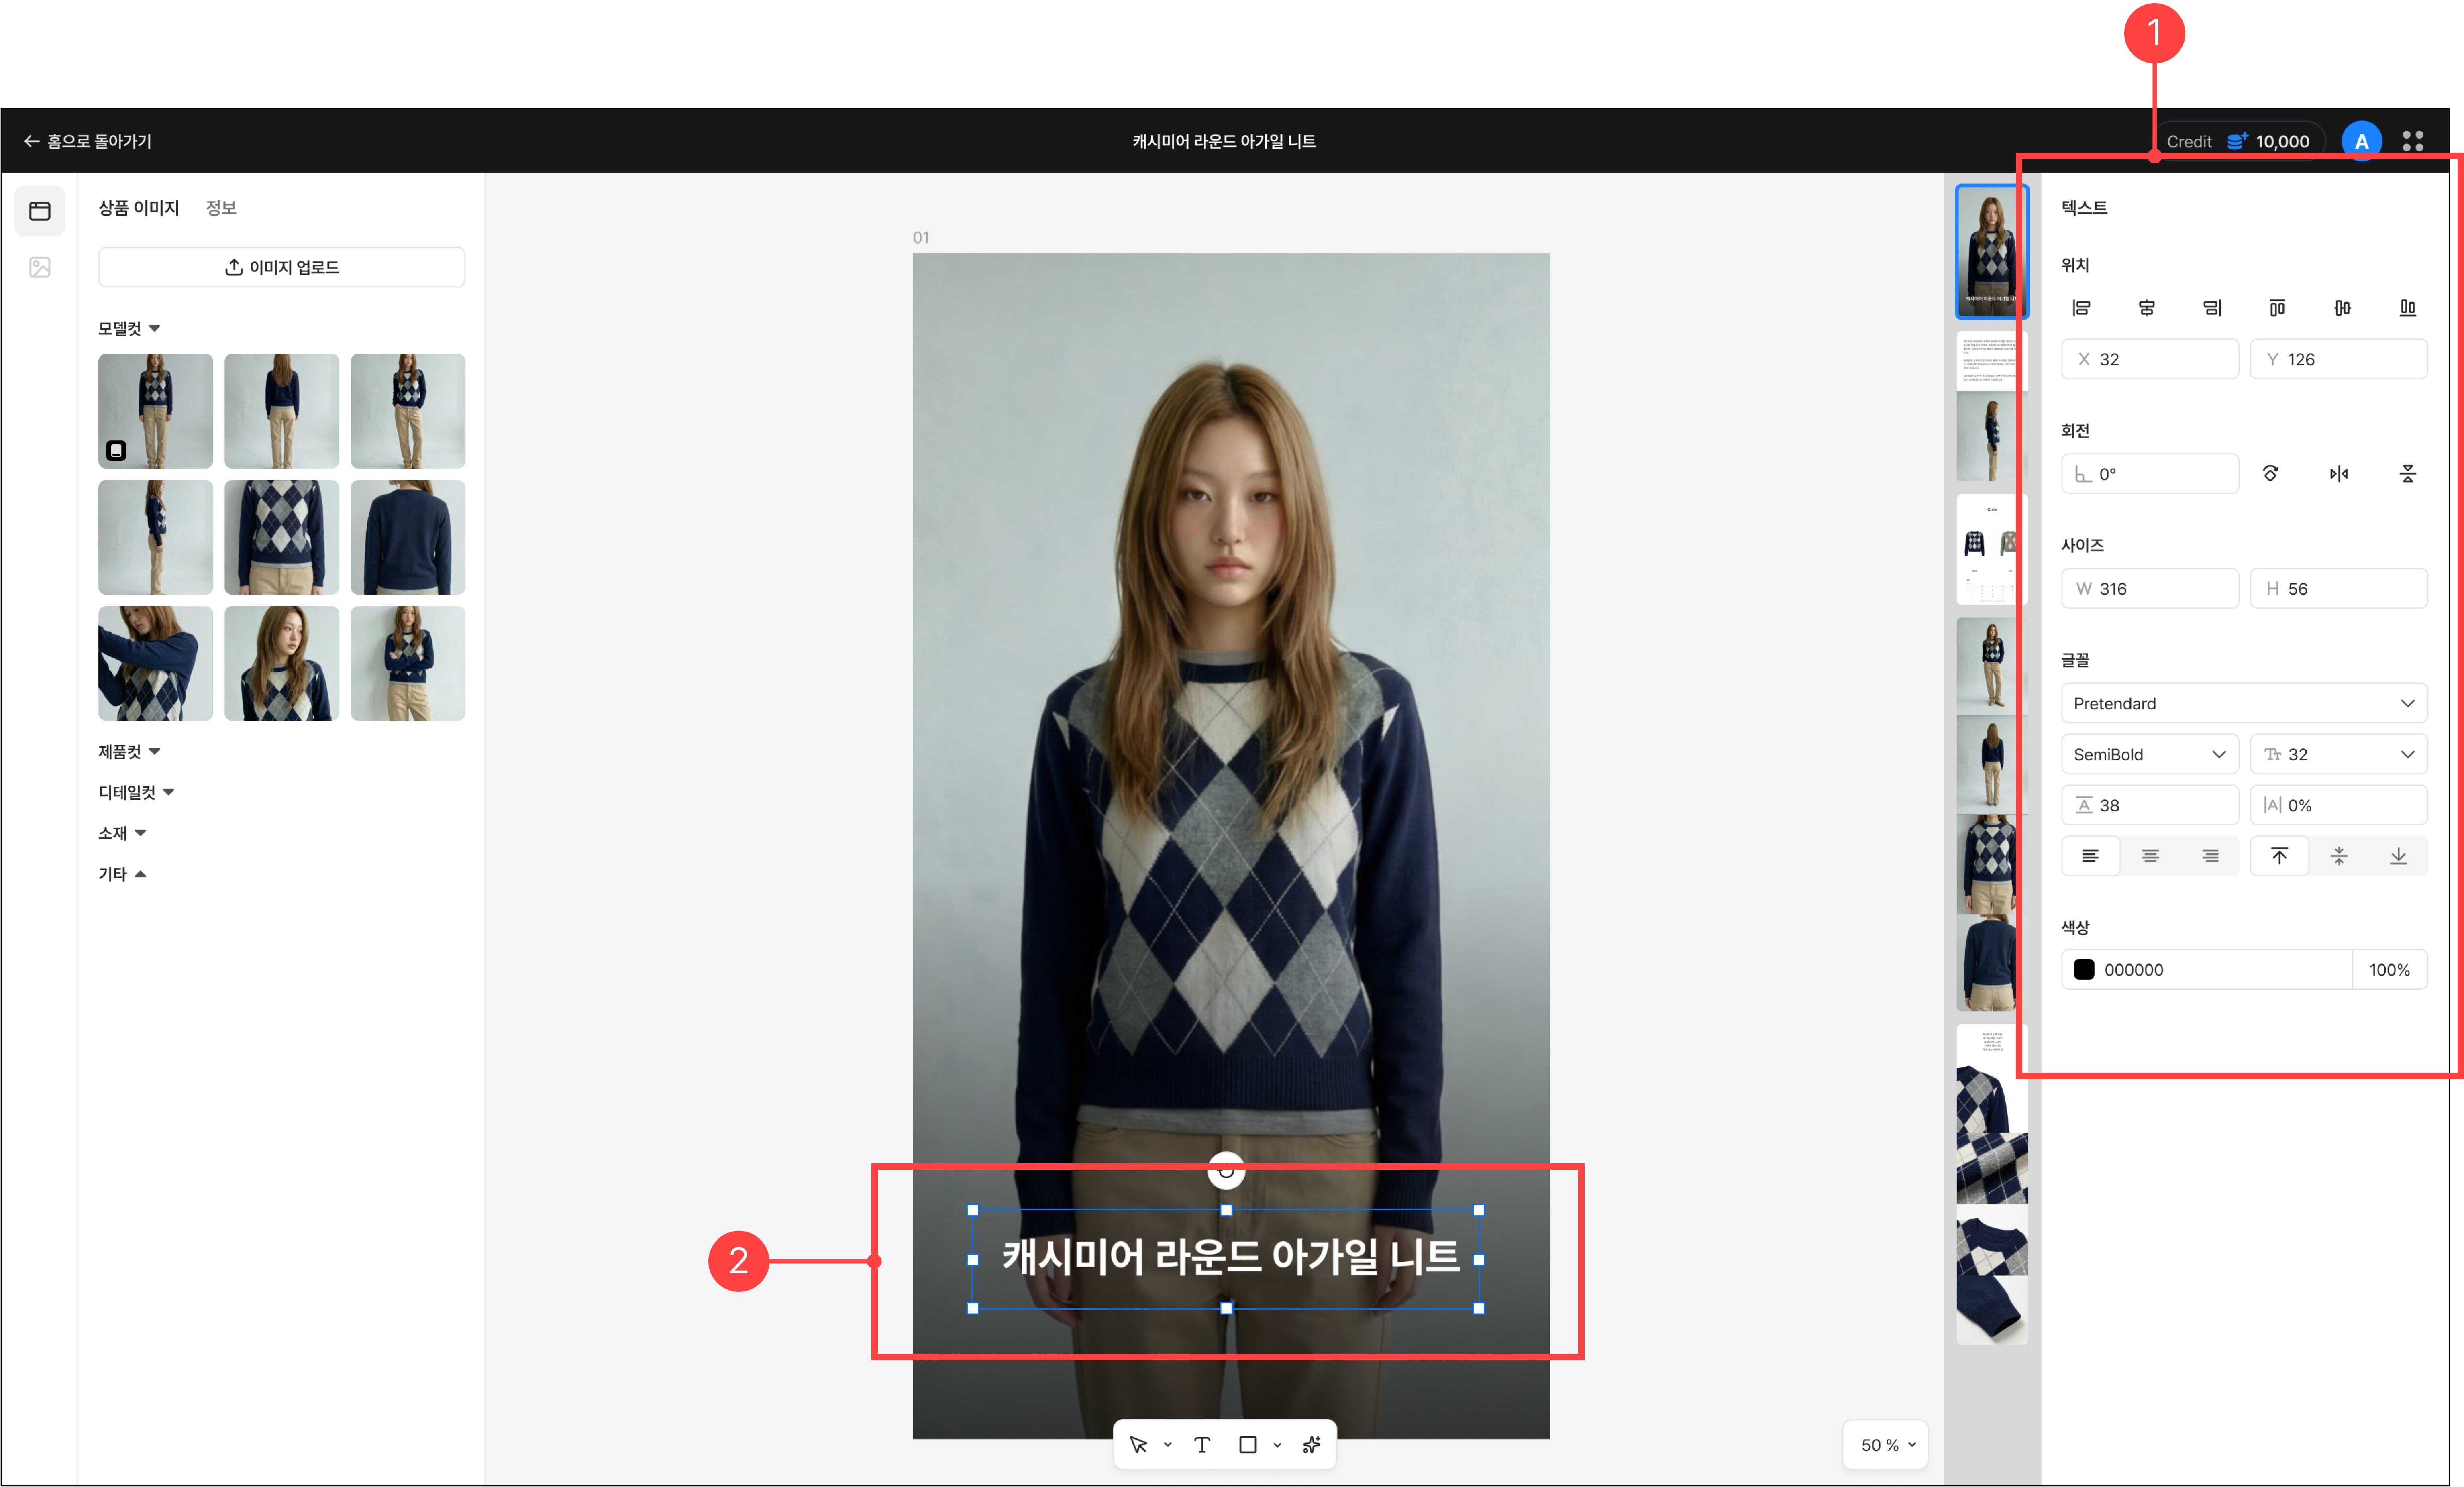
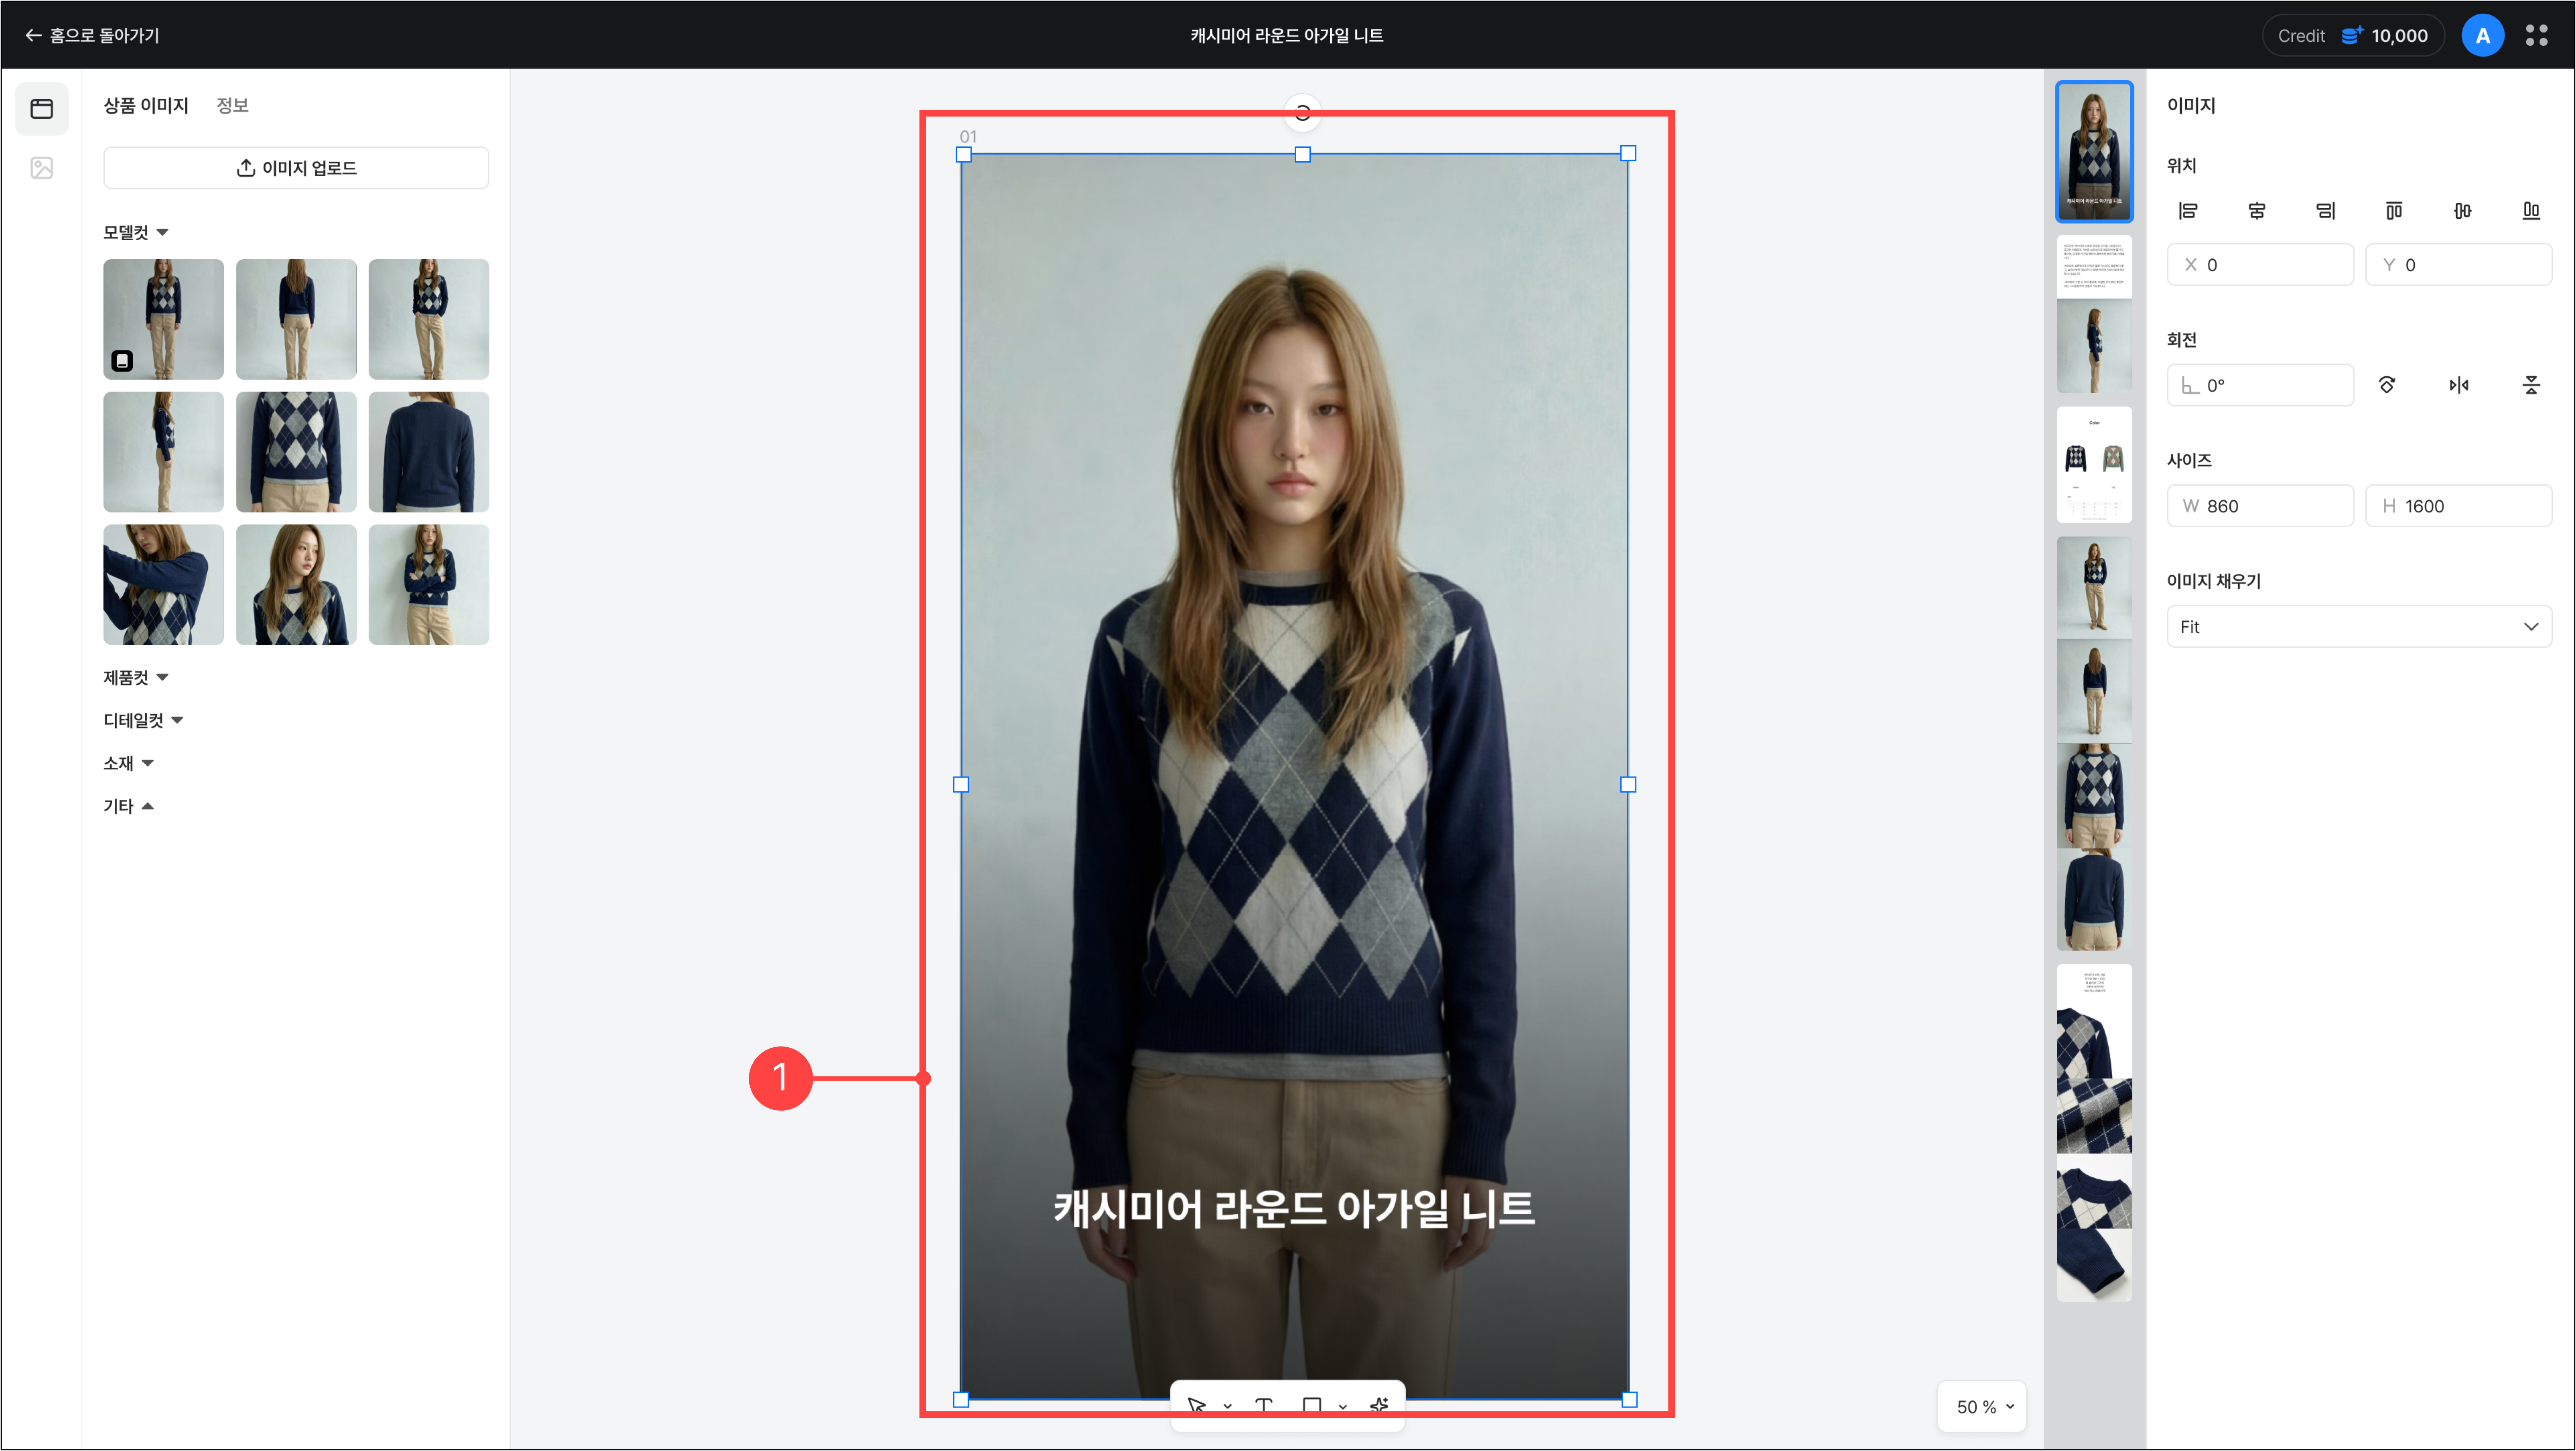
2.5.Editing a product page – Right panel
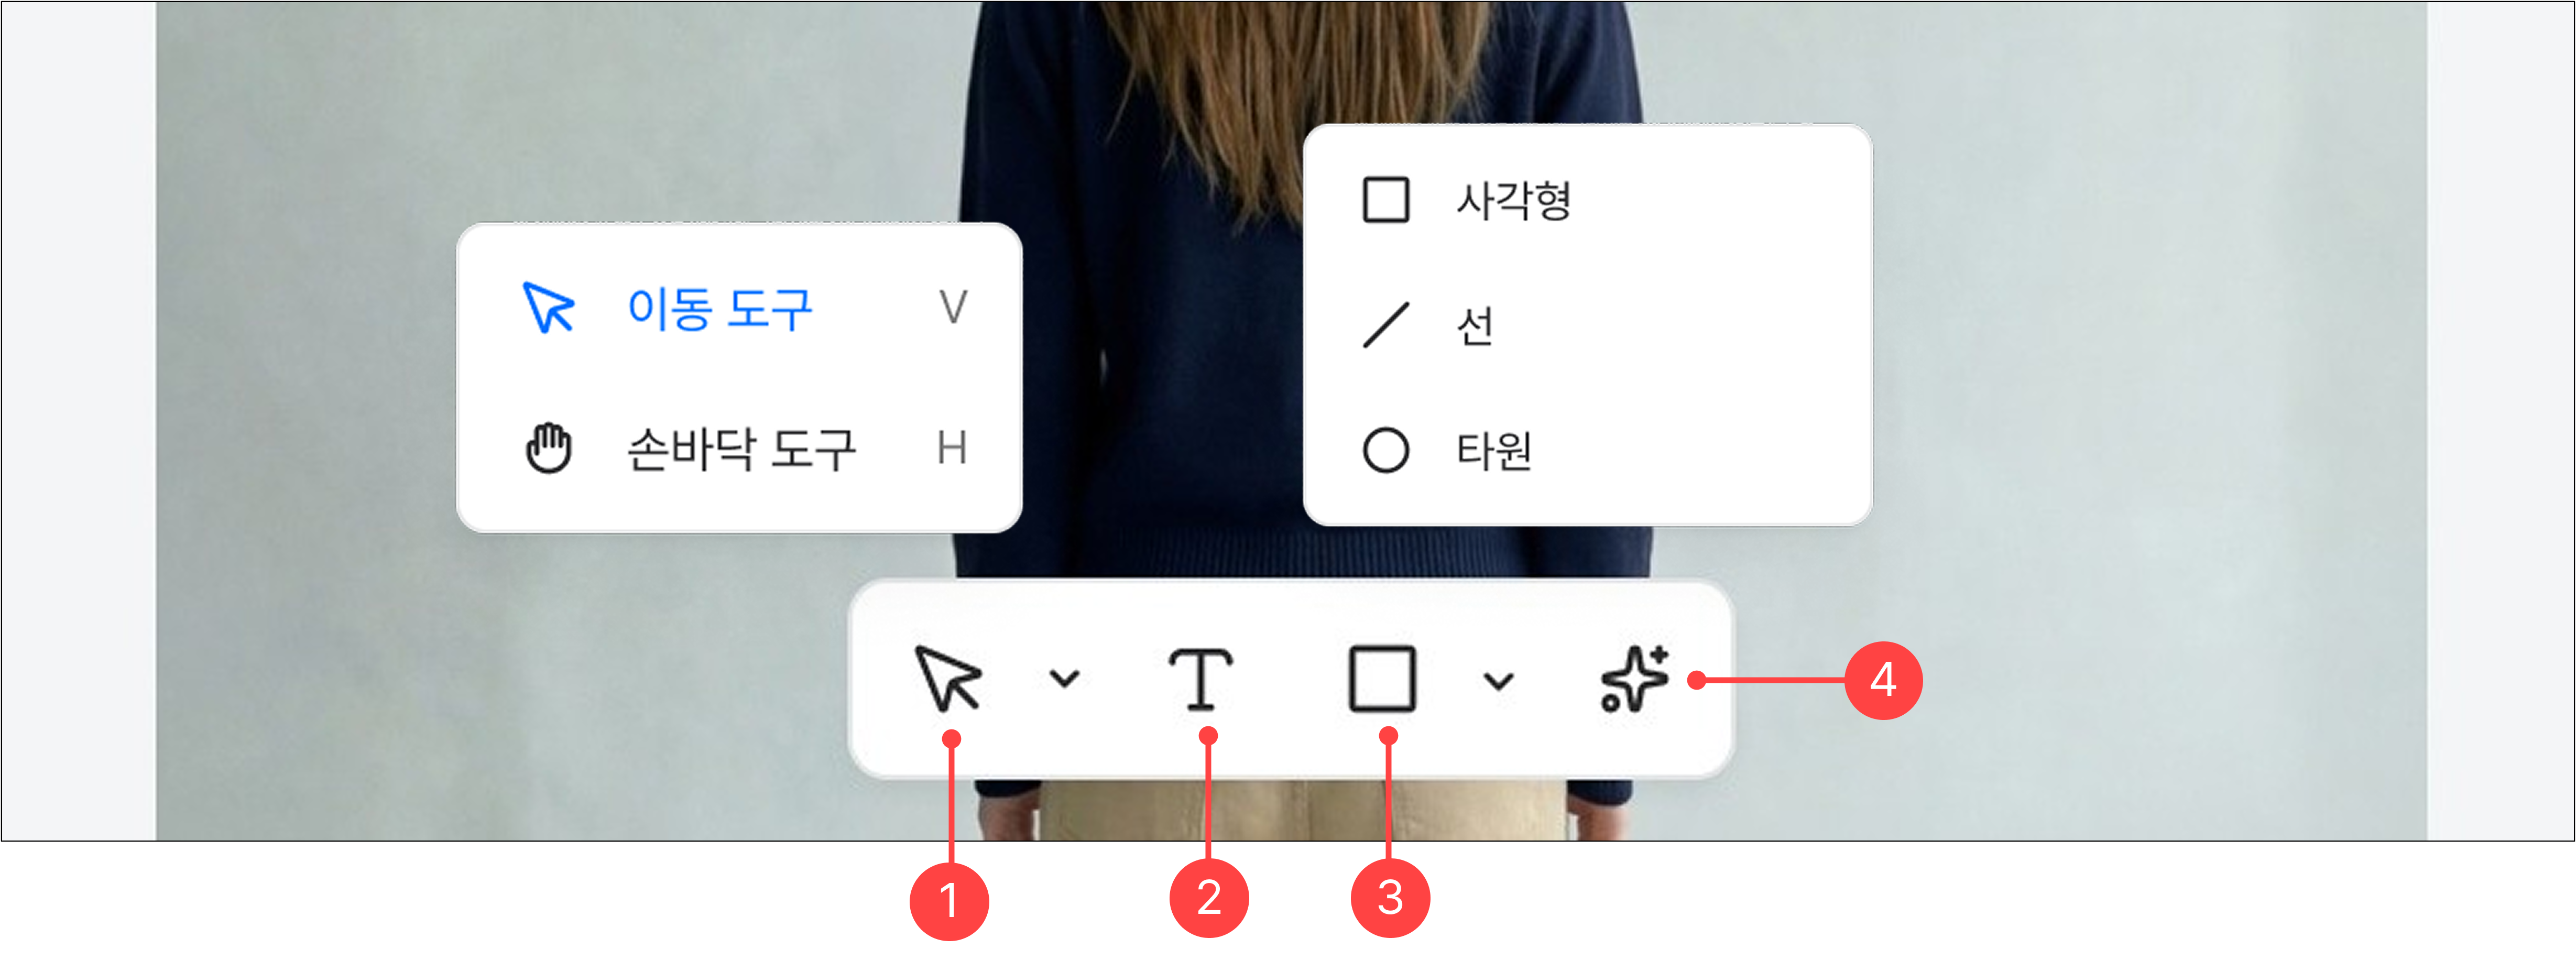
2.6.Editing a product page – Bottom toolbar
2.7.Editing a product page – Editing text
2.8.Editing a product page – Editing images
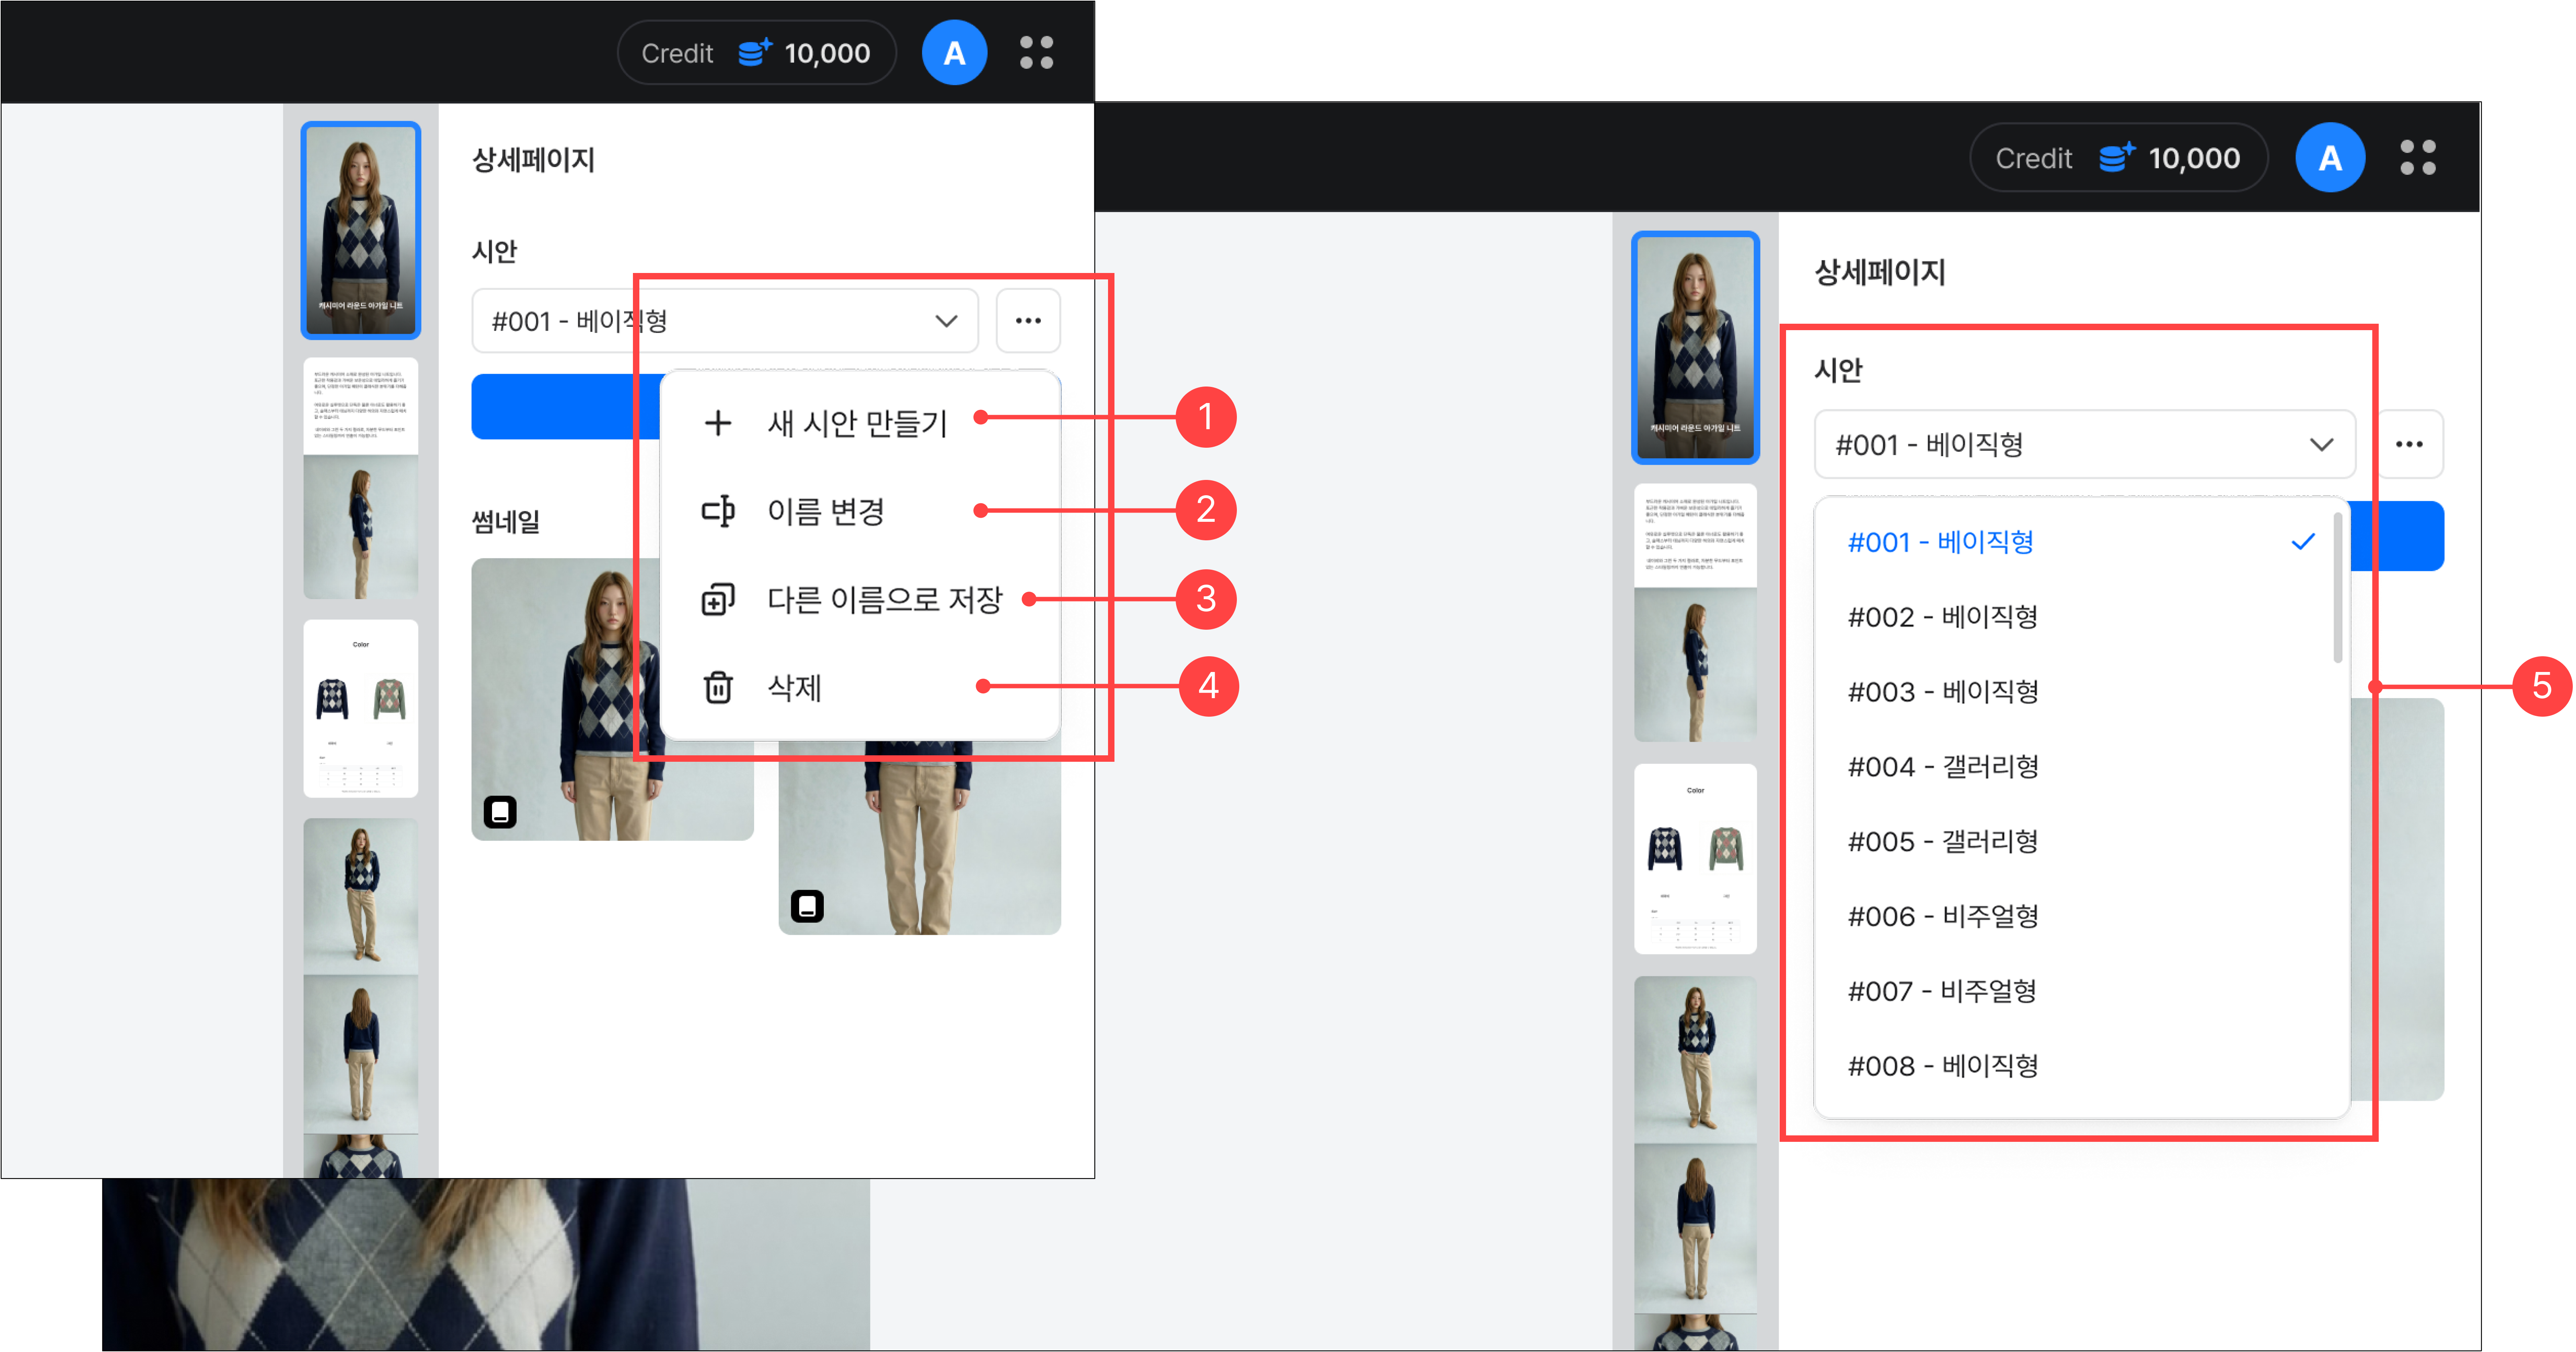
2.9.Editing a product page – Creating a new draft
Using the More button in the right panel, you can create alternative drafts of the current product page. Each draft can use a different template or a different tone for the product page text.
2.10.Editing a product page – Editing with AI CHAT
With AI Chat, you can edit a selected text or image component. Select the element you want to change, enter your request, and AI updates it accordingly.

3.1.Exporting a product page
You can save the generated product page. You can save it in the size that matches the platform specification you want.
Previous
Product management guide